Introduction – Adding Solar
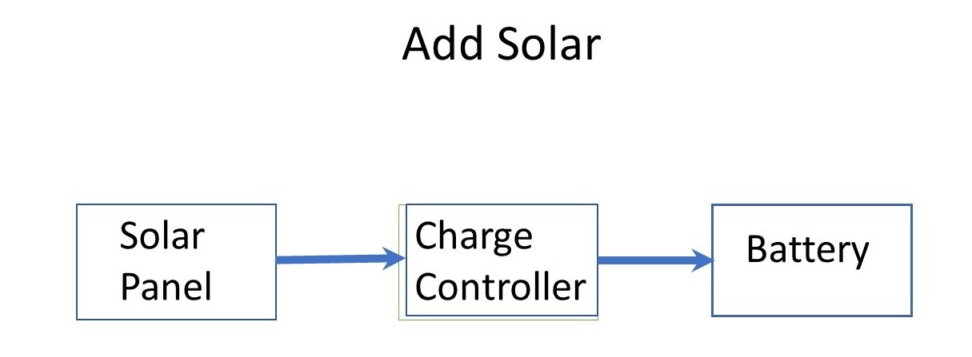
Electrically, the solar add is simple. A PV panel generates electricity from the sun, the Solar Charge Controller manipulates the voltage for efficient charging and charges the house battery. The solar charge controller also prevents overcharging of the house battery. Of course, getting the PV panel(s) installed up on the roof may be more of a chore.
Since the Kisae DC to DC charger that is in the base system already has a solar charge controller built in, you already have that part. The only new adds are the PV panel(s), a disconnect switch and some wire.
This solar information page provides the details for deciding what kind of solar and how much solar you want for your van. For example, do I want/need solar? How much solar do I need? Types of solar panels? how should I mount them? How much solar will I collect at this location and this time of year? If you are at all in doubt about solar, read it first.
Wiring Diagram
This is the wiring diagram with solar added – the added solar components are in the upper left. Very little additional wiring to do.
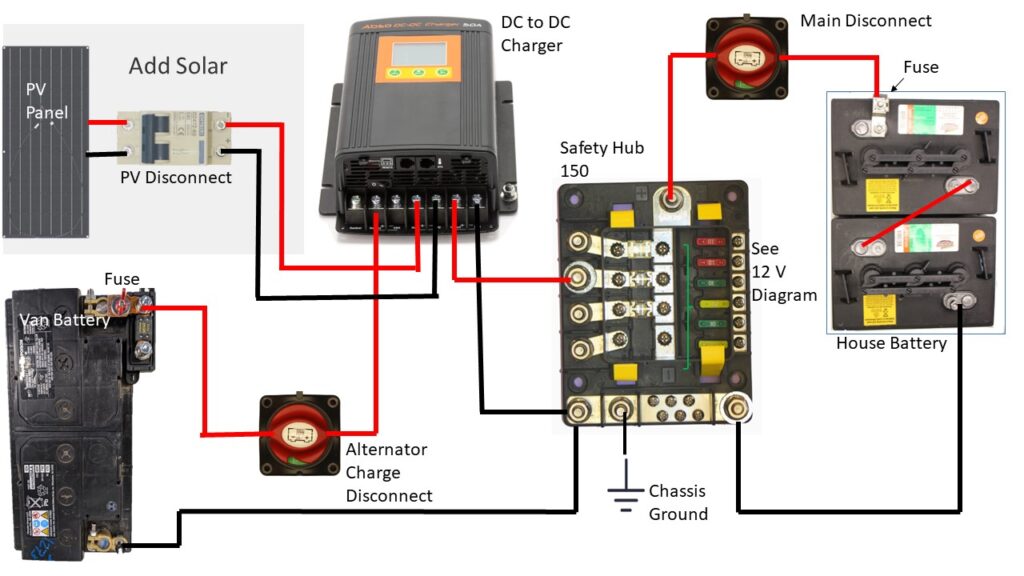
Since the Solar Charge Controller was already included in the DC to DC charger in the basic system, the only components to add are the solar panel(s), the disconnect switch, and the wire.
The PV panel(s) come off the disconnect switch at the upper left.
Component List
You will need to add the components shown below to the basic system for solar.
| Name | Description | Cost | Link |
| Solar panel(s) | Choose a panel or panels that suit you See this for advice… | TBD | TBD |
| Solar Disconnect | Disconnects the solar panels from the system | $15 | Amazon |
| Wire | |||
| PV Wire | PV wire extension cable with MC4 connectors AWG 10 | Amazon |
Installation and Wiring
Be careful that the PV panels you select are compatible with the Kisae DMT 1250 (or 1230). The output voltage of the PV panels must be in the 14.5 to 50 volt range. The maximum PV panel output current is 30 amps. The maximum PV panel wattage is 500 watts. If you are close to the power limit, there are some exceptions in the manual to review that may allow more power.
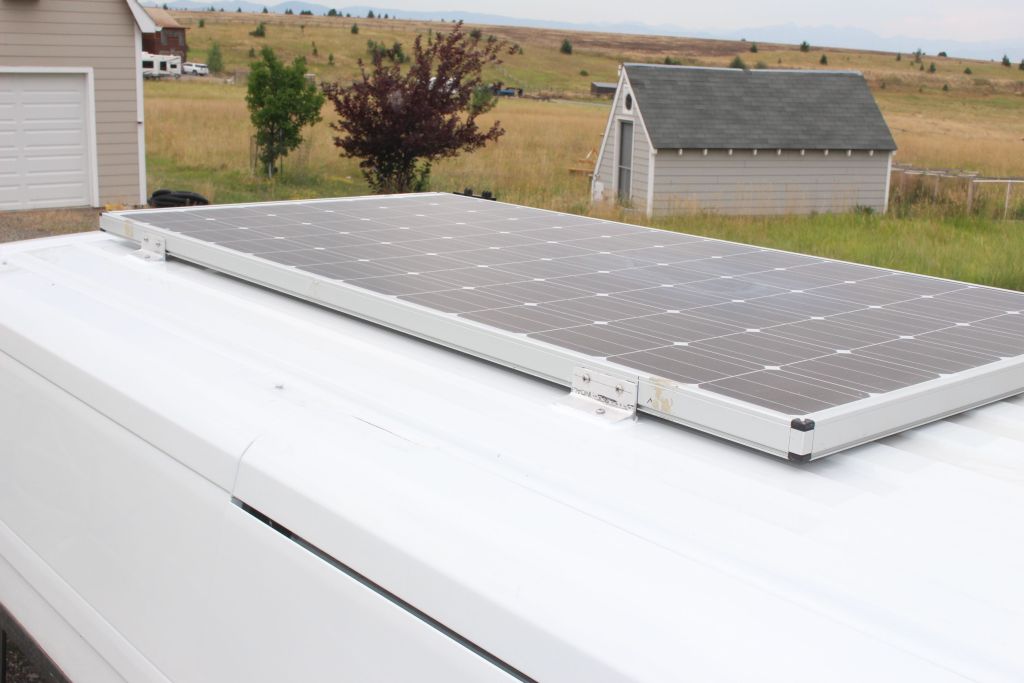
Mount the PV panel(s) on the roof of the van. Advice on the options for mounting the panels
The Kisae DMT 1250 (or 1230) DC to DC charge controller (which includes the solar charge controller) should already be mounted as part of the basic system.
Mount the solar disconnect Breaker at place that minimizes the wire length from the Kisae charge controller to the PV panel(s) and is also reasonably accessible. This switch is used to disconnect solar charging when it is not desired.
Connect the Kisae Solar Charge Controller to the Disconnect Switch
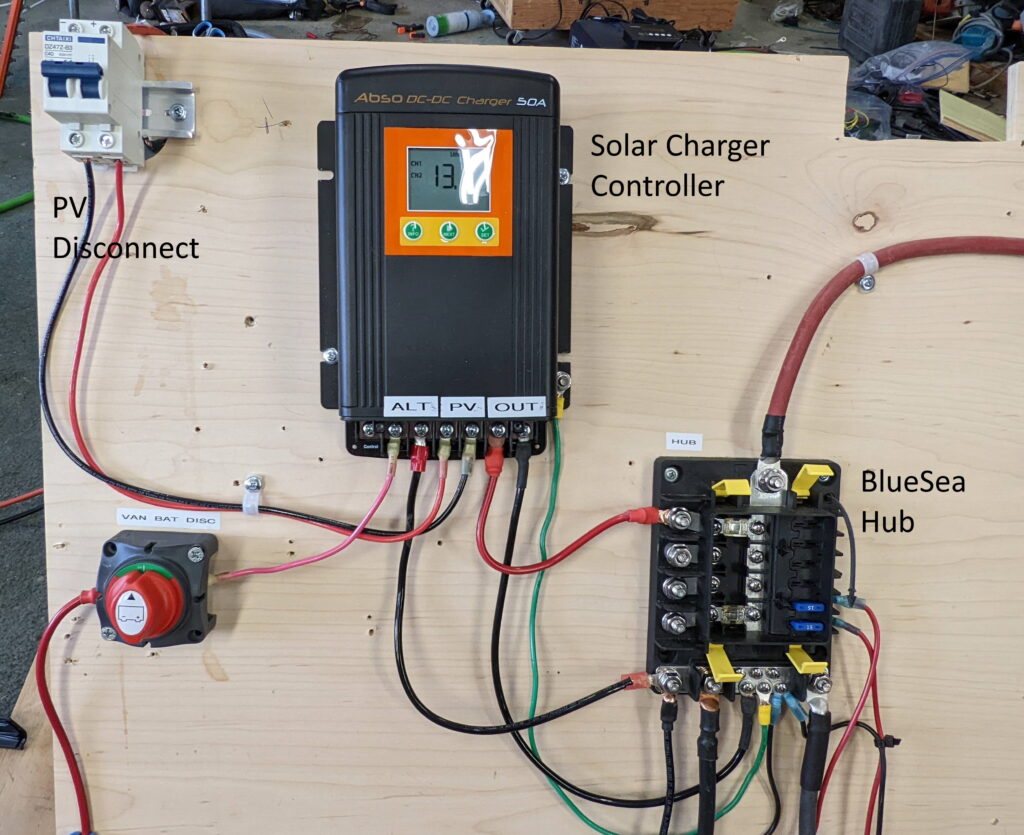
The new disconnect switch is in the upper left of photo below.
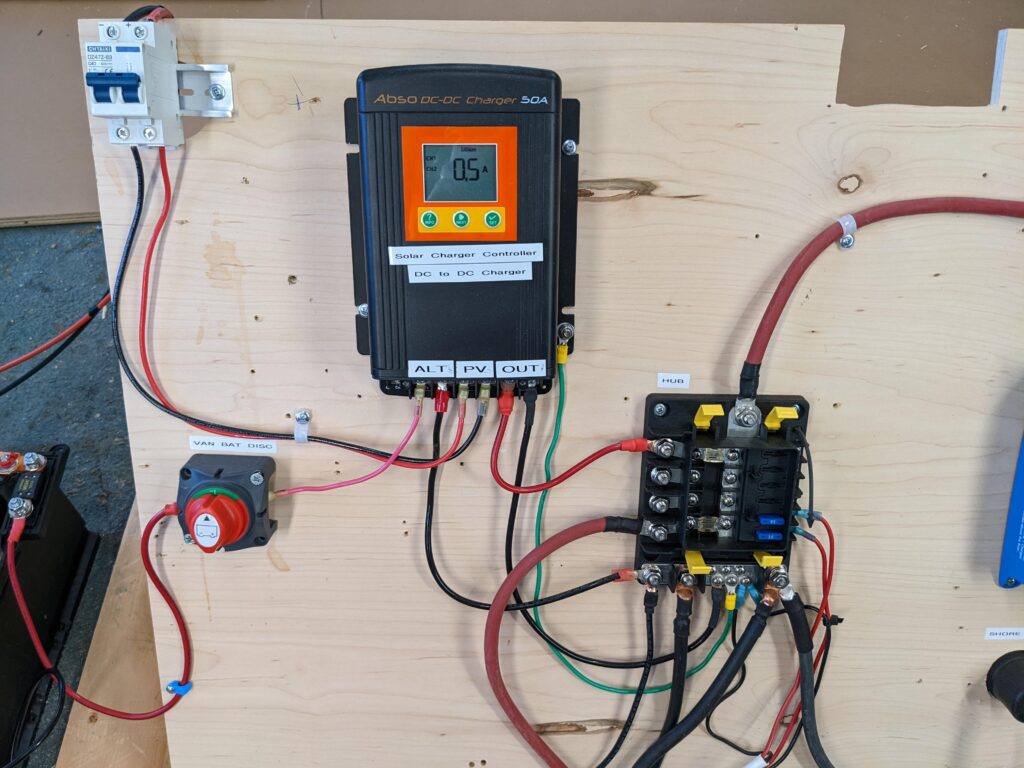
Using some of the #10 PVconnect the Kisae PV channel (channel 2) to the disconnect switch as shown in the photo. Connect the red wire to the “+” terminal of Channel 2 and black to the “-” terminal of Channel 2.
Run the #10 PV wire from the other terminals of the disconnect up to the PV panels on the roof. Use the red wire for positive. You will need some form of weather proof gland to run the PV wires through the roof – this will vary from van to van. On the ProMasters, the backup camera housing is a handy place to get the wires up to the roof.
Note: if you have a lot of PV panel wattage, or a lot of 12 volt panels in parallel, you may need to use heavier wire than #10.
Happy Sunshine!
If you see any errors or misleading information on this page, or if more information should be provided, please let me know in the comments.
Gary 7/16/22
Update April 2024:
I have replaced the import 2 pole solar disconnect breaker used to disconnect the solar panels with an Anderson SB50 connector. The reason for this is that poor quality breakers can arc when used to disconnect solar panels that are generating power. On a poor quality breaker, this arc can may not extinguish on its own in that the solar panel continues to produce current to sustain the arc. The sustained arc can ignite the plastic case of the breaker, and this fire could spread. A quality breaker will not have this problem, but they are expensive. I decided to use use an Anderson SB50 connector as an inexpensive and reliable/robust way to disconnect the solar panel. The SB50 is rugged, can be disconnected under load without arc damage, and provides a simple reliable way to disconnect the solar. It does not provide over current protection as a breaker would, but solar panels are self limiting on current, so over current protection is not required.