I was wanting to do some remodels to our camper van, but its the middle of winter in Montana and its COLD outside. If I could get the van into the garage/shop this would not be a problem, but the garage door is too low to get the van into the garage. So, the solution is to make the door tall enough to get the van in without costing a small fortune.
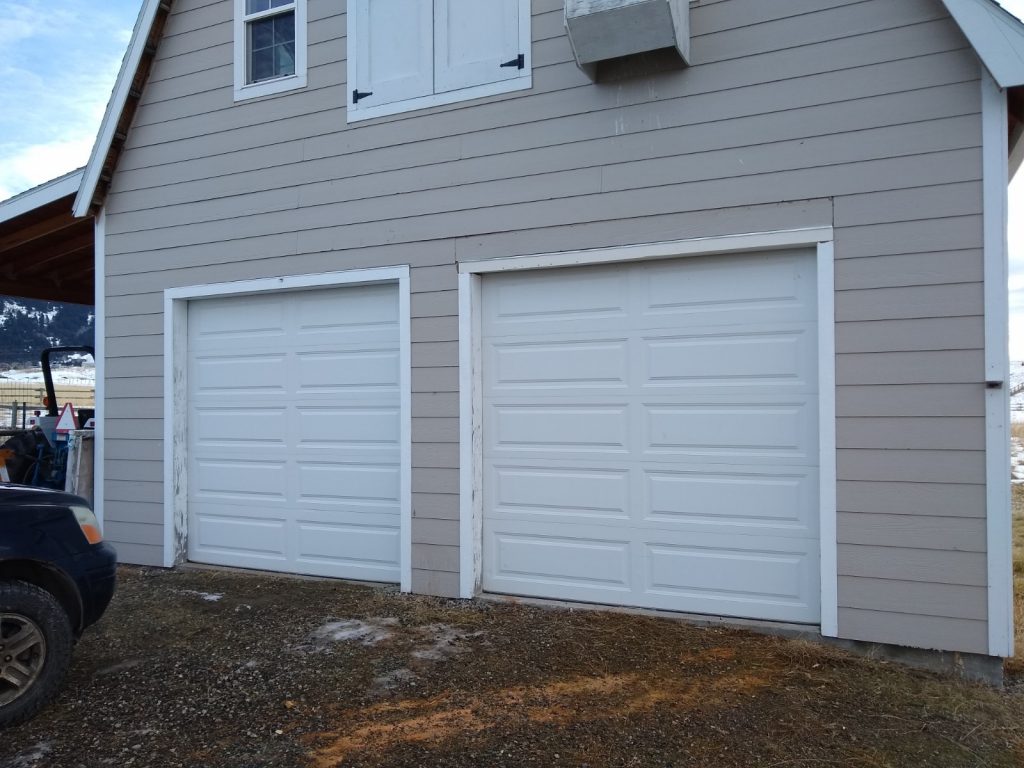
My first thought was for me to raise the header on the garage door up some, and then have the garage door installer who put the doors in when the garage was built to modify the door to fit the taller opening. But, this proved to be more of a job than anticipated — by the time all the door and track changes were added it up it cost as much as a whole new door. In addition, the garage has two identical doors and we thought it was going to look a bit odd to have one door taller than the other, and changing both doors would double the cost.
So, this is an alternative and somewhat odd way to get a tall van into a not so tall door — but, its cheap and it maintains the original look of the garage.
Overview:
- Move the door header up enough so that the van will fit under the header.
- Move the door tracks upward enough so that the van will fit under the door when the door is in the up position.
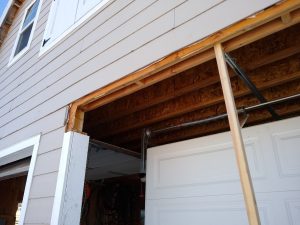
- The siding and sheathing above the door now extend down below the bottom of the raised header – cutout the siding and sheathing out in such a way that that they can be removed and replaced easily.
So, with this method the door itself does not need to change, the tracks are also unchanged except for being raised up a bit, and the door looks exactly the same from the outside as it did before. The sequence for getting the van into the garage is to remove the removable panel of door trim and siding above the door, raise the door in the usual way, and drive the van in.
Before Starting
Measure the height of the van carefully and add an inch for clearance. For my van, this new opening needed to be 103 inches high. The existing door height was 94 inches, so I needed to add 9 inches to get the van in. In our case, even with the header moved all the way up to the top plate, there was not enough room under the header to allow the needed 103 inches. To fix this, I decreased the depth of the header by ripping about 1.5 inches off the header. Given that our doors are in the gable ends of the garage and the header is very lightly loaded, the reduced depth of the header was not a problem. In other cases, the header may need to be reinforced.
Move the door to the up (open) position, and measure the vertical distance from floor up to the garage door panels. In our case, the door in the up position was 2.5 inches to low for the van to fit under it. The solution was to raise the whole track system up 2.5 inches.
Also, check that the door is wide enough for the van to fit through. In our case, it was just barely wide enough to fit the van in with the mirrors folding in.
It is important to do all the measuring very carefully, as it may not be possible to use this method in all cases — for example, if the garage ceiling is too low.
Build Steps
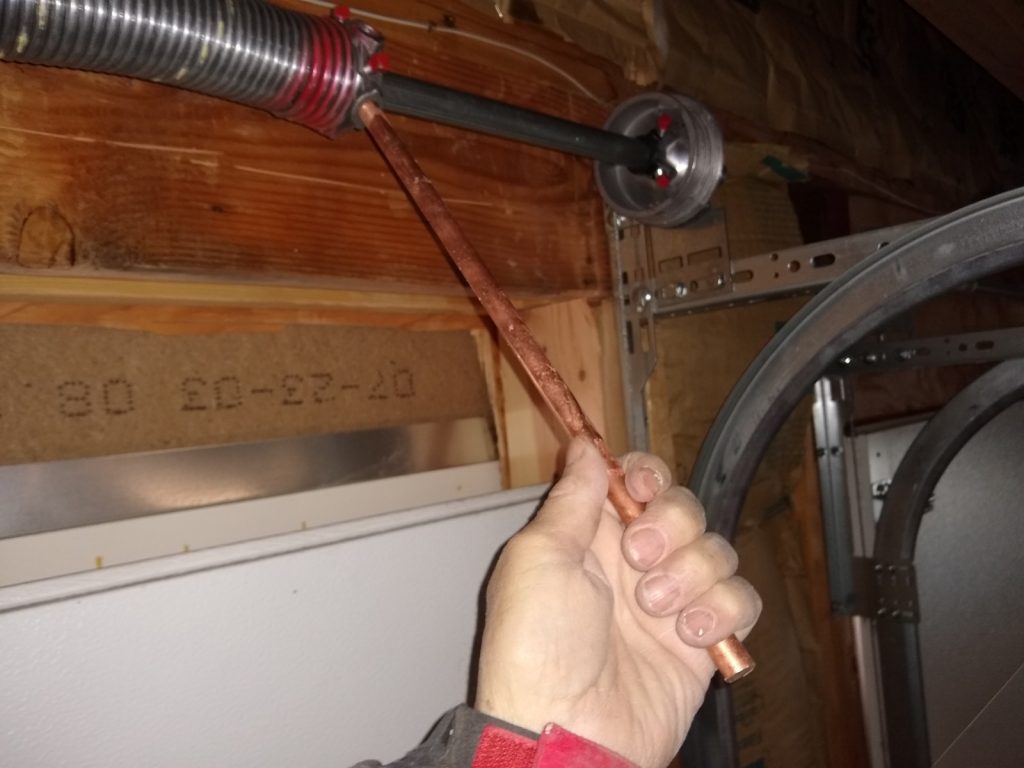
Unwind door torsion spring
Unwind the torsional spring that makes it easy to raise the door. This is potentially dangerous as there is a lot of energy stored in the spring. You will need a couple of winding bars, which are half inch steel bars that put in the sockets on the torsion spring end plate to allow the unwinding to be done in a controlled and safe way. Do a Youtube search on garage door torsion springs to get full instructions on how to do this safely.
Move tracks out of the way
Detach the track system from the door frame and move it back away from the door frame to allow room to work on the header. You will want to tie the tracks to the door so the tracks do not pull off the rollers. The back end of the tracks can just be detached from their support and held up by a couple of rope loops from the ceiling — this allows the whole track unit and door to be slid backward and out of the way.
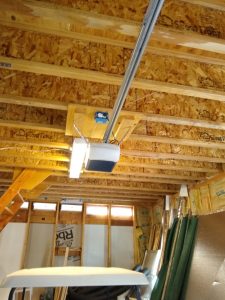
Also had to detach the garage door opener on the door end and tie it up out of the way.

Cut away siding above door
To make it easier to get the existing header out, cut out the existing siding and sheathing above the door to be even with the bottom of the header after the header has been moved. In my case, this just required a vertical cut on the left and right side of the door. No horizontal cut was needed as the new header location lined up with a siding joint. Bear in mind that this is the piece of siding/sheathing you will be removing and installing each time you put the van in the garage — so make it easy to attach/remove.
Remove door header
The next step was to get the existing header out and this took some effort. It was nailed in on every side. I used a recip saw with a nail cutting blade to cut as many nails as I could get to, but it was still a struggle and took a big hammer 🙂
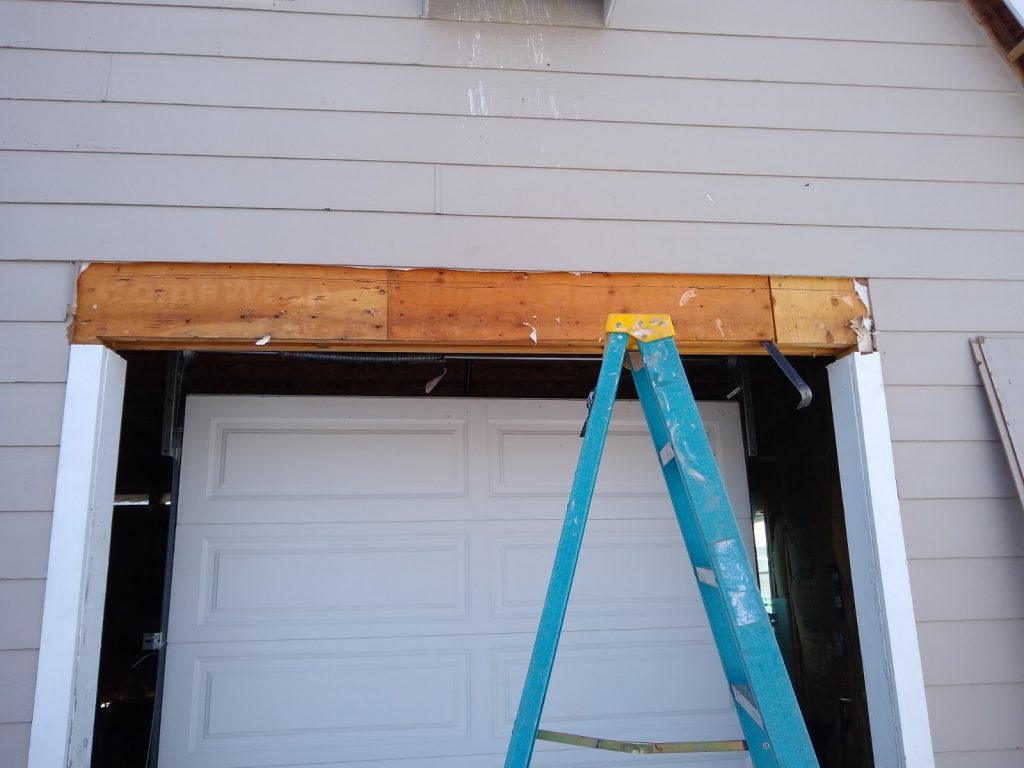
Relocate the header upward
In my case, there was about 5 inches between the top of the header and the top plate on the wall, but this was not enough to let the van fit under the header without taking about another 1.5 inches off the height of the header. So, I ripped about 1.5 inches off the header with a Skil saw.
I then jacked the new header all the way up to the top plate, and then extended the two 2 by 6 door framing jack studs to support the re-positioned header. Then nailed the header in place.
The existing header was carrying so little load that I did not need to support the top plate while removing it. The top plate did not move at all when the header was removed. This may not be the case for doors that are not located in the gable ends or that are otherwise more heavily loaded — so, you may have to rig up some temporary supports for the top plate during the time the header is removed.

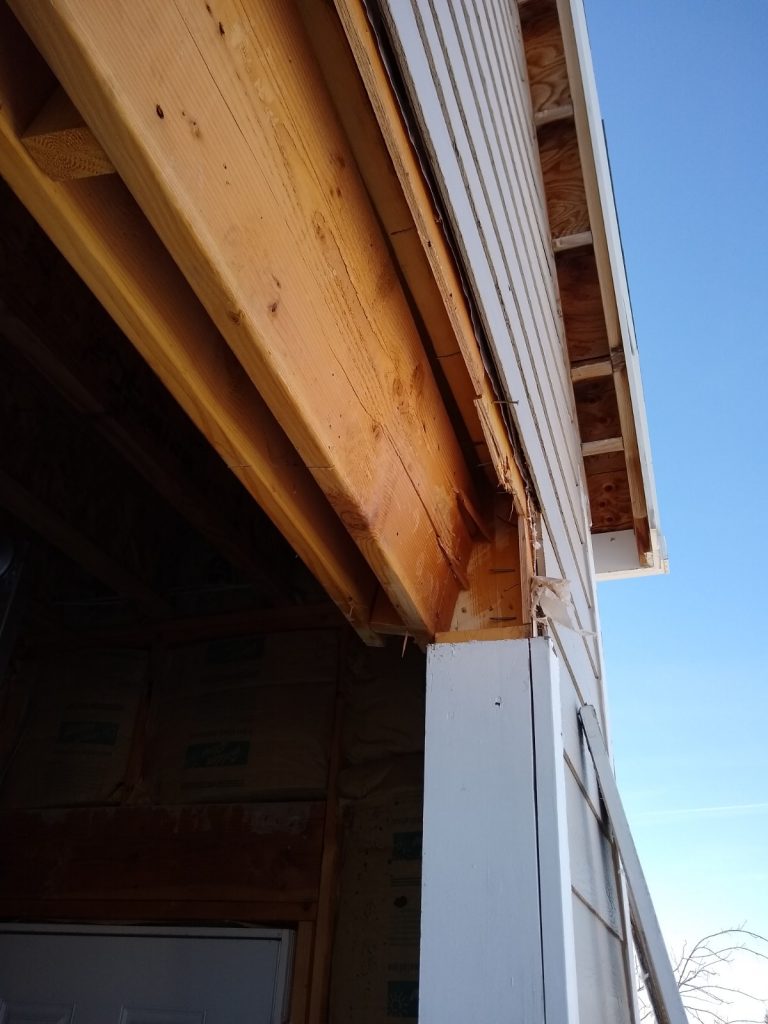
Move the door tracks upward
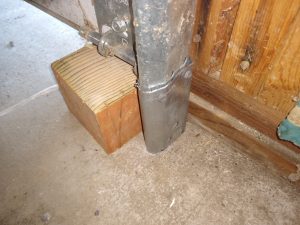
I had to move the whole door track system upward about 2.5 inches so that the van would fit under the door with the door in the up position. At the door end, I just screwed it back into the door frame 2.5 inches higher. This left the bottom of the track 2.5 inches above the floor and to fix that, I cut some short pieces off the back end of the track and spliced them onto the bottom of each track. The track extension is just snapped over the existing track and secured with a couple short screws.
On the back end, the track was supported by some metal angle iron and I just move it up a few holes and reattached it.
If the top panel of the door gets into the curved part of the door track, then you may have to adjust the top set of door rollers to because the door will be further down the track curve when it stops at the floor. On mine, the top rollers are adjustable for just this purpose.
Wound up the torsion spring
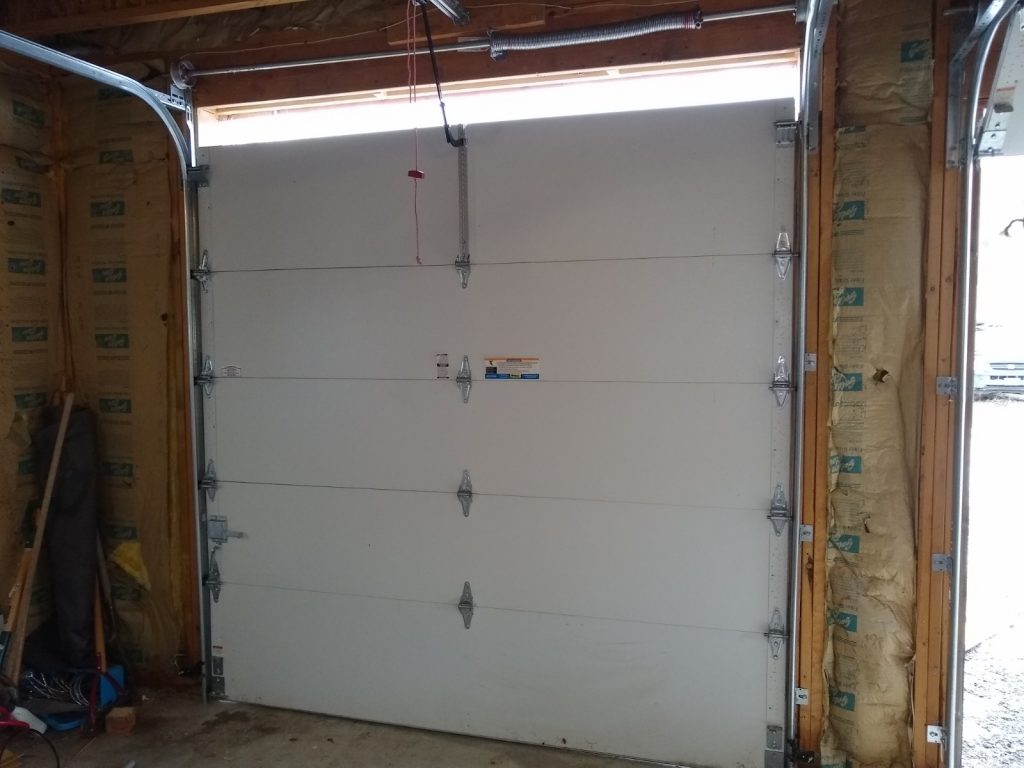
After getting the tracks back in position, I wound up the torsion spring. You have to be careful at the start of the winding process to make sure that the lift cable goes onto the starting groove on the lift pulley. At this point, I could run the door up and down easily, and verified that the van would fit in the garage. It actually turned out to be tighter in the width dimension than in the vertical dimension. Without the folding mirrors it would not have fit width wise. I am going to see if I can replace the 2 by lumber that frames the door with 1 by lumber to gain another 1.5 inches in door width.
Door opener
Reattached the power garage door opener moving both ends a bit higher to clear the door.
Trim above door
I rebuilt the trim and siding piece that covers the opening using lighter weight wood so it would be easier to remove and replace. This piece is secured with a couple screws that only take a minute to undo. I guess this panel could be hinged on the upper edge to make it faster to get it out of the way.
Normally, this trim piece stays installed and I can park a regular car in the garage just using the garage door opener. When the van is going into the garage, I remove the trim/siding piece above the door and open the door with the garage door opener and pull the van in, and then put the trim piece back in. It takes less than a minute to remove or install the trim piece, so for the few times a year I want to get the van in the garage, its no problem.
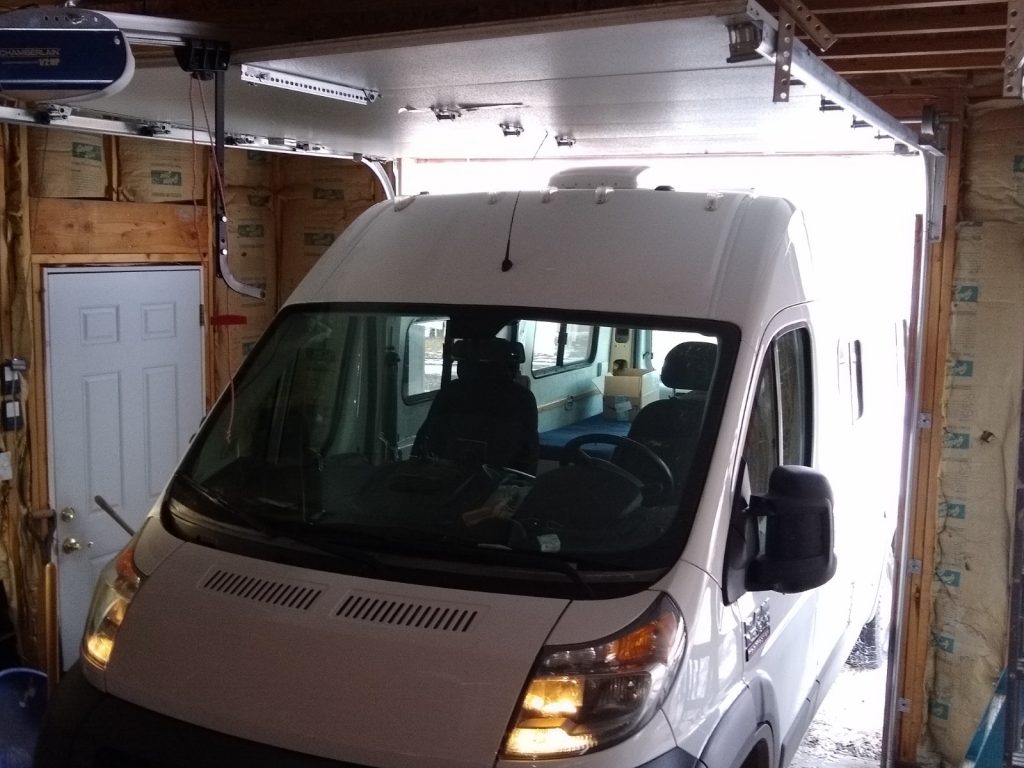
So, now I can work on the van inside my cozy solar heated garage — nice!
Gary
January 23, 2020
Good morning,
I read your posting on Promaster forum. I have a similar issue but my exterior is stucco which equals to expensive construction/ garage work. Once inside the garage I have no ceiling issues. I have plenty of clearance. I a have a roll up garage door.
But I only need 2”- 2.5” of clearance.
Do you have any thoughts on safe psi to deflate the tires to get it in. I would of course inflate once inside the garage to avoid tire damage.
I have a Promaster 2500 camper van.
Hi Juan,
I answered on the ProMaster forum – I’m GaryBIS there.
But, I did a little more digging…
On my tires, there is 5.75 inches from the outer edge of the rim to the outer diameter of the tire,
At the bottom this gets compressed down to 5 inches with the tire at its normal 55 psi.
So, you would have take the 5 inches down to about 2.5 inches, or about half of the total 5 inches.
I think this might be doable.
The people who drive on jeep trails or sand often lower their tire pressures to get more traction.
This video shows a couple guys experimenting with how low they could go without having the tire break its bond with the rim bead while going around corners pretty aggressively. They got all the way down to 6 psi before they had a bead separation while driving around corners aggressively. This still did not damage the tire, and, of course, you won’t be driving around corners aggressively. The tire deflections they were getting at these low pressures looked like they would be enough to get you the 2.5 inches you need.
https://www.youtube.com/watch?v=5oKMD8iuAJY
If it were me, I’d set up a ruler next to the rim or body so you can see how much you have dropped, and then start carefully lowering the pressure and see what you can do. Based on the video and some of the other sources, I’d go down as low as 10psi, or maybe even 6 psi.
I’d be gentle when driving it into the garage, and add a few psi back once in the garage.
One thing to look at on your garage is not only the clearance at the door, but also once inside the garage. In my garage, the dioor tracks and opener were also to low for my van and I had to raise them.
Please let us know what you find out.
Gary
When we built our house we knew someday we’d get a van, but not a really big RV. The ceiling was finished at 10′ but the original doors were 6′-8″. We decided to use big doors and hope that future home owner would pay for the doors and hinges at a place near the water. You can see the lower door to the right of the new barn doors.
Good Thinking!!