Its June, and seems like an odd time to worry about RV water system freezing problems, but we had some trips last winter where some form of freeze protection would have been nice. So, decided to work on it when the weather was nice and warm.
Fresh Water System Freeze Protection
Our fresh water system consists of an 18 gallon poly tank (located inside), a 12 volt Shurflo RV pump, and connecting plumbing to the galley.
We have had the system freeze up a couple times. On other occasions, we have had to run the furnace when we were away from the RV to prevent freezing, which wastes fuel and increases carbon emissions. When the system does freeze up, it takes quite a while to thaw out even when the RV is back up to room temperature. The pump is also susceptible to freeze damage and had to be replaced once due to freezing. So, it seems like its time to do something about it.
While the write up below is brain numbing long, the changes are simple: Add insulation to the tank, and add a tank isolation valve that allows the plumbing/pump to be drained without draining the tank. The thermal mass of the insulated tank water provides days of freeze protection and the simple plumbing drain protects the rest of the system.
Approach
After thinking about it some and doing some calculations (see below), we decided on a two pronged approach.
- Insulate the fresh water tank.
- Provide for a quick and easy way to drain the plumbing and pump so there is no water to freeze.
This is a nice simple approach that is easy to implement, and does not require the addition of electrical heaters that add complexity and take juice out of the battery. It appears (see calcs below) that this will protect the system for several days, and that’s enough for us.
Fresh Water Tank Insulation
Our fresh water tank is inside the van and built into the base of the bed platform. Since it does not have a lot of clearance in some directions, I was limited in how much insulation I could add, but did manage to add half inch underneath it, 1 inch on sides and back, and half inch on the front. I could not add any insulation on top the tank, so the plywood cover provides the only insulation on top. The insulation was leftovers — mostly Polyiso.
If I were just starting the conversion, I would allow for 1 inch Polyiso on all surfaces of the tank, which would give about R7 all around. As it was, the area weighted average R value I was able to get is R2.9. This still makes a big difference in how long it takes water in the tank to get down to freezing and then to freeze (see calculations below)
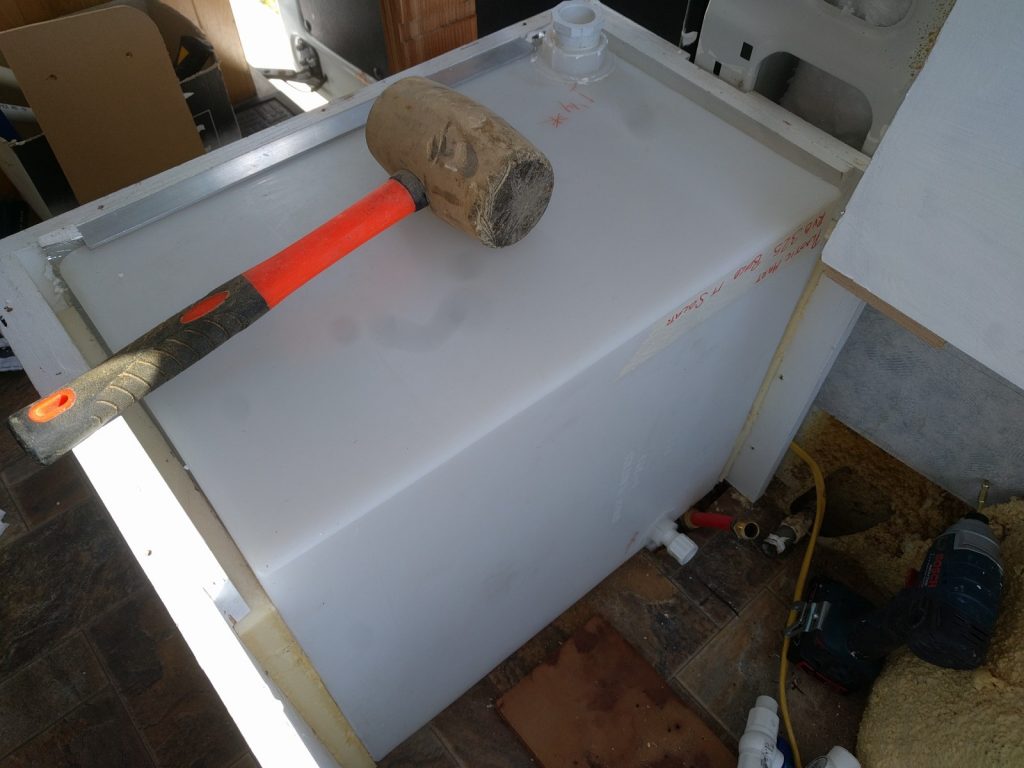
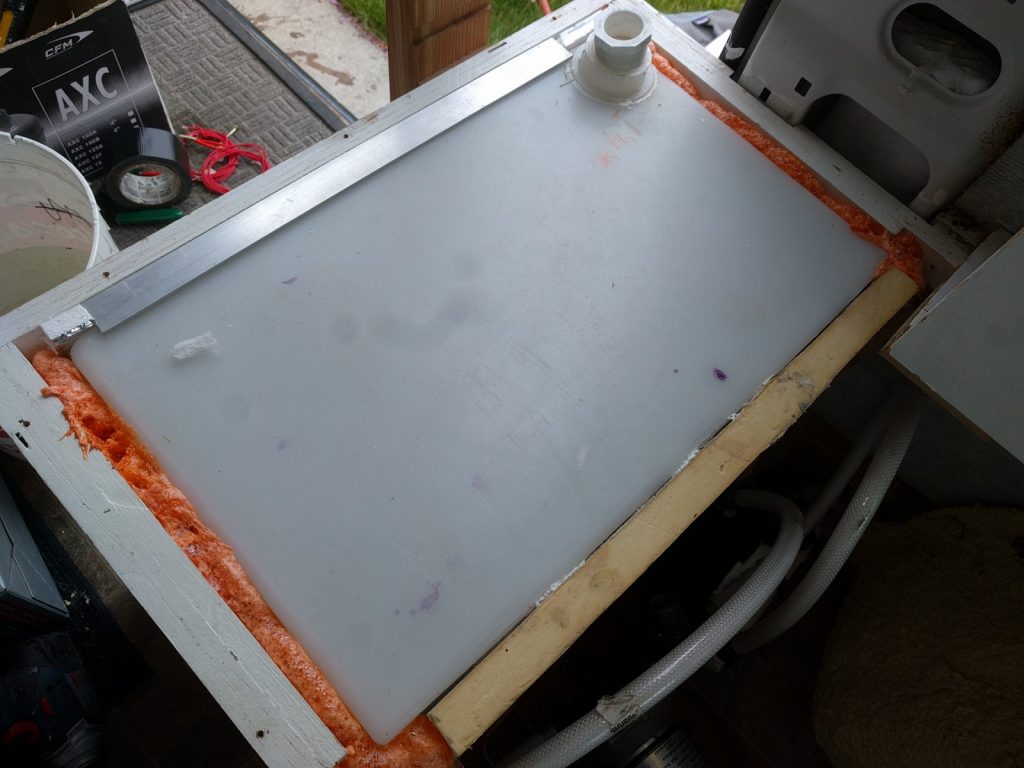
Picture shows the insulation, which is a tight fit. Half inch Polyiso under the tank, 1 inch on the two sides, half inch styrofoam on front wall, and one inch Polyiso on back wall. No room for anything on top. Some Great Stuff to fill in the gaps.
Quick Way to Drain the Plumbing
We decided that in the end it was simpler to provide a quick and easy way to drain the plumbing lines and pump (without draining the tank) to prevent freeze ups. This turns out to be simpler (and probably more reliable) than installing electric heaters along plumbing lines, valves and pump. In the end, we only had to add one valve to accomplish this.
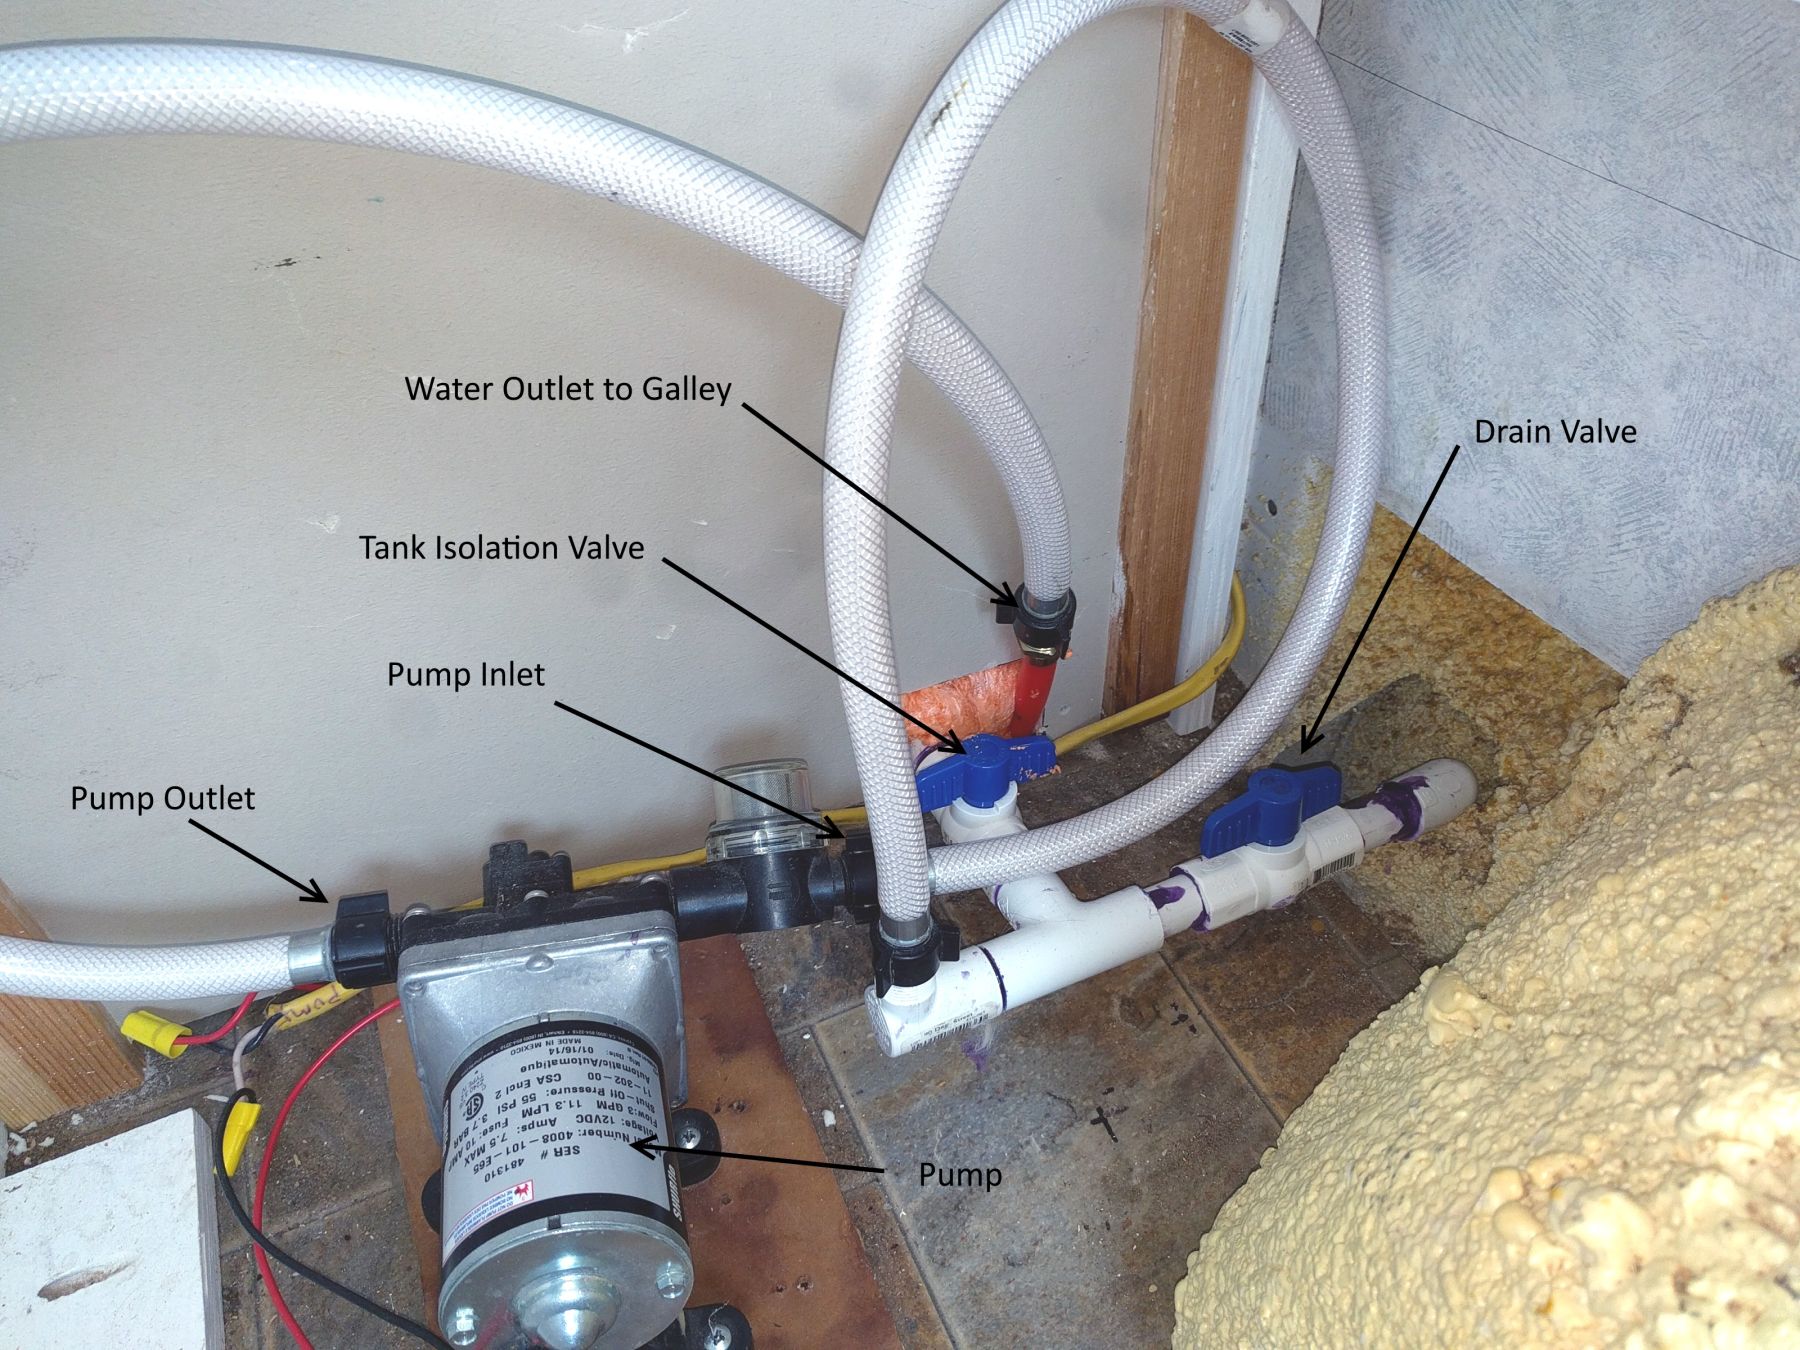
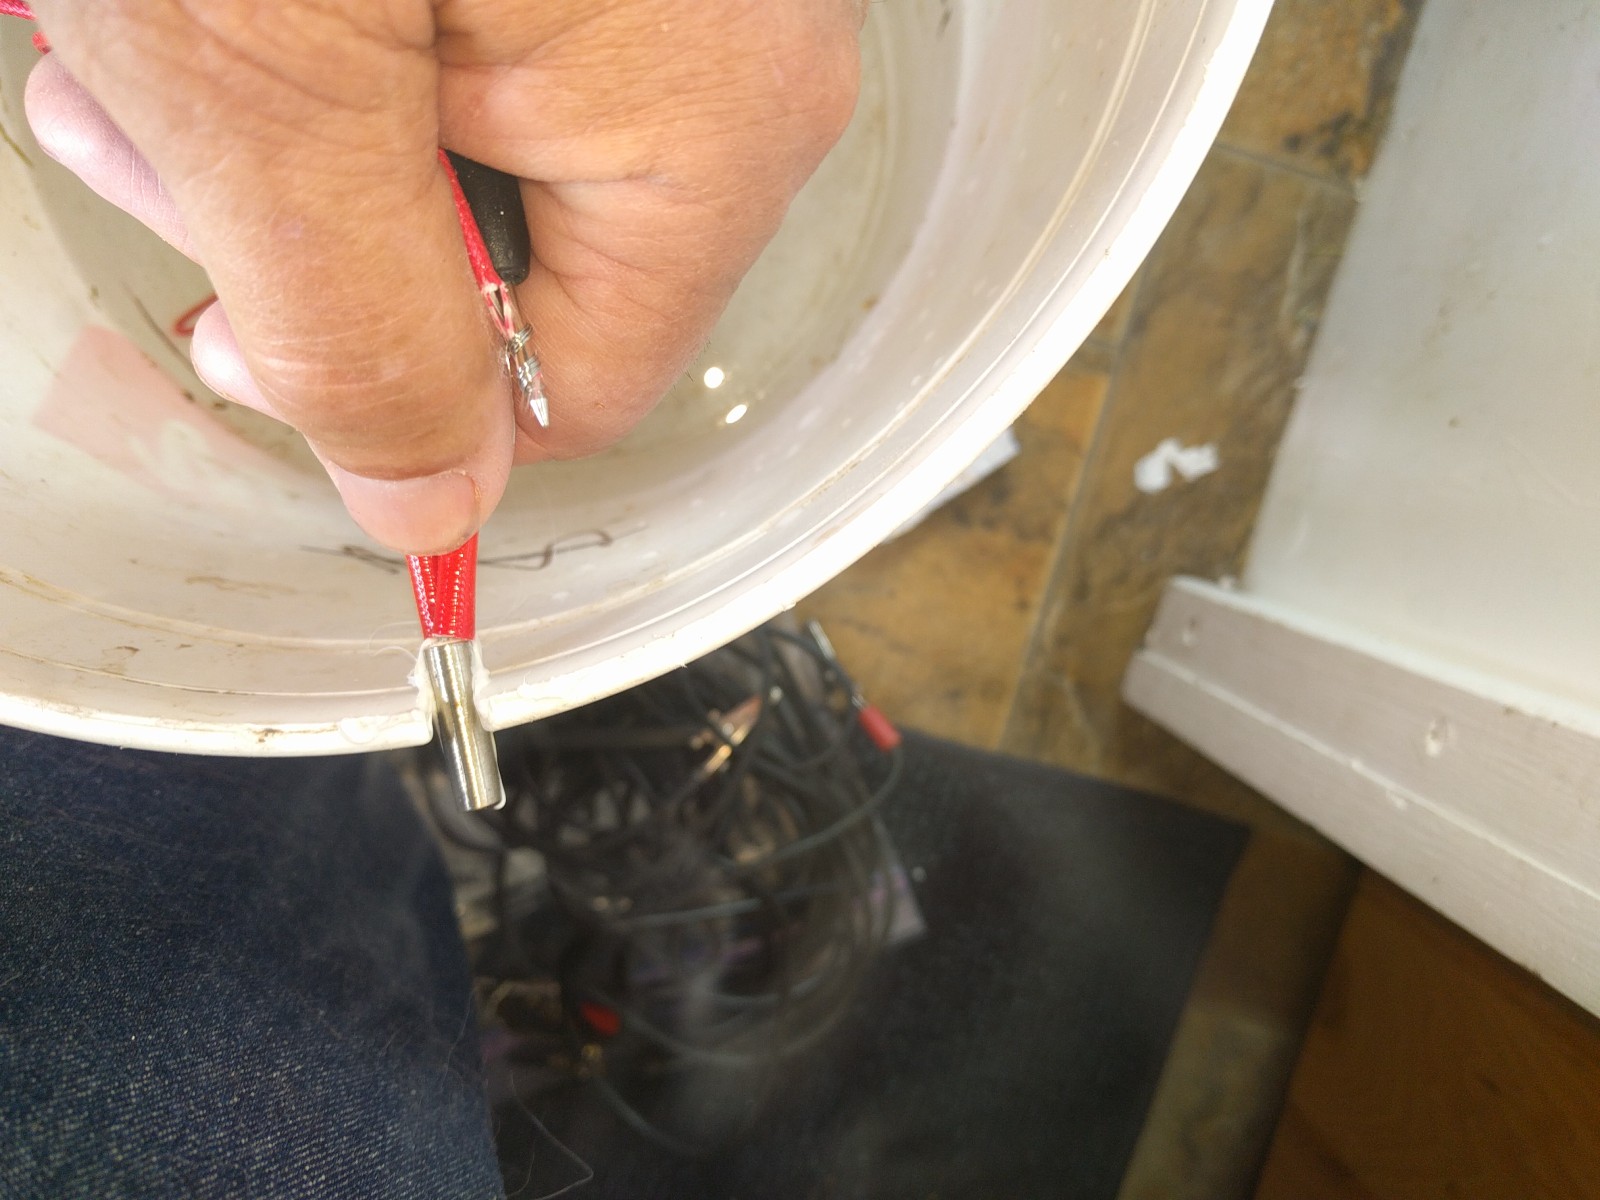
The picture above shows the plumbing. The drain line just goes through the floor and drains on the ground. The flex hoses reduce pump noise and make it easier install/replace the pump. The line that leads out to the galley is red PEX line that is just above the Tank Isolation Valve in the picture.
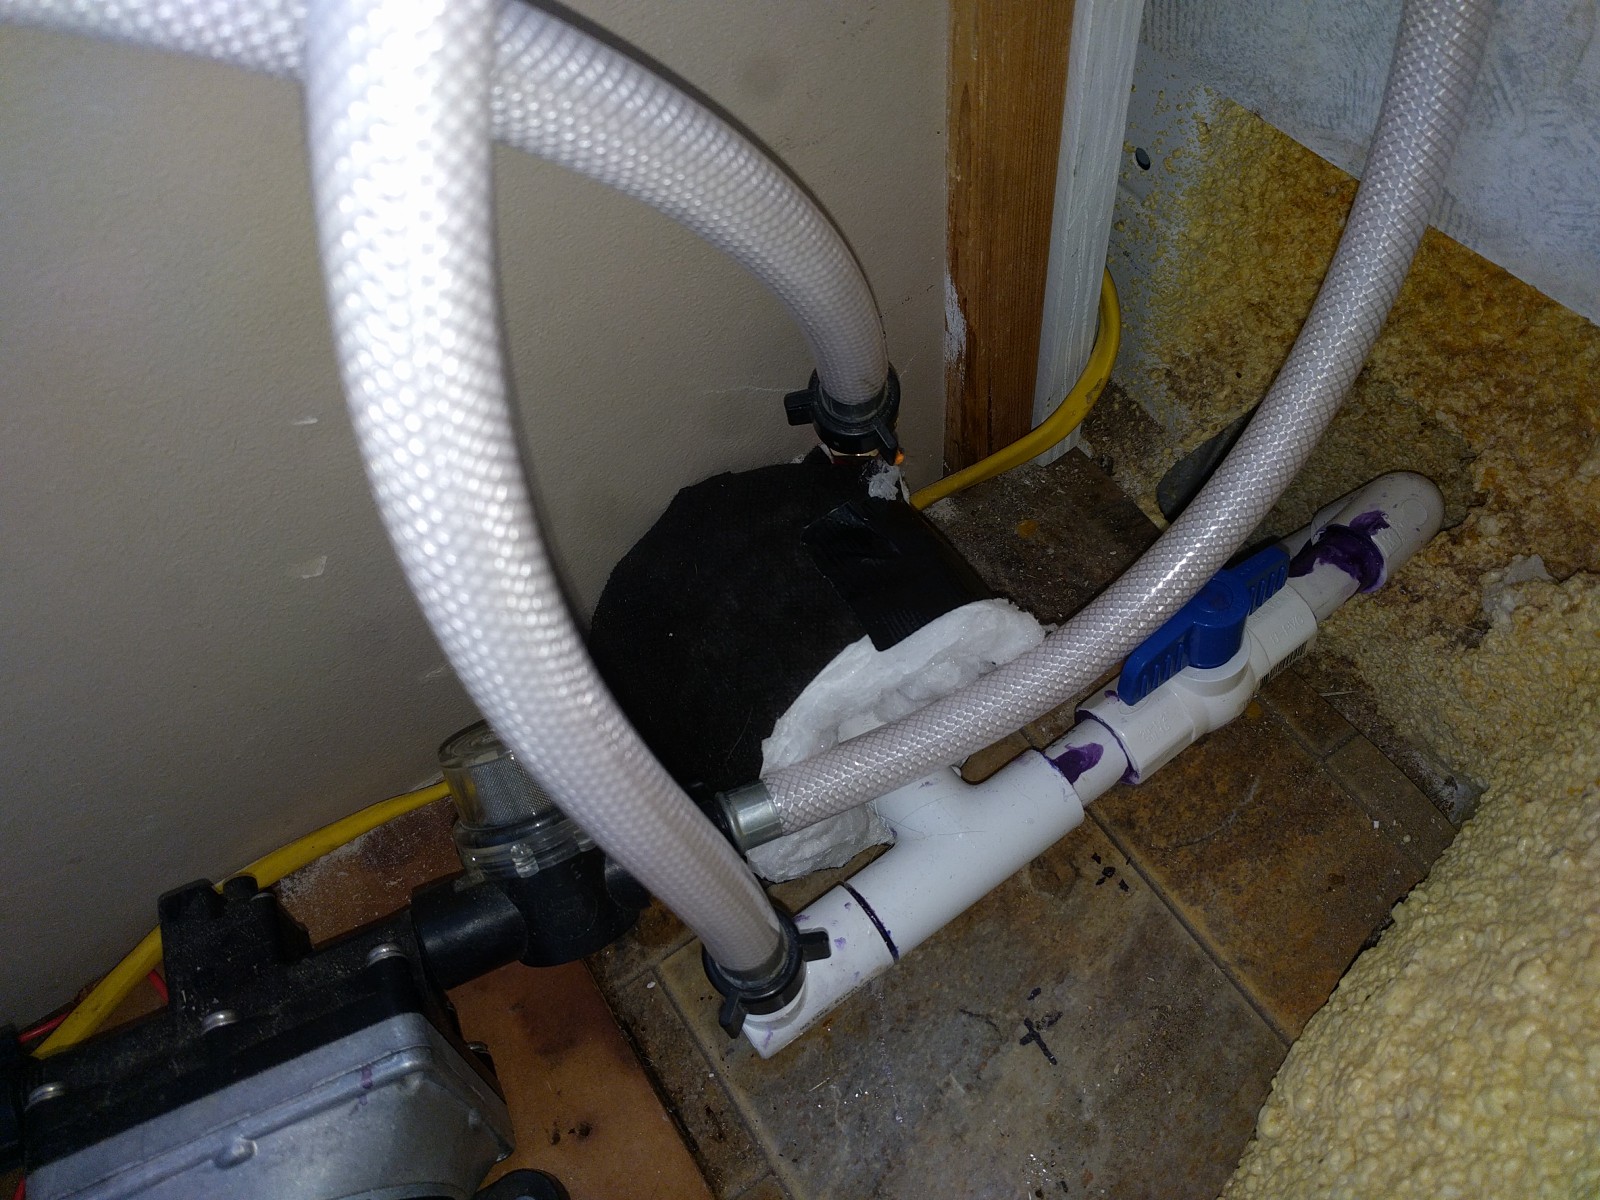
While all the plumbing in the picture is new, the only change from the old system is the Tank Isolation Valve, which allows the plumbing to be drained without draining the tank. The Tank Isolation Valve is as close to the tank as possible to reduce the chance of it freezing. It is also covered with a bit of Thinsulate.
For normal use:
The Tank Isolation Valve is open and the Drain Valve is closed. Flow goes from tank, through isolation valve, then to the flex hose that connects to the pump inlet, then out the pump outlet, through the outlet flex hose to the red PEX line that goes to the galley.
The procedure to go into freeze protection mode is:
- Close Tank Isolation Valve and open Drain valve.
- Open the galley sink faucet.
- Run pump until only air is coming out of the galley sink faucet.
The pump pulls in air via the drain line — this replaces the water in the plumbing and pump with air.
For extra credit (probably not really needed), you can disconnect the flex hose from the pump outlet and run the pump for a couple seconds — this absolutely insures that the pump is cleared of all water.
Update 2021: The common RV diaphragm pumps turn out to be pretty easy to damage through freezing, so disconnecting the flex hose from the pump and running it for a few seconds is probably a good idea.
If you have a more complicated plumbing system, you will have to open each faucet with pump running until it spits air out.
To go back into normal mode, close the Drain Valve and open the Tank Isolation Valve. When the pump turns on, it will probably spit air out the galley faucet for a few seconds before normal flow starts.
Its important to note that water expands as it turns to ice, so if you plan to expose the tank to freezing conditions for more than a few hours, don’t fill the tank completely full or the expanding ice may damage it.
Other Freeze Problems (or not)
There are other systems that might have freeze problems on the van, like the toilet and black water tank and the grey water tank. We have a composting toilet, so no freeze problems there and no black water tank.
For our grey water tank, we either pore some RV antifreeze down the sink, or just let it freeze, and then thaw out when the weather gets warming.
Letting the grey water tank freeze carries a bit of risk as there have been cases of ice damaging the tank, but we have just let it freeze on the last couple RVs with no problems. Letting it freeze should only be allowed if the tank is not full — there must be some expansion space for the ice. And, letting it freeze is not going to work if you are going to be in freezing weather for an extended period. I guess that insulating the grey water tank and adding a heater would be another option.
Heater Experiments and Thoughts
We have not ended up using any heaters in the system (yet), but I did buy two different types and do a little experimenting with them with the idea that they might be needed. Just passing this on for whatever its worth.
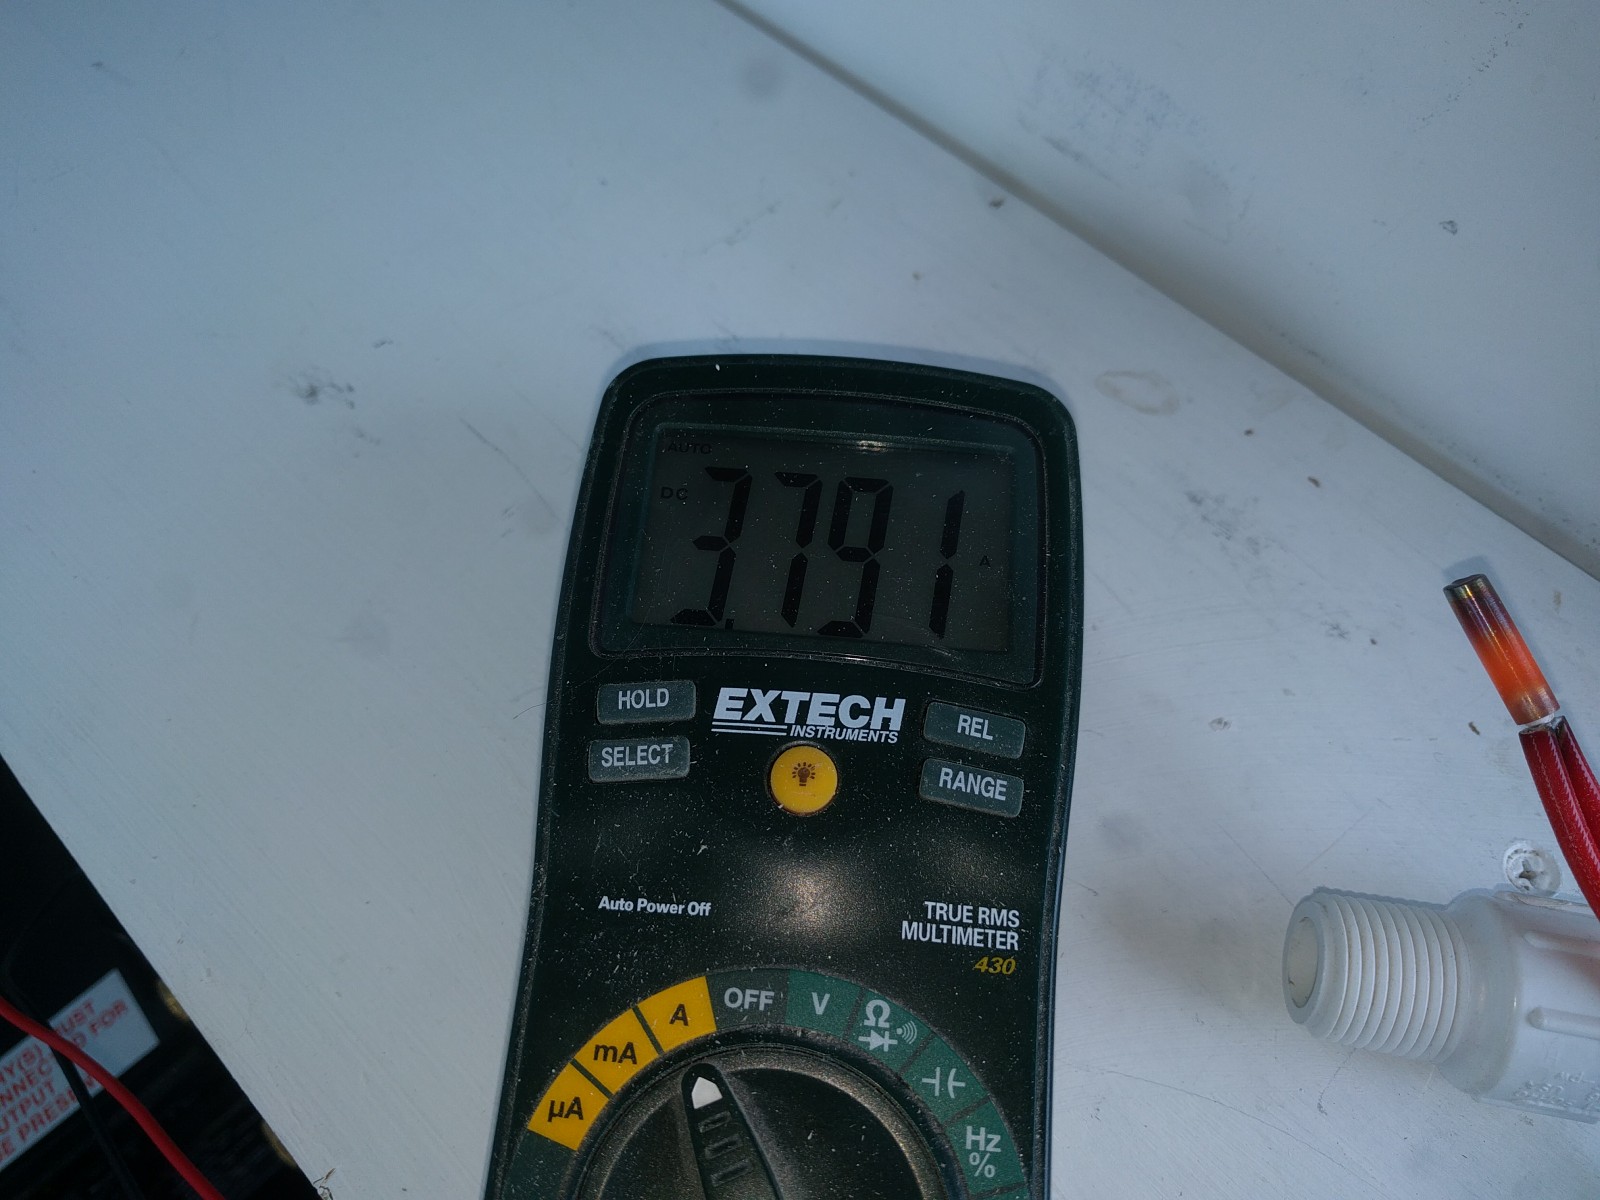
The first is a 12 volt, 40 watt, and 3.8 amp ceramic cartridge heater from Amazon.
I thought this might make a good heater to immerse in the fresh water tank.
Hooking this up to 12 volts, it gets very hot — after about a minute in air, it actually glows orange. When immersed in water, it runs much cooler of course, but still slowly boils the water around it and is to hot to hold onto. This seemed way to hot for me — I don’t really want something glowing orange in my plastic water tank if there happens to be no water in the tank. The current draw is about 3.8 amps. At 0F outside an with the insulation level on my tank, it would run 80% of the time to offset tank heat loss — about 37 amp-hrs overnight.
Also tried hooking two of these in series, which cut the current down to 1.9 amps, or about 20 watts total for both heaters. This did tame them down quite a bit, but each heater was still hot enough to melt plastic.
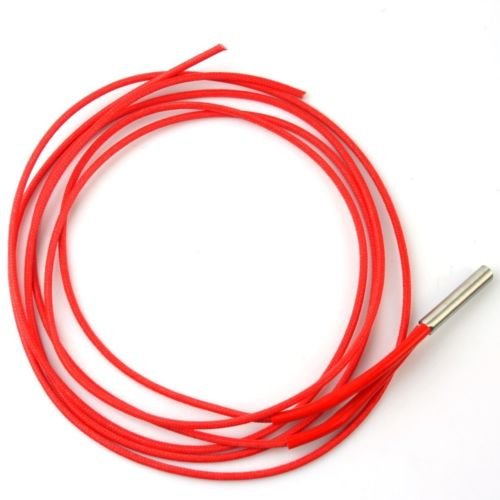
Also ordered some heater wire. With this wire, the whole wire heats up when current is applied. I believe that it could be used along plumbing lines and wrapped around valves to keep them from freezing — probably best used in conjunction with insulation.
The 5 meter length of wire I bought has a total resistance of about 30 ohms and when hooked up to 13 volts, it draws about 0.54 amps. In open air, the wire heats up to just warm to the touch. Putting it under some carpet to see how hot it gets when insulated, it was still easy to hold. I think it probably could be used along a pipe run under insulation to provide freeze protection for the line, but be sure to test it and make sure it does not get to hot. How warm it gets could be regulated by how long a wire you use. Some form of thermostat would also be needed so that it is only on when temps go below a set level.
I’ve ended up not using the heat wire because 1) the quick drain system seems easier and simpler, and 2) my most susceptible to freezing line runs through the floor under the finished flooring, where its hard to get to.
There are also pad style heaters you can buy that are intended for heating RV tanks, and some of them have built in thermostats. This might be a good option if you decide you need to heat your tank.
Tank Heat Loss Estimate
This method of freeze protection is based on the insulated thermal mass of the water in the tank to cool down and ultimately freeze slowly enough to provide the needed protection.
How long to cool the tank down to 32F — Assuming:
Tank water starts at 60F
Tank is full of 17 gallons of water (141 lbs)
Outside temperature is 0F
Insulation R value averages 2.9
Tank surface area 10.6 sqft
Initial heat loss (tank at 60F) = (10.6 sqft)(60F -0F) / (R2.9) = 219 BTU/hr
Tank temp drop per hour = (219 BTU/hr) / (1 BTU/lb-F) (141 lb) = 1.6 F per hour
Heat loss with tank at 32F = (10.6 sqft)(32F -0F) / (R2.9) = 117 BTU/hr
Tank temp drop per hour = (117 BTU/hr) / (1 BTU/lb-F) (141 lb) = 0.8 F per hour
So, initially the tank goes down about 1.6 F per hour but slows to 0.8 F per hour as the tank cools.
If we say about 1F per hour, then it takes the tank that starts at 60F about 28 hrs to cool down to 32F — at this point ice can start forming.
How fast does ice form?
Once the tank reaches 32F, it will stay at 32F as water is converted slowly to ice from the top down. It takes a lot of energy to turn water at 32 F to turn into ice — 144 BTU per lb of water.
For the same assumption, the rate of ice formation is:
Ice formed per hour = (117 BTU/hr) / (144 BTU/lb) = 0.8 lbs ice per hour (0.1 gal/hr)
So, 24 hours later, 2.4 gallons of the tanks 17 gallons would be an ice layer at top of tank. It would take about 7 days of 0F to freeze the tank solid.
An important note is that water expands as it becomes ice, so don’t start with a completely full tank if you expect freezing conditions.
So, in rough terms, and for these assumptions you have about a day of 0F outside temperature before any ice forms, and probably a couple days more before you get enough ice to be a problem.
If the tank is partly empty, the tank gets to freezing faster. A tank that is near empty will freeze much faster.
If the insulation level is increased over my paltry R2.9, the freeze and ice formation times get longer.
If the outside temperature is higher than 0F, the freeze and ice formation times get longer.
The sort of end conclusion is that the thermal mass of the water in the insulated tank give it a fair bit of freeze protection, while the low mass of the water in pipes and pump have little mass and even if insulated will freeze fairly fast.
The bottom line for us is that we will try it without any heaters and I think it will work out OK — will let you know after next winter 🙂
Another Freeze Protection System
Another freeze protection system has been described at FitRV that you might want to consider.. To me, it seems very complicated and time consuming to implement, but it may be just your cup of tea.
We had a freeze problem with water, a little like yours. Our water outlet from the water tank is only 30 cm from the rear door, and our heater is in the front. Did some partial freezes last year that I was able to clear by running the water, but edgy. Our fix is to constantly run a little computer fan blowing air to the back under the bed in the winter. No duct, not fancy at all. Works great, no problems since doing that. I have a web thermometer there, temps are always within 5C (lower) than the main van temp. And it doesn’t drain the battery!!
Hi Don,
That’s a really good way to handle it.
Not a bad way to keep your Li batteries at or above charging temperature either.
Thanks for the suggestion.
Gary
Hi Gary,
Yes, we are also using a fan on the Lithium batteries to keep them warm. They are a particular problem because the electrical cabinet is at the base of the side column (Ford Transit, I think the C or D-column). The column is open cuz that’s where all the wiring up to the ceiling is. In the winter It becomes basically a heat pipe attached to the outside skin of the van.
Again, just a computer fan, no ducting, does the job fine.
Hi Mary Jo — Thanks!
Gary
It’ll be a cold day in hell before I’d have the ability and confidence to implement one of your suggestions/solutions. However, I love learning and enjoy reading. More than that, I respect and admire those with the abilities you have. Engineer? Physicist? Or just a very dedicated DIYer with the tenacity to do the work until the required results are achieved? I think a little bit of a mix. Actually, I’m not a “Fun-Dummy” (my beloved, deceased husband coined that word. An intelligent person who, at times, does something silly or stupid making it appear as though he or she is quite dumb though we know that is not really the case. So, calling a person by that term is all in fun but don’t forget in that moment, you did or said something quite dumb). I do plan to adopt some of the techniques you espoused. I sure as hell can’t go through another 24 hour period worrying about damage, fittings cracking, floods, etc. Thank you so much for your post. In addition to me, no doubt many more
will benefit from it.