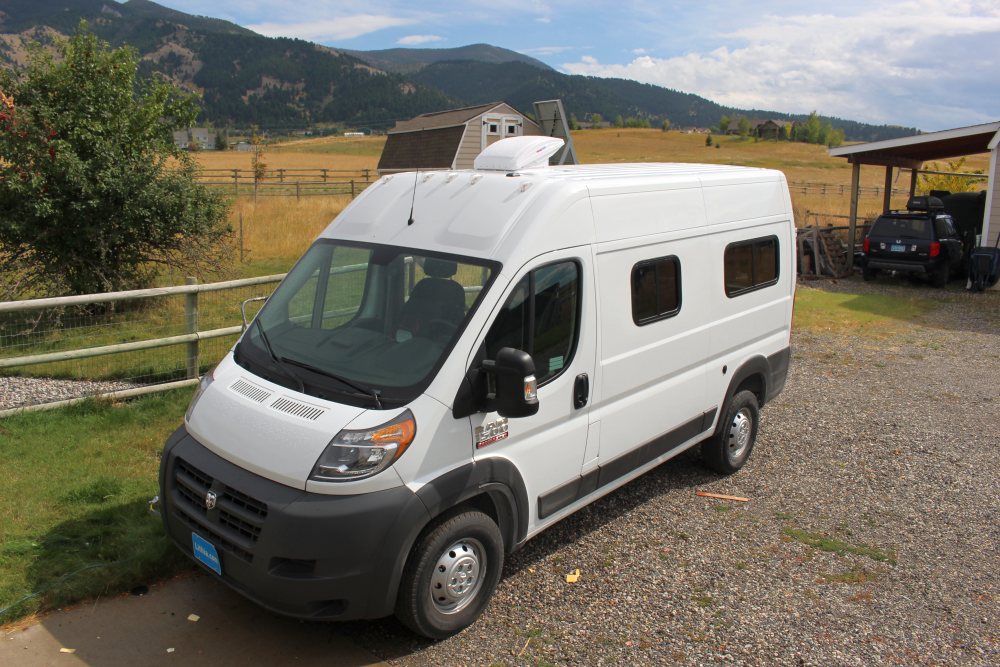
For ventilation of the camper van, we are using a Maxx Fan installed in the ceiling.
This page goes over the install.
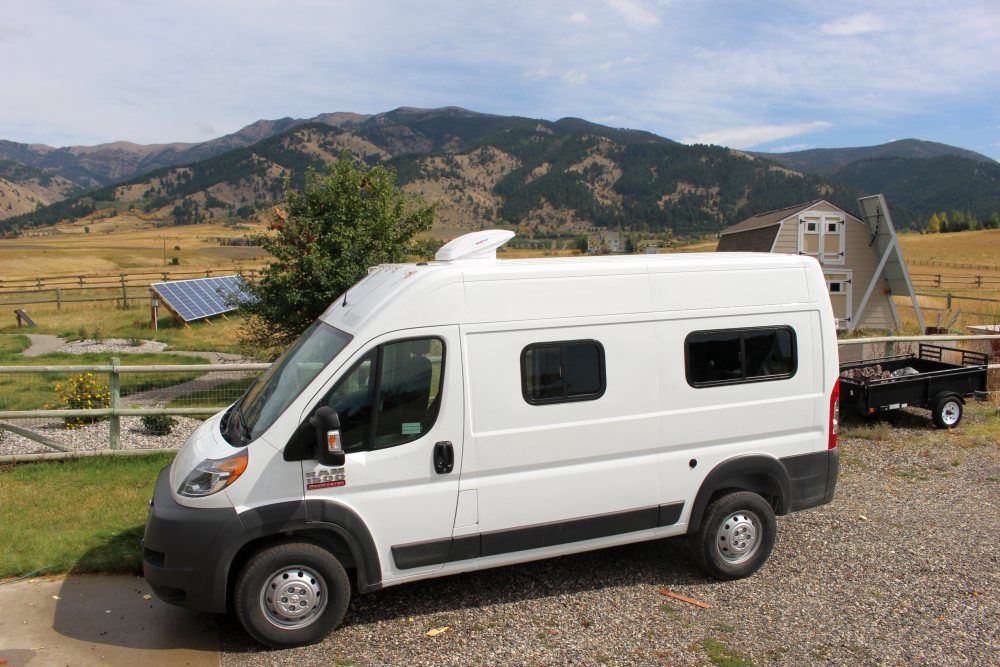
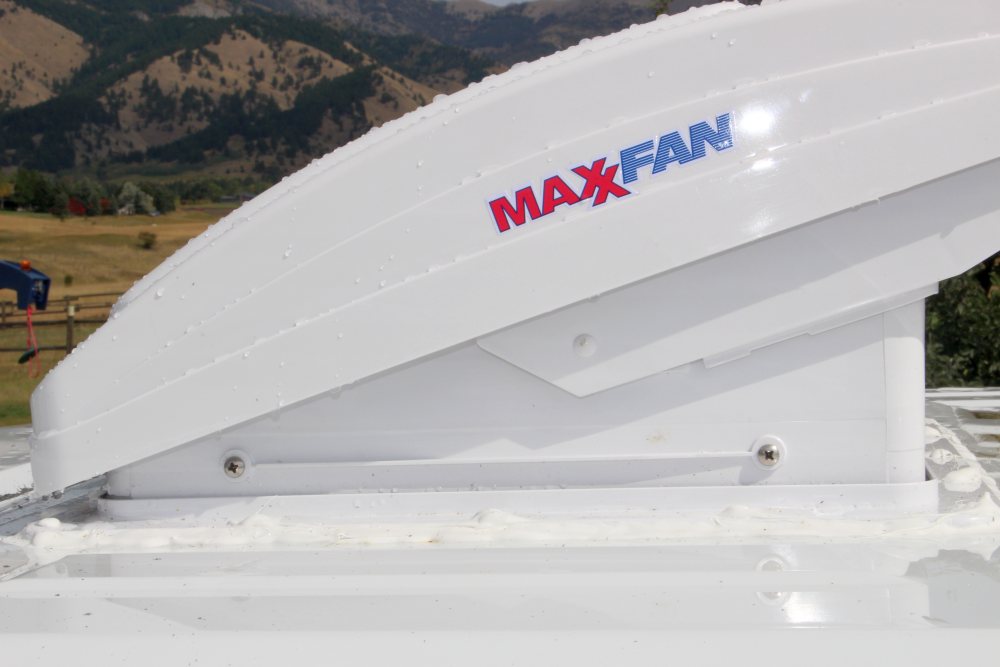
The camper van with Maxx Fan in open position.
Go back to the main camper van conversion page…
Which Fan?
There are two fans out there that people appear to like for RV ventilation. The Maxx Fan and the Fantastic Fan. They both appear to be good products that do the ventilation and cooling job well. Both come is several models that range from fairly simple manual control up to full automatic with remote controls.
We had a Fantastic Fan in an earlier RV and were quite satisfied with it, but this time we decided to go with the Maxx Fan — it appears to have somewhat better aerodynamics and to handle ventilation in the rain or while driving somewhat better — will see. I don’t think you could go wrong with either brand.
Installation Steps
The basic steps in installing the Maxx Fan:
- Decide where you want the fan
- Make a template to mark the cutout
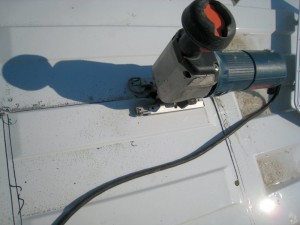
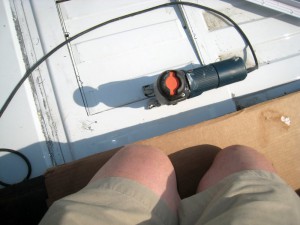
- Cut out the hole
- Install Butyl Tape on fan cutout frame
- Screw fan cutout frame to roof
- Apply sealer over frame
- Install fan in frame
- Test fan for operation
See below for details on each step.
Decide Where You Want the Fan
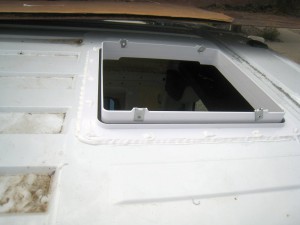
The ProMaster has a nice spot to put the fan up near the front of the roof. If its installed there, you don’t have to deal with the ribs in the roof (see pictures below).
This location works out well for us in that we have a very long PV panel that has to go behind the fan, so the fan needs to be up near the front to leave room for the PV panel. Others may wish to install the fan further back.
Make a Template to Mark the Cutout
The fan needs a 14 by 14 inch cutout in the roof. The easiest way to get this right is to make a 14 by 14 cardboard template, and then place the template on the roof and draw around it to mark the hole.

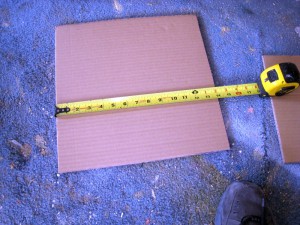
Align the template carefully on the roof, and then mark around it, and cut the Hole.
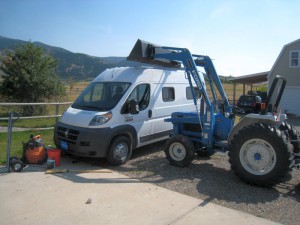
Be careful about where you put your weight on the roof — it can be dented. Guy on the ProMaster forum reported some serious dents made by the people who installed his fan.
I used my tractor’s front end bucket as a work platform to avoid stepping on the roof a lot, but working from a ladder from each side will also work fine. If you are careful, you can kneel on the roof right over the roof support frame that runs just aft of the front doors.
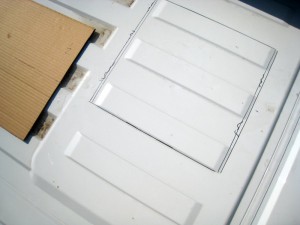
At this point, I had to scrape away the foamed in place insulation around the cutout on the inside of the van. You will only have to do this if your insulation comes right up to the cutout.Once the cutout is done, clean up the sharp edges. It would be a good idea to apply some rust primer to the cutout edge at this time, but I did not.
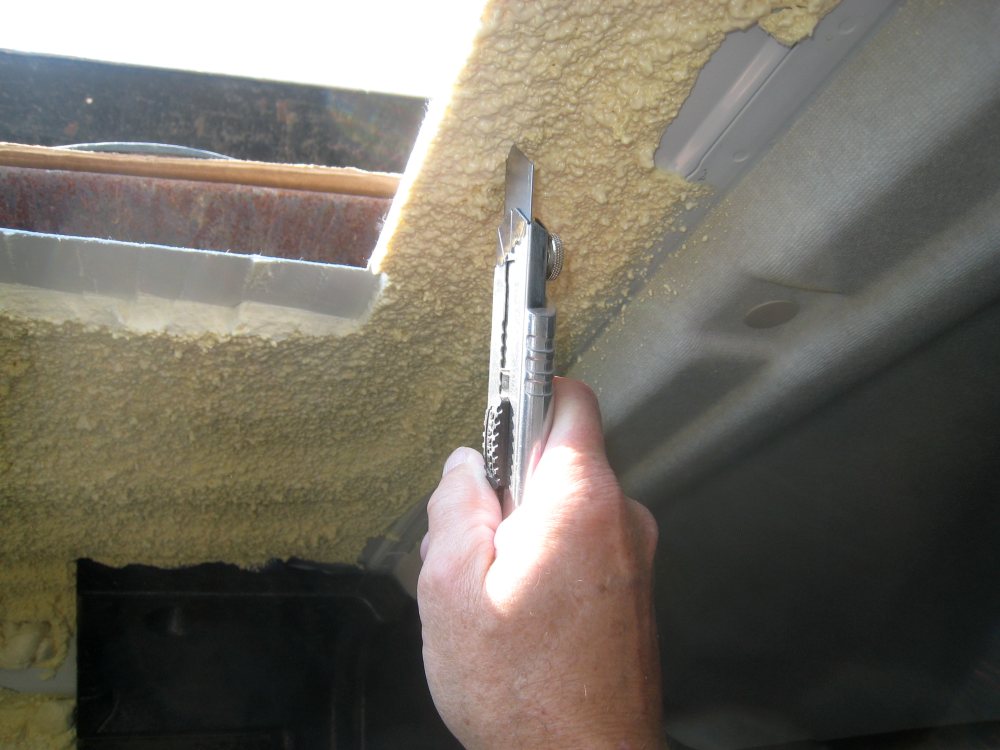
Cutting/scraping back the foam insulation around the fan cutout.
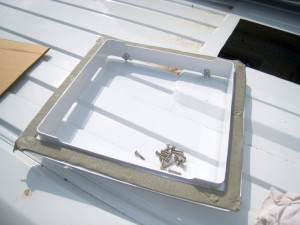
Install Butyl Tape on Fan Frame
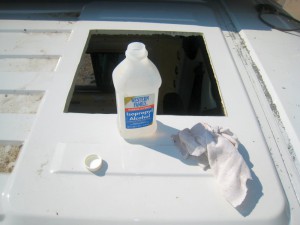
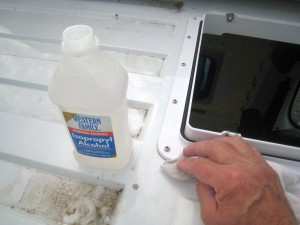
Clean up the area around the cutout where the butyl tape will be in contact with alcohol or the like.
Run butyl tape around the fan cutout frame. This butyl tape will get squeezed between the roof sheet metal and the fan cutout frame and will seal out water leaks. Be sure to run the butyl tape over the screw holes in the fan frame.
Screw the Frame to the RoofOnce the tape is on the frame and the sheet metal is clean, place the cutout frame in the cutout and center it up and push it down.
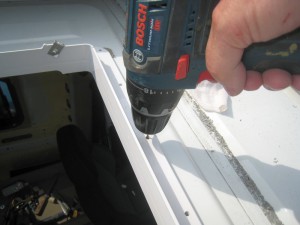
Do the final tightening with a screw driver. You should see a bit of butyl tape squeeze out along the frame.
Apply Sealer Over the Frame
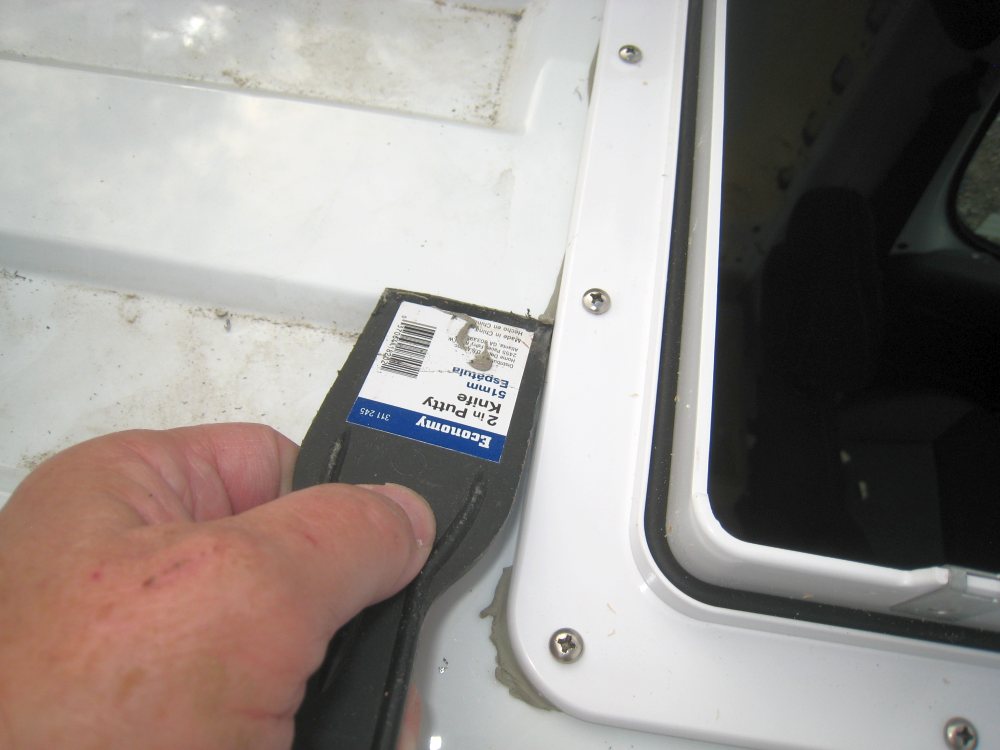
Once the butyl tape has had a chance to finish its squeeze out, go around the cutout with a plastic scrapper to remove the excess butyl tape.
Next, you want to apply a sealer over the screw heads and along the edges. Maxx Fan mentions Dicor Lap Sealant, and I used it — it seems to have a good reputation. Our local RV parts place had it for $10 for a caulk tube. Its applied with a regular caulking gun. Silicone caulk would be another option.
Before applying the lap seal, do a cleaning with the alcohol or similar.
Now, Install the Fan in the Frame
At this point, Maxx Fan suggests installing the connectors on the electrical wiring so they are ready when the fan is dropped into the frame.
To install the fan assembly in the cutout frame, you first open the fan up all the way, and then just drop it into the cutout frame with the fan opening facing aft.
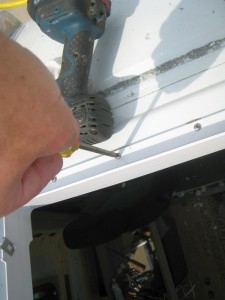
Line up the four holes in the fan with the 4 nutplates in the cutout frame, and secure with the 3/4 inch stainless screws.
Two of the four screws that hold the fan assembly to the fan cutout frame.
Maxx Fan has just recently added a rubber gasket to the joint between the fan and cutout frame, and I found that I had to apply a fair bit of down force to compress the gasket enough to get the screw holes to line up.
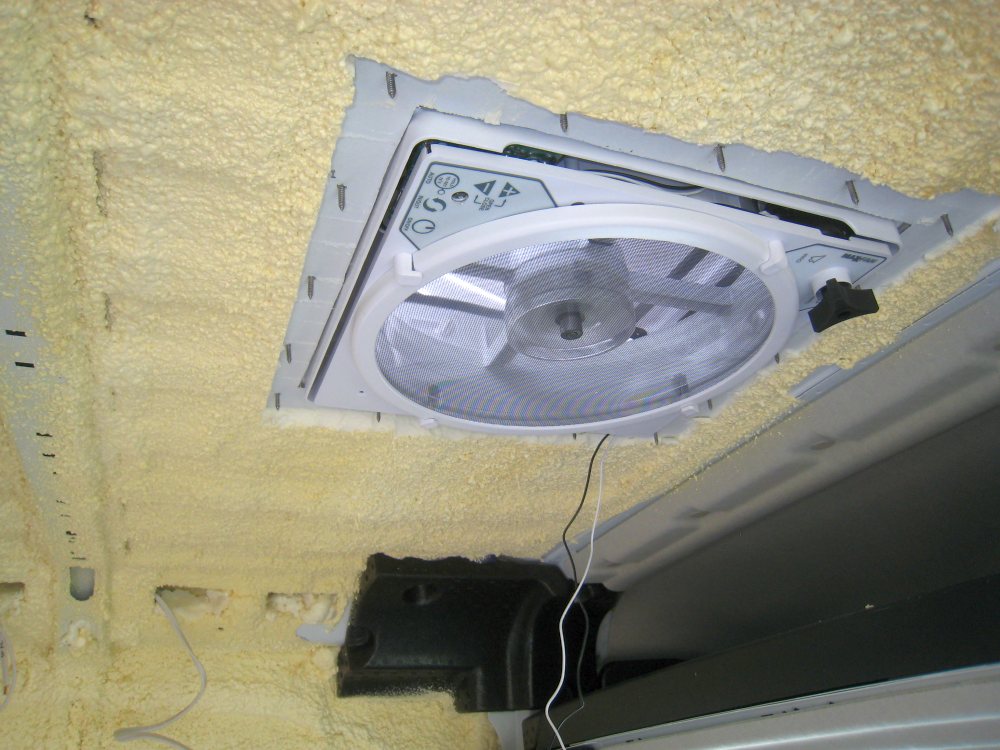
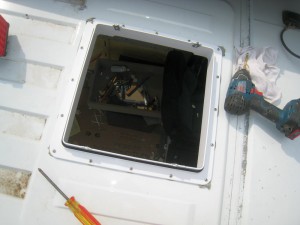
Fan from the inside.
I still need to install the inside decorative molding, but will wait until the I decide on the type of ceiling we are doing.
Important Note:
You may want to figure out what kind of internal support frame will be needed to support the ceiling panels, and make this frame and use the same screws that are used to mount the fan to also secure the inside frame that supports the ceiling panels. See the comment on this from Colin in the Comments section at the end of this page.
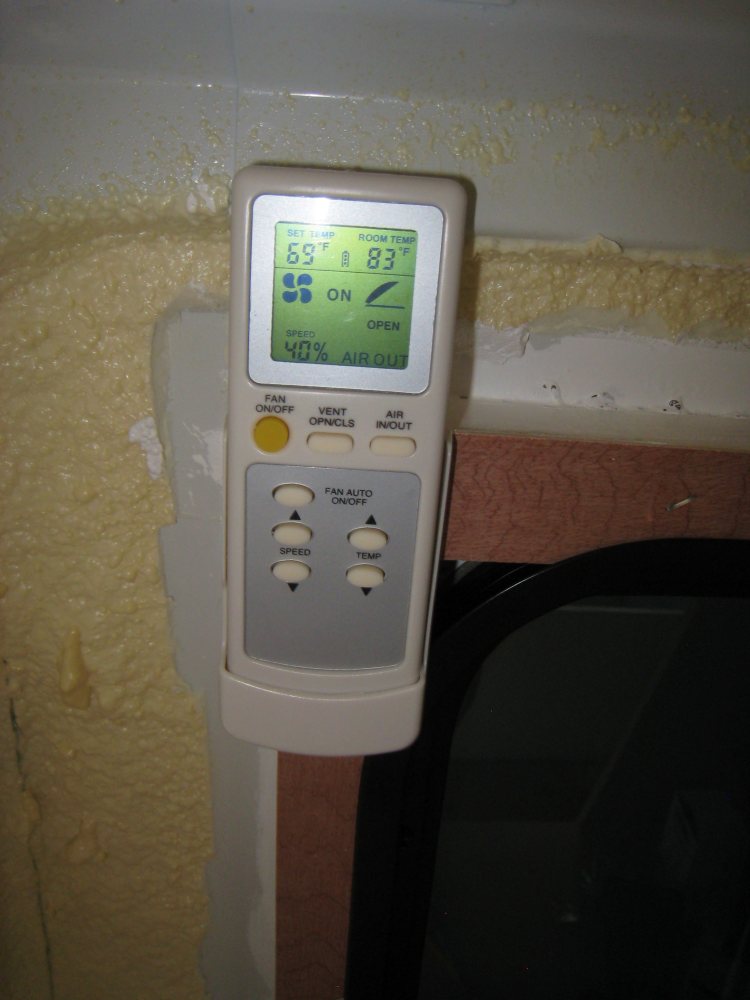
The remote allows you to turn the fan off and on, control the speed, and even automatically maintain an inside temperature.
There are models with and without remote.
Overall, the Maxx Fan appears to be well designed, and the installation is straight forward. The instructions that come with the fan are good. Will see how it does in service.
Cost and Weight
It took me about 3.5 hours to do the install.
The fan weight is 14 lbs less the 2 lbs of sheet metal that comes out.
Cost of the relatively fancy model of the Maxx Fan was $268 from AmericanRVCompany.com.
Another Ventilation Idea
John saw this page and suggested an alternative ventilation scheme. His suggestion is to use the ProMaster van’s own ventilation system and a new timer that would turn turn it on intermittently through the night — say, 5 minutes on and 15 minutes off. While this might not provide the level of ventilation that a Maxx Fan or Fantastic fan does, it does make use of hardware that you already have and reduces aero drag a little.
High Capacity Cooling
For the kind of camping we normally do, the fan alone works well for cooling. But, if you are in a hotter climate, cooling becomes more of an issue. These are a few thoughts on what you might do about a more robust cooling system.
The things that will make your camper van more comfortable in hot weather:
- Choose a reflective paint color (this makes a lot of difference)
- Insulate the van well — if you can include a reflective layer with an airspace in the insulation stackup, this helps with radiant heat transfer.
- Install something like a MaxxFan or Fantastic fan in the roof and use it in conjunction with open windows for cooling.
For dry climates, you might look at evaporative cooling — here is one DIY evaporative cooler that works, and can be run on a not too large house battery.
RV style air conditioners are also possible and work. The disadvantage being that the power consumption is so high that you are pretty much limited to being tied to shore power or a generator.
Kingtec makes a 48 volt DC model that is said to run on solar. This would likely take a 48 volt house battery back, and its running power appears to be (48 volts)(18amps) = 864 watts, so it would take a big solar installation to keep it satisfied even if its only running part of the time. Cooling output is 16,000 BTU/hr — probably more than is needed for a well insulated van.
Danhard makes some AC units for vehicles that fit inside the van.
One person on the ProMaster Forum is trying an inside room AC unit set up between the driver and passenger seats — this is the type with the hose that runs from the AC to a window.
Simple Cooling Methods Test
I did a simple test on the van to evaluate the effectivness of some simple cooling methods:
- White vs dark colors
- Simple ventilation (Maxfan and open window)
- Reflective window shades
Turns out these can be quite effective for moderate outside temps — getting the temperature inside the van almost down to outside ambient.
Gary
September 18, 2014, June 24, 2015, July 1, 2016
I do not understand the thinking of a forward fan. Aft makes more sense as it would draw fresh air, either from windows or stock air intake, to the rear of the vehicle, therefore cooling more space and removing humidity. This is critical for a rear sleeping area especially if it’s a loft as it’s hotter higher toward the roof. I would prefer the forward roof area be cut for a sun/moon roof or hatch in front of the rack and solar panels.
Hi Paul,
Lots of pros and cons to front vs rear roof fan.
We have the forward fan and sleep in the rear and have windows at over the beds.
The fan does a good job of pulling air into the over bunk windows – you can get just about any airflow you want by just changing the fan speed.
We have the galley toward the front, and a forward mounted fan does a really good job of exhausting cooking fumes.
If we moved the fan to the back, then the solar panel would have to move forward, and I think it would impact MPG more than the other way around.
https://www.buildagreenrv.com/mpg-penalty-for-roof-racks-on-camper-vans/
I would read up on skylights – people seem to have mixed results regarding leaks.
Gary
test
Hi Gary!
First off, thank you SO so much for taking the time to put this site together and maintain it so well. It is an AMAZING resource to have for a van build. You have been immensely helpful.
I am getting ready to install my MaxxAir fan and it will be my first time cutting into the exterior of my beloved van. I would just like to make sure that I cause as little harm as possible with my tools selections.
What type of blade did you use for this project-if you remember?
I am seeing that 21-24 teeth per inch is recommended, but will feel more comfortable if I can get confirmation/advice from someone that’s done the same project. Hoping to decrease the chance of error as much admin possible!!
I can’t thank you enough for this site and all of your carefully thought out information and advice!!
Regards,
Emily
Love the site! regarding the color choice, I was thinking of getting promaster in the light silver color. Do you think that would be similar to white in terms of reflecting summer heat, or do you think white would be much more efficient?
thanks!
Hi Clayton,
I’d think that silver would be good in the summer.
These guys seem to agree: https://phys.org/news/2011-10-silver-white-cars-cooler.html
There are some silver van owners on the ProMaster forum that could probably pass on some direct experience. You could post a question there.
Gary
thanks gary! I suppose I should have just done the extra research myself. I’ll stop being lazy now. Thanks for your help!! I think I’ll be referencing your site a bit as I build out our van.
No problem at all — I remembered seeing that article earlier.
Gary
Hi Emily,
Thanks!
I’m pretty sure I used a Bosch T118A — specs here: https://www.boschtools.com/us/en/boschtools-ocs/t-shank-jig-saw-blades-for-metal-t118a-29702-p/
It says its a “17-24 Progressive Teeth Per Inch” whatever that means.
If your sabre saw has and adjustable advance lever, I’d try it on a low setting — maybe the first notch.
It cuts pretty easy — will probably be a lot easier than you think.
One thing to be careful of is that you can dent the top by walking/kneeling on it.
Thanks for the site. I have referenced it in each of my research phases on my own Promaster conversion.
I thought it would be helpful to add a solution if van/skylight placement requires placing over the roof ribs.
Hein, who is very active in the PM forums, sells this excellent template which accommodates the ribs perfectly:
http://www.ebay.com/itm/141927089804?_trksid=p2060353.m2749.l2649&var=441061195543&ssPageName=STRK%3AMEBIDX%3AIT
I used 2 myself. I for Maxxfan, the other for a near-matching Fantastic skylight.
Thanks again.
Thanks Craig.
Gary
Hey Gary,
What are your thoughts about attaching the fan without the use of screws? Saw some people that attached it with only Sikaflex construction adhesive, and sealed it with the construction sealant. Any experience with Sikaflex? Thoughts on its strength? I figured less chance for leak with no holes.
Also I’m torn between mounting towards the front to avoid the ribs as you did, or setting it back further. I have a fantastic fan, so I’d be concerned with the wind load on a less aerodynamic fan for the front mount, especially if I was only using adhesive. Plus it may look awfully ugly there.
Once again thanks for all of the tips!
Hi Mike,
The Sikaflex is very good. I read about one person in AU that attached a large solar panel to his van using brakets glued to the van with just Sikaflex and drove it around AU for an extended period with no problems. So, I’d guess it would be OK with just the Sikaflex. But, also not a bad idea to follow the instructions and use the screws.
Not sure about the construction sealer for sealing — the Dicor sealant has a very good reputation — I used it and it seems to be working well.
One thing that we have found on the MaxxFan mounted toward the front is that it is a modest source of noise when we are driving, even if its fully closed and tight against the seal. The other consideration if you are going to mount PV panels on the roof is to leave room for them. This is one of the main reasons we put the fan up front. For us, the up front location is also in a good place for venting cooking odors. So, good/bad things about both locations 🙂
Gary
Hi Gary! Awesome sight, it has been invaluable!
From the pictures it looks like you screwed your fan frame to sheet metal only. I wanted to make sure it was acceptable and no support or structure needed to be under the sheet metal.
Thank you!
Hi Colin,
I think that structurally, its fine to attach the fan only to the sheet metal — its feels very rigid and strong by the time you get the screws, butyl and sealant in.
But, it may make more sense to use an interior frame. If you look on this page: https://www.buildagreenrv.com/our-conversion/our-conversion-paneling/ you can see that if you put the ceiling panels in the same way I did, you will need an interior wood frame around the fan opening to screw the ceiling panels too. I forgot about this when I was mounting the fan (before the ceiling went in), and I had to contend with the mounting screws for the fan being in the way of the interior frame. It would probably make more sense to make the interior frame that supports the ceiling panels before mounting the fan, and then just using the same screws that the fan is mounted with to go through bothe the van sheet metal and into the ceiling support frame. It would be stronger and easier.
Thanks for bringing this up — I’ll add a note in the page text for people to look at this comment.
Gary
Hi Gary-
Planning on installing a Maxx Fan in my Nissan NV1500. A couple of questions: Do you recommend the thermostat? I would like to put the fan in the rear. Unfortunately the roof on the NV is ribbed. Anything special that I need to do to seal it properly? Amazon says that the fan is often sold with Dicor Lap Sealant and Camco 25003 Universal Vent Installation Kit with Putty Tape. Do you recommend these? Thanks for the great site.
Hi Jon,
I have seen others with ribbed roofs use plastic spacers in the valleys between the ribs — not sure if this is really necessary as the butyl tape seals well. Depending on the depth of the ribs, you might be able to double up on bye butyl tape in the rib valleys.
The butyl tape and Dicor do appear to work well and I have had no leaks on mine.
Mine has the thermostat, but we rarely use it. We do use the fan quite a bit and I think its an essential for van conversions. The control allows you to run the fan at percentages of its max rpm (eg 10%, 20%, …) and that is what we typically use — the warmer it is, the higher the percentage we run it at.
When we bought the model with the remote I was thinking boy, are we getting lazy, but have to admit its handy to have.
Some nights when its cold, we just manually open the cover on the fan a bit for night ventilation with running the fan itself.
I looked at the Camco kit, and it looks like the screws are not stainless steel — I would use stainless steel screws. I’d buy the butyl tape and screws separately.
The Dicor is good stuff, and its good to have a tube around for various sealing jobs.
Gary
Gary…what did you use for the screws on the fan? I’ve seen some use light weight wood to drill the screws into and then cover with insulation.
Great, great site!
Hi David,
They are stainless steel sheet metal screws.
I can’t remember if they came with the fan or not, but you can get them at Lowes.
Gary