Here are some recommendations for wiring techniques and types of wire that you should consider for use on your build. Many of these recommendations are based on the ABYC (American Boat and Yacht Club) electrical code that is widely used in boat construction. It seems like a good fit to camper vans.
Type of wire to use
Low Amperage 12 Volt DC Circuits:
This is wire used for 12 volt circuits like lights, water pump, roof fan, ..
The ABYC recommends using stranded copper wire that has been tinned.
For the low amperage 12 volt circuits (eg lights, fridge…) I think this is a good choice.
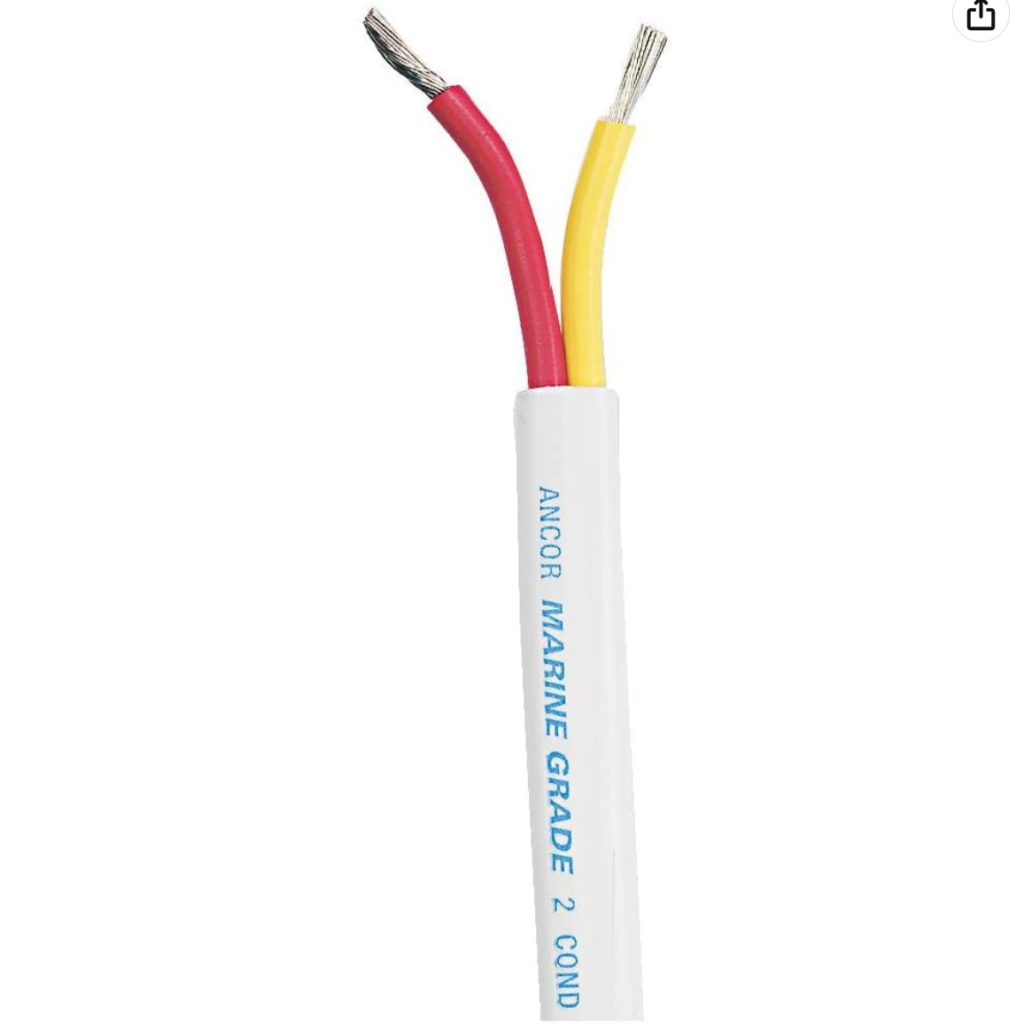
This wire by Ancor is fine stranded copper that is tinned. The insulation is rated for 105C. It meets a whole slew of specifications (see the Ancor website).
I like the jacket over the two insulated copper wires – it makes it easier to run (one wire instead of 2), the jacket makes it a bit stiffer and provides some extra abrasion resistance. You can label the wire writing on the jacket with a pen.
People use other kinds of wire – like speaker wire, cut up extension cords, Romex house wiring (I used to use Romex). But, when there are so few dollars to save, what is the point of not using wire that is known to work really well in this environment? I would at least avoid using wire that does not meet some kind of spec.
You will have many of these low amp 12 volt circuits. Some will be very low amperage and some maybe as much as 20 amps. You could go through and pick the exact wire gauge for each circuit, but if you go that way you will be making some work and will end up having to order different several wire gauges. Instead of this, I recommend standardizing on AWG 14. This will be overkill for some runs, but it makes life a lot easier for not much more money. It also means that if you later want to add another load on a circuit, the #14 wire will likely be good. It also allows you to standardize on the same size fuse, since the fuse size is determined by the wire gauge.
There may be a small number of your circuits that either draw a lot of power, or have a long wire run. These circuits should be checked using the BlueSea Circuit Wizard to see if they are OK for #14 wire, or need a higher gauge – but, odds are pretty good that the #14 will be OK.
You should use Red wire for the positive wire. You can use either Yellow or Black wire for the negative. The ABYC favors yellow for negative in that there is no confusion with AC wiring color codes. Color code info…
High Amperage 12 Volt DC Cables:
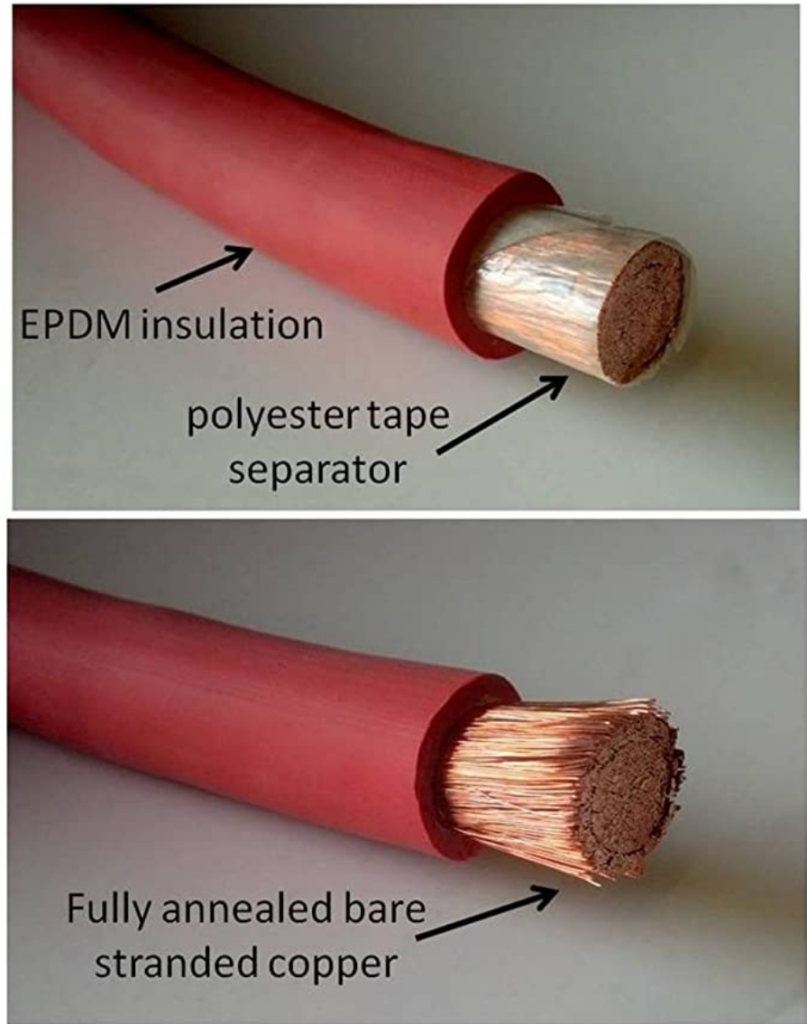
These are the thick as your thumb cables between the battery and Hub and inverter. On our base system they are mostly AWG 2. The ABYC again calls for stranded and tinned copper wire with insulation that meets their stiff requirements.
I do think that for most people who are not going to be wiring several systems, it will probably work out better to have the cables custom made for you. This way you won’t have to buy some expensive tools that you may only use once.
You may be able to find a local shop to make the cables – some of the shops that do high end big watt audio systems for cars will make them. Another potential source is marine shops.
Battery Cables USA has a good reputation on the van forums for good quality and reasonable prices.
These are the cables I used
This is a kit that includes some heat shrink tubing and some 5/16ths and 3/8ths lugs, but not enough lugs to do the whole job.
I am sure the Ancor heavy gauge marine wire would also work well.
Tools for making wires/cable
For wire gauges up to AWG 10:
Since you will have quite a few low amperage 12 Volt DC circuits and the tools to make these wire/terminal assemblies are not to expensive, most people will probably go ahead and buy these tools. After trying several brands, these are the ones I’m using and like:
Wire Strippers and cutters:

Klein Tools 11063W Wire Cutter / Wire Stripper
This one actually works – most of them don’t
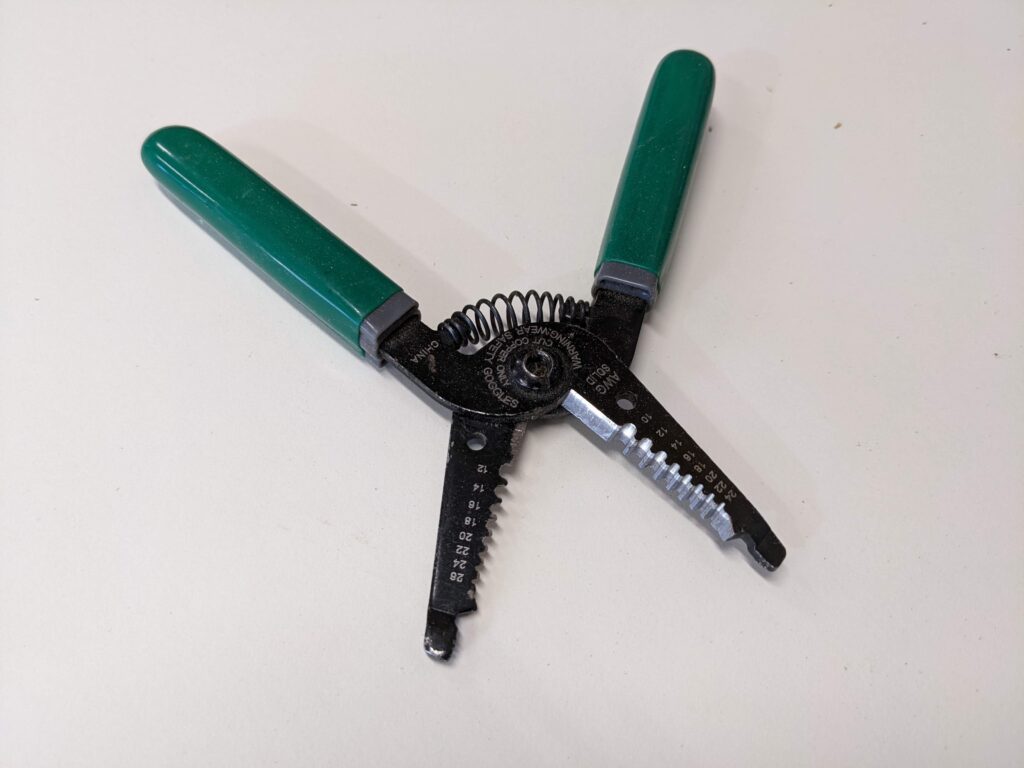
This is another type of wire insulation stripper that works well, and also has cutters. I prefer the ones above, but these work fine too.
Crimpers:
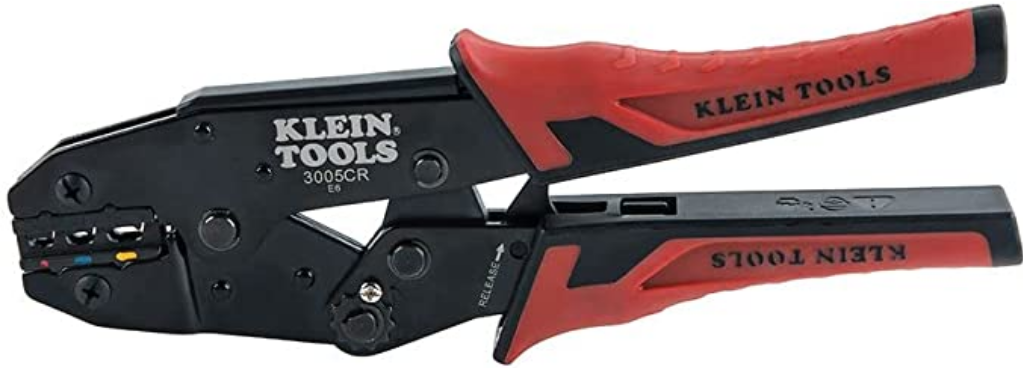
Klein Tools 3005CR Wire Crimper Tool, Ratcheting Insulated Terminal Crimper for 10 to 22 AWG Wire
These do consistently good crimps.
Crimp terminals:
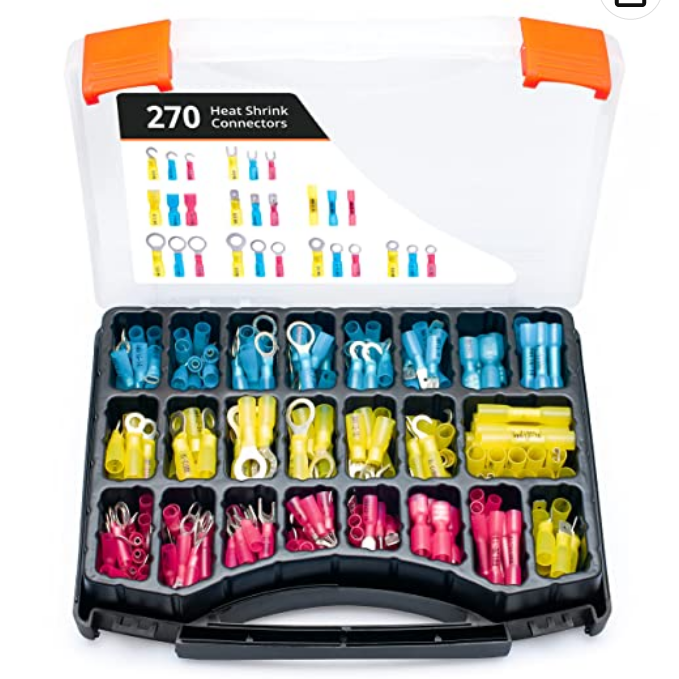
These are good quality crimp terminals that work well with the crimper above. They have heat shrink insulation that helps seal out moisture.
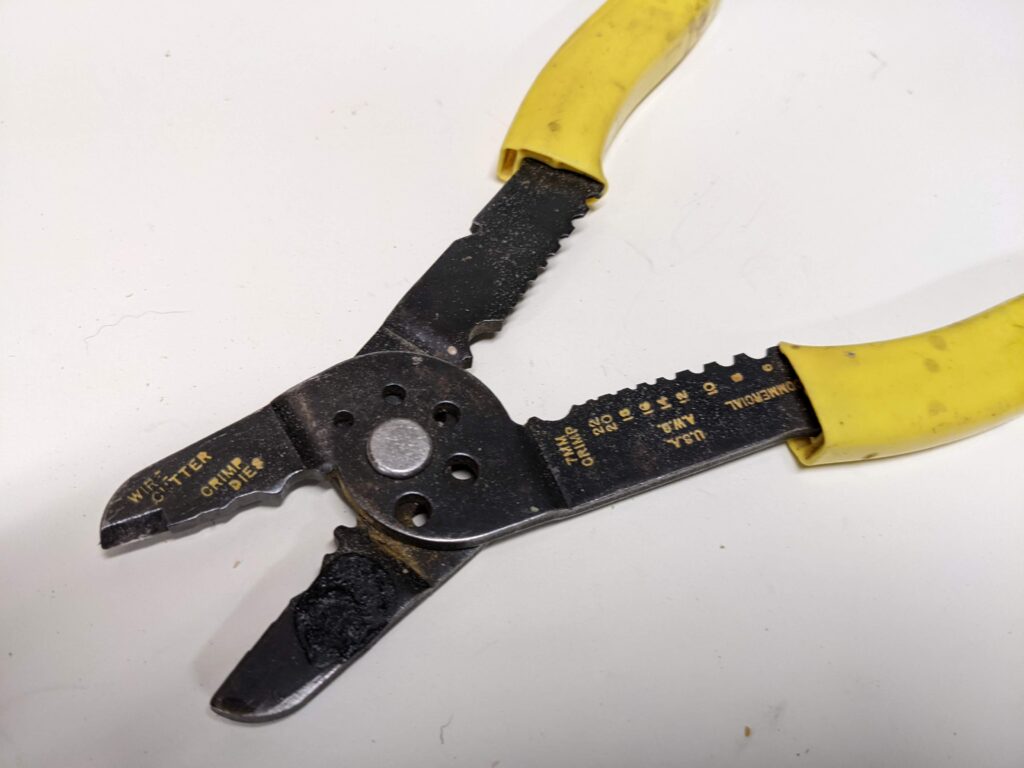
I do NOT recommend this type of crimper. Its just to hard to get consistent crimps with the type of crimper.
For wire gauges over AWG 10:
Most people who are only building one van will choose to pass on buying these tools and have the cables made, but in case you want to give it a go, here are the tools I’ve settled on.
Wire cutters
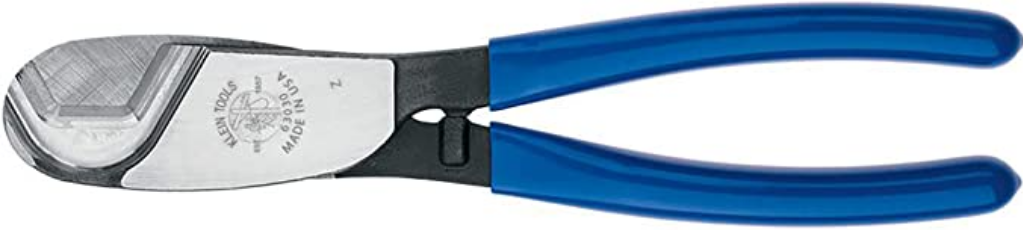
Klein Tools 63030 Cable Cutter, Coaxial Cable Cutter
These are amazingly good cutters for large gauge cables. Very clean cuts. They also work well for stripping large wires – with a careful touch.
Crimpers:
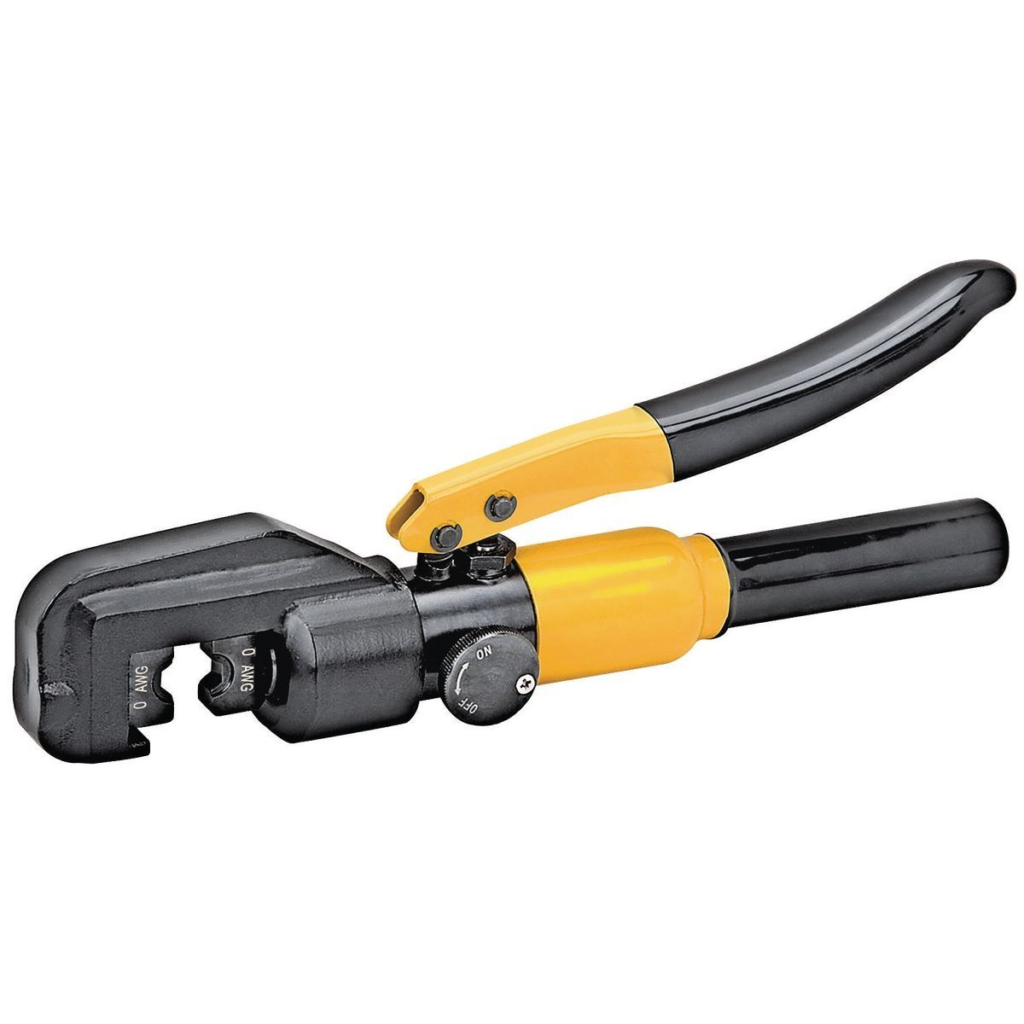
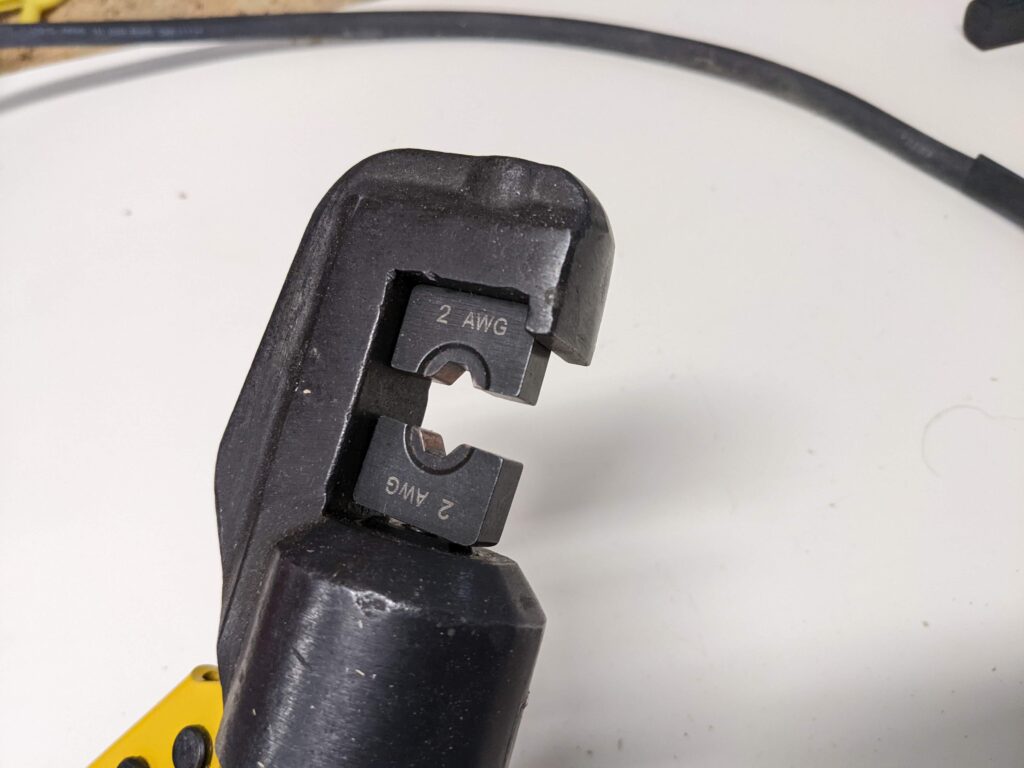
Harbor Freight hydraulic crimping tool.
The tool includes dies for gauges #14 to #0 – if you need to crimp larger than #0 wires, these won’t work.
I tried these after trying hammer crimpers, and I think they make better, more consistent crimps.
I’m sure these are not as good as some of the pro electrician $500 crimpers, but they do a good job and only cost $70.
Wiring techniques
This section covers the basic techniques for wiring the system.
Crimping terminals on wires up to AWG 10:
Cut the wire to the required length for the run.
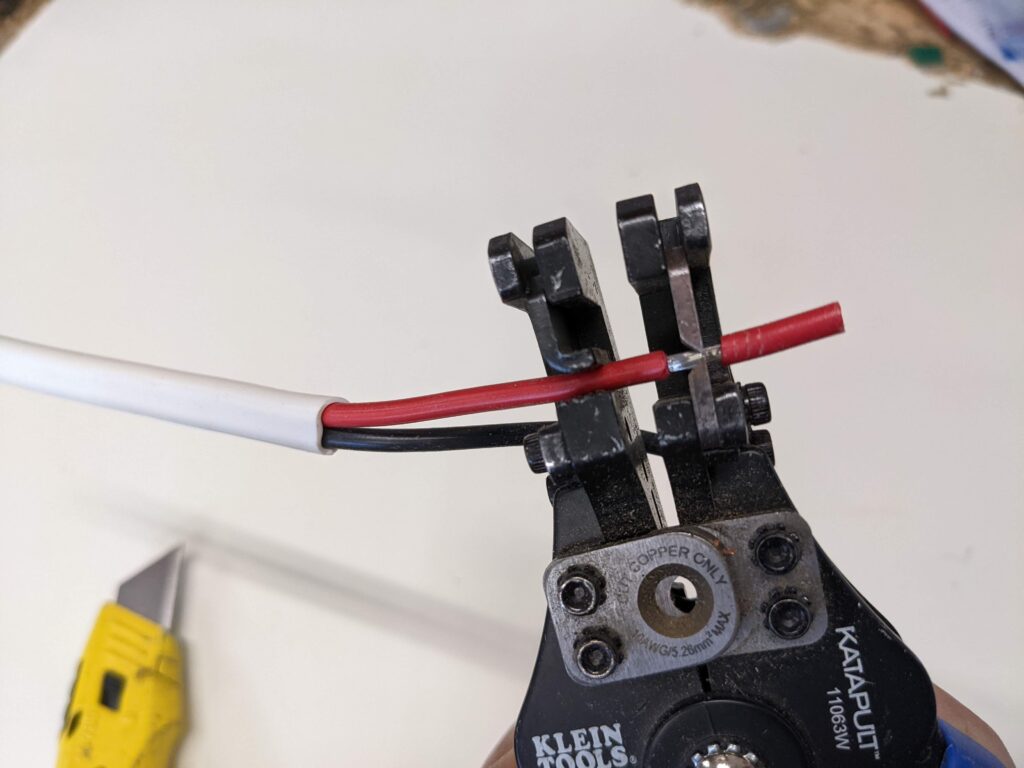
Using the wire strippers, strip 3/8 to 1/2 inch of insulation off the wire.
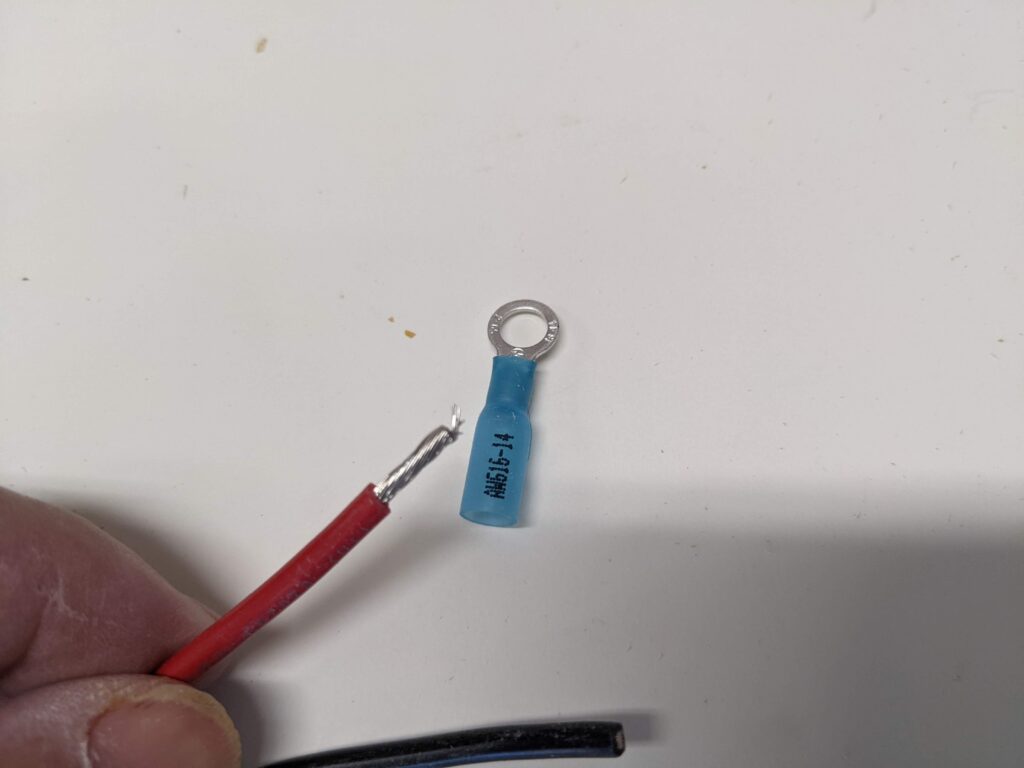
Strip about 3/8 inch off the wire and insert it into the crimp connector.

Insert the wire fully into the crimp connector – you should be able to see the end of the wire poking through toward the ring end of connector. Place the crimp connector in the crimper while applying some pressure on the wire to keep it from slipping back out of the connector.
Squeeze the crimper handles all the way down until it releases – it will click a couple times as it ratchets down. This is what gives the consistency in crimps for this crimper.
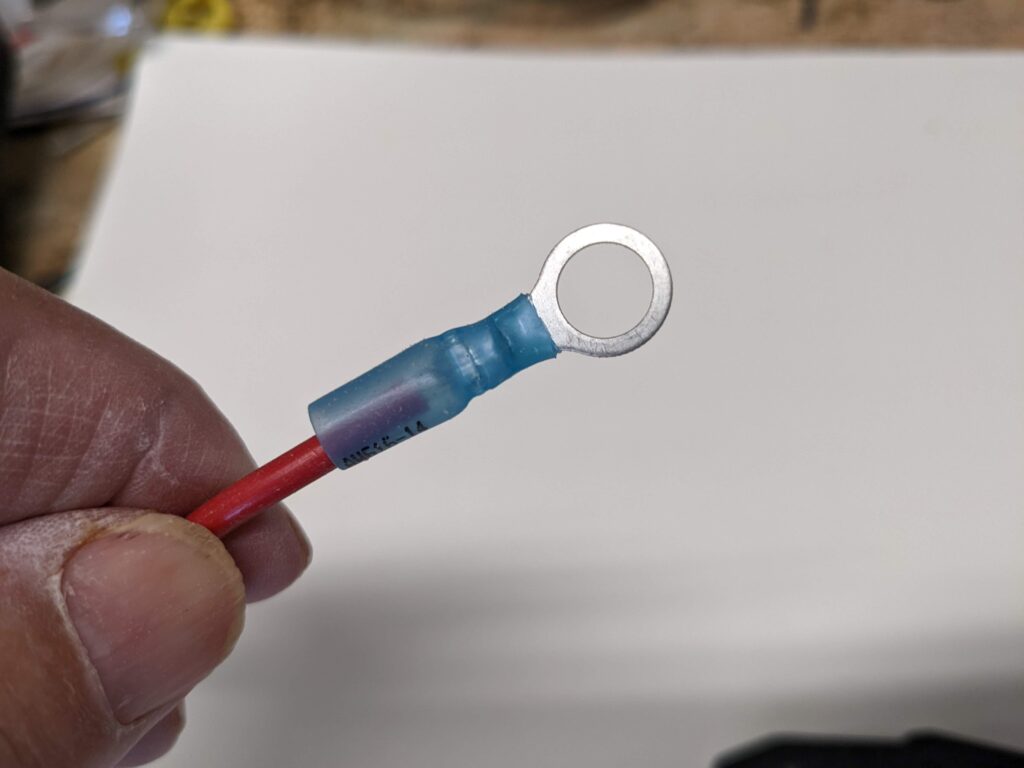
Examine the crimp critically.
Grab the ring terminal with a pair of pliers, and give the wire a solid tug to make sure it has a good connection to the wire. DO THIS ON EVERY SINGLE CRIMP CONNECTION YOU DO! Even with a good crimper and good technique, occasionally you will get a bad crimp that will just pull out.
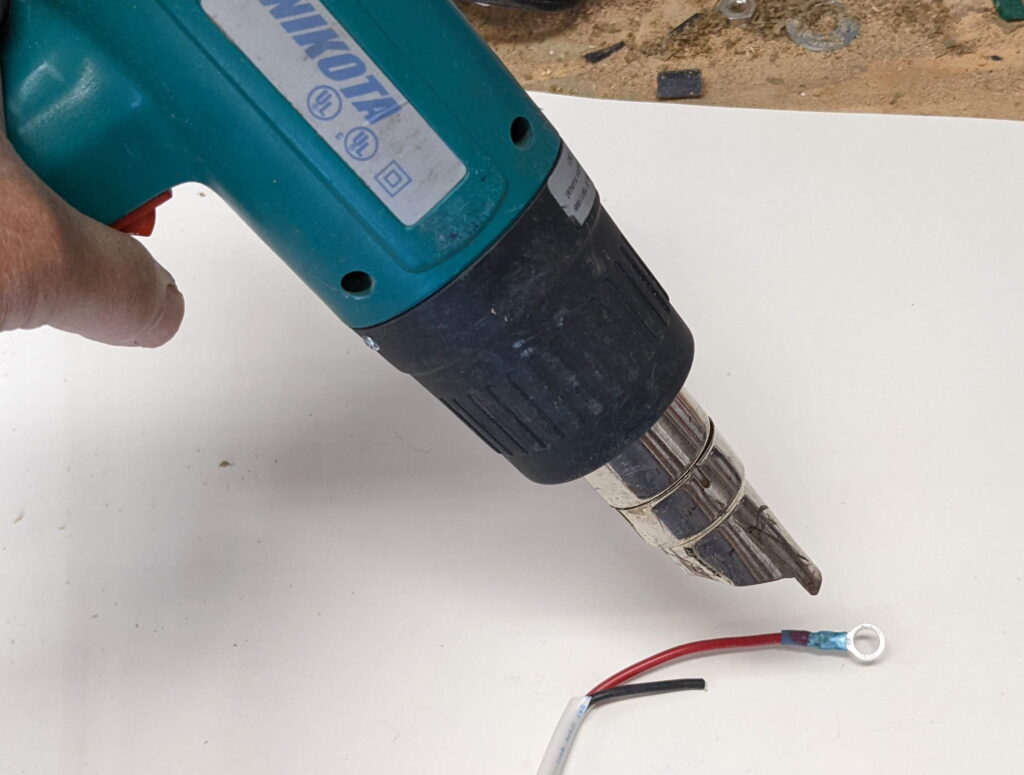
Use a heat gun to shrink/melt the plastic sleeve down. The wire insulation and plastic sleeve on the terminal should fuse right together. This provides some moisture resistance.
Wire Nuts:
Most of the connections you make will be crimped on lugs that go to screw terminals as described above, but occasionally you will meet a situation where crimps don’t work well. For example, multiple wires coming together. In these situations, I use wire nuts. There are lots of folks out there who think wire nuts are evil and should never be used, but I think they are reliable and easy to use. They can be used to join more than 2 wires together, and the wires can be solid or stranded or a mix. When using them, twist them on VERY tight (the wires coming into the nut should be starting to twist together), and after twisting, pull hard on each individual wire coming into the nut to make sure they are all secure. Some people like to tape over the wires coming into the nut and over the nut with electrical tape, and this is not a bad idea. Wire nuts are not good for wet environments, but there are special wire nuts made for wet environments that have a sealer.
If you decide you don’t want to use wire nuts and have to connect several wires together, have a look at Wago connectors.
Crimping terminals on wires over AWG 10:
You will probably want to have these made, but if you decide to make them, here are some hints.
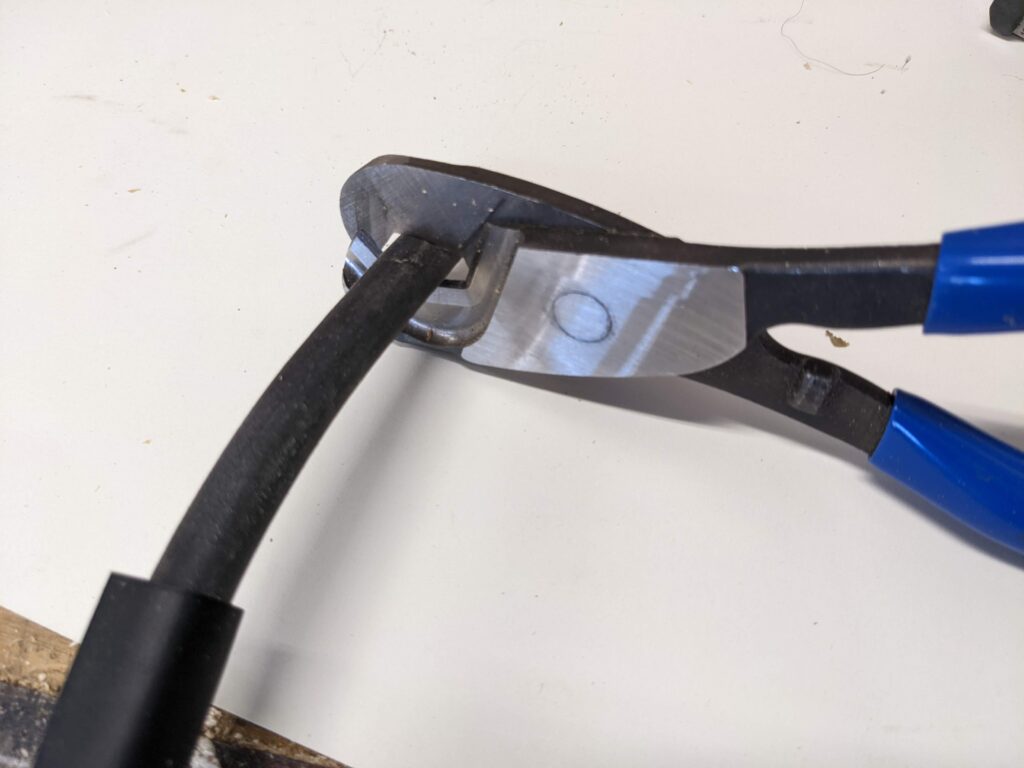
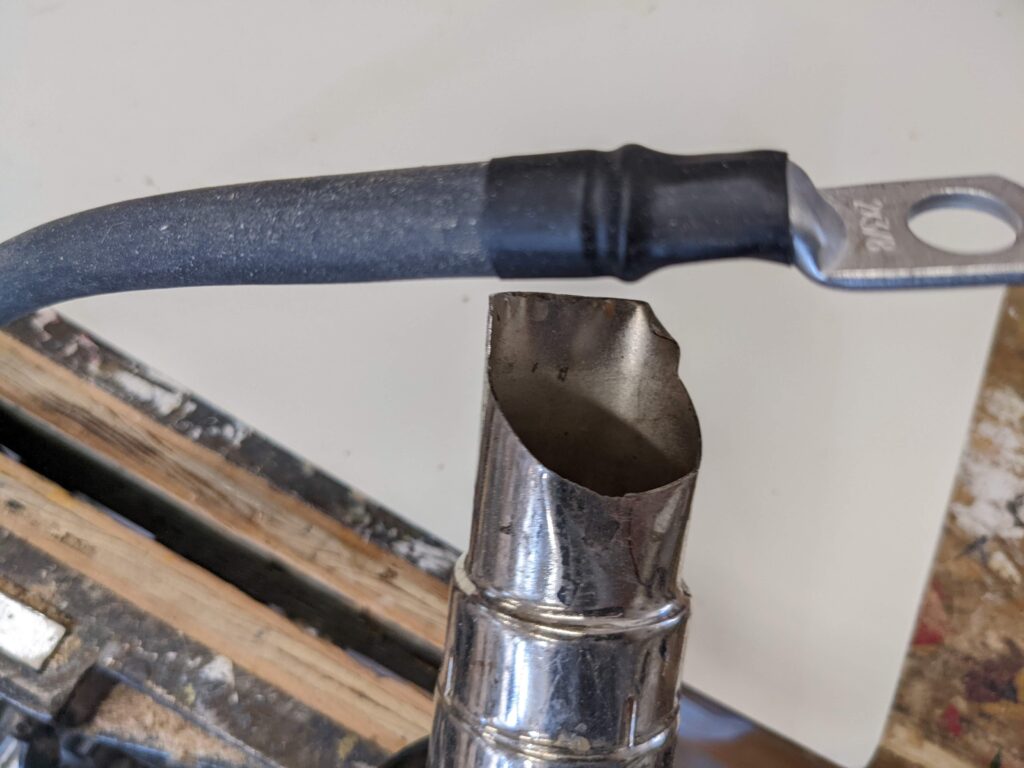
Cut the wire to length.
Using the same wire cutters, strip off about half an inch of insulation. Just rotate the wire cutters around the wire with slight pressure until you have almost cut through the insulation. Then bend the wire, which will break insulation so you can pull it off with fingers. This is surprisingly easy with good sharp wire cutters.
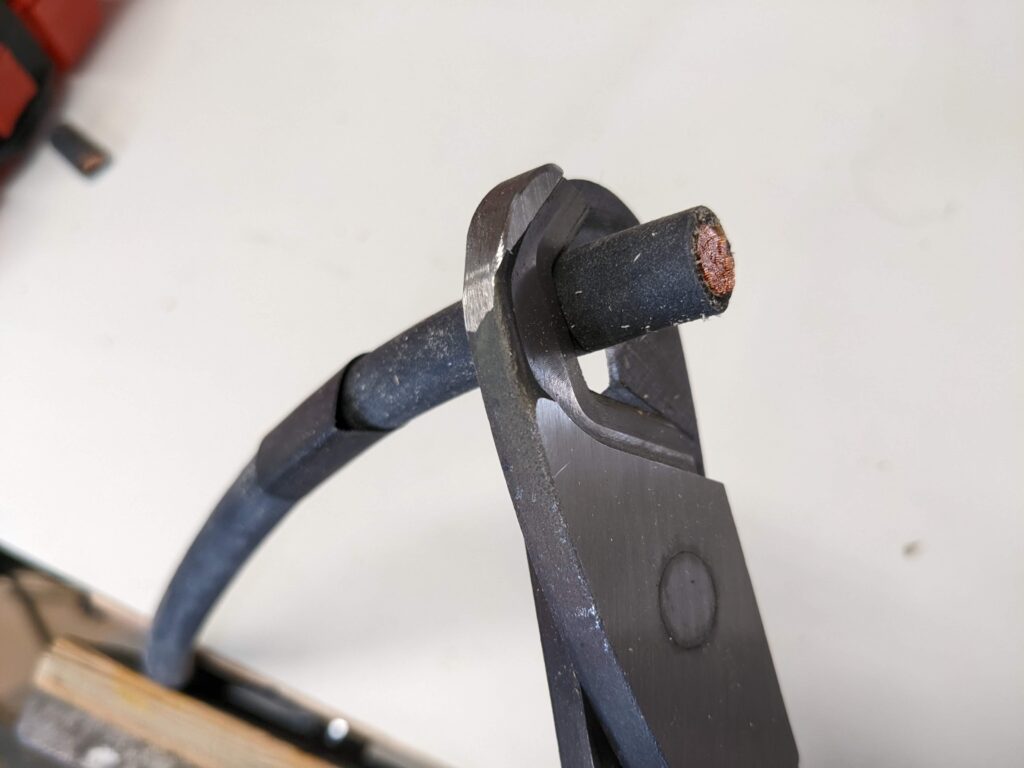
Slide a piece of heat shrink tubing over the wire at this point, and push it up the wire a ways so it will be there when you need it later.
Put the die set in the hydraulic crimper that matches the wire size you are using.
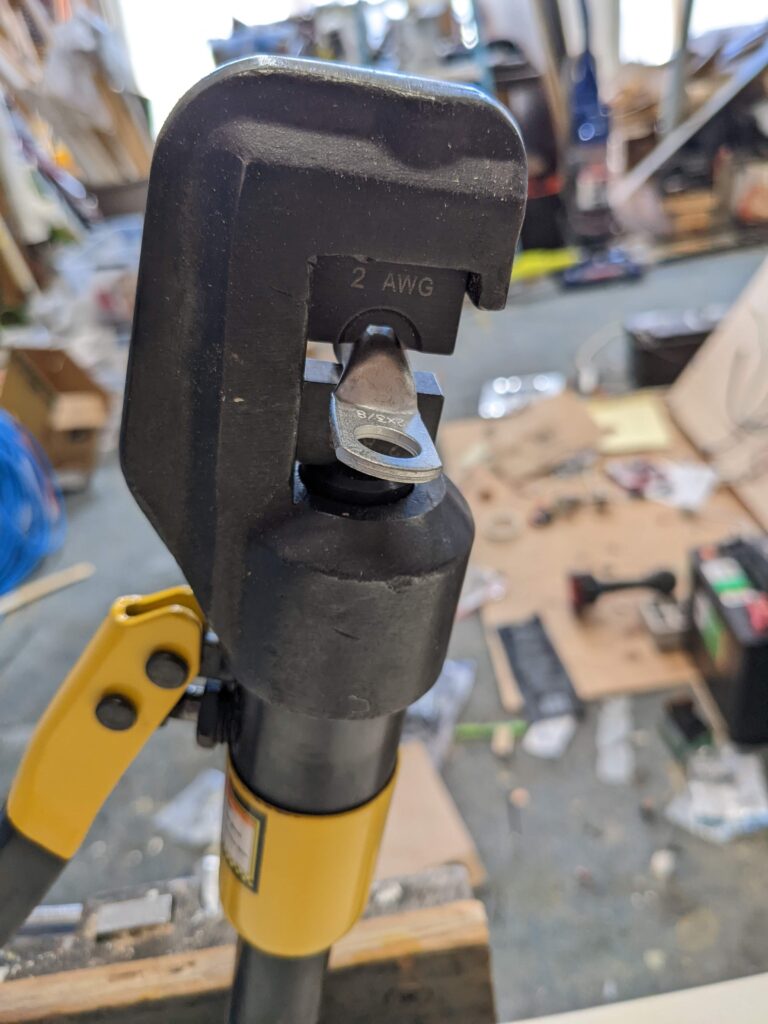
I put the crimper fixed handle into a wood jaw vice to act as a third hand, then place the lug (without wire) into the jaws and lightly clamp the lug in place. Then feed the bare wire end into the lug and keep a little pressure on it to keep the wire from pulling out. Then close the valve tight and pump the handle. Pump the handle hard to compress the lug.
Note the orientation of the lug as its placed in the jaws – plane of the lug parallel with the face of the jaws.
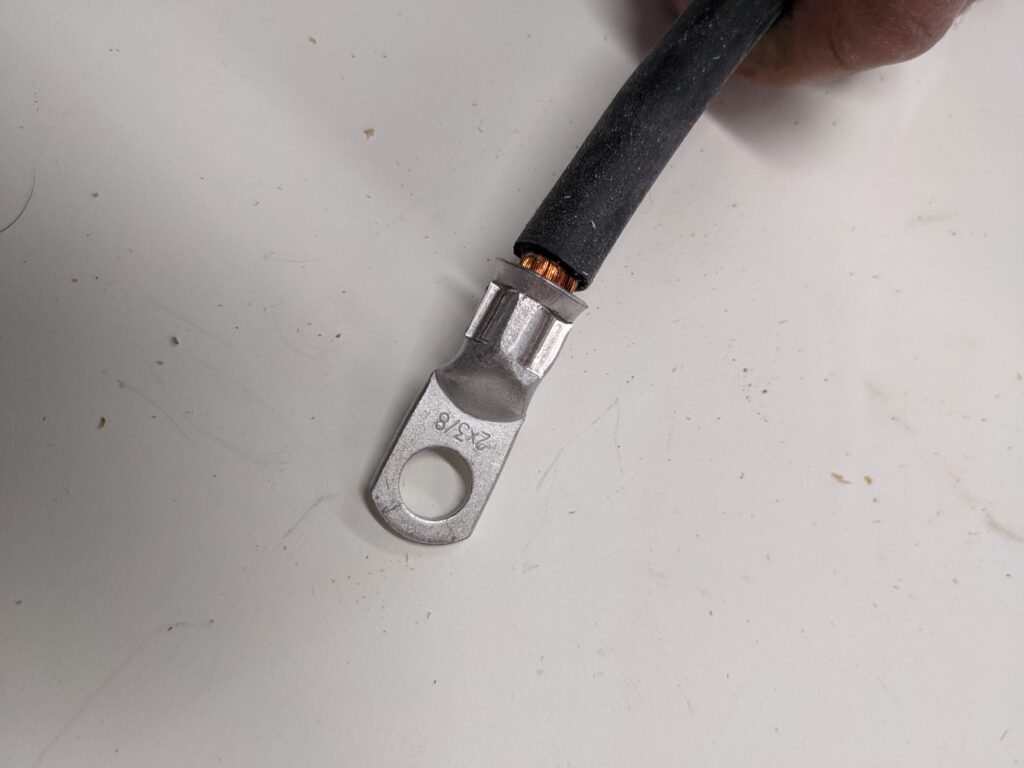
Examine the crimp carefully.
Put the lug in a vice and give the wire a really good tug to make sure the crimp is good.
Use a heat gun to shrink the heat shrink tubing into place.
Hint: When you are doing short stiff cables, put the first lug on, then orient the 2nd lug so that when you install the cable you will not have to twist the cable to get it on both lugs.
If you see any errors or misleading information on the page, or some information that should be added, please let me know in the comments
Gary 7/28/22