This page covers working out the inside layout for our RAM ProMaster camper van conversion.We have tentatively settled on the 2nd layout shown below (the Aft Bed one).
Main objectives are:
– Keep it simple
– An open feel inside
– 20 mpg
– Comfortable beds for 2
– No need for hookups
– Drives like a car
The ProMaster we have is a high roof, 1500, 136 WB. This gives us an area to work with of about 10.1 ft long by 6.5 ft wide (behind the driver/passenger seats). The inside height is about 76 inches.
This is our 4 th RV, and one thing we learned from the others is that keeping it simple and open rather than trying to cram too much into too small a space is what works for us. For us, what really counts is a comfortable bed, minimal cooking facilities, and a nice open feel. We are doing without shower and just going to use a portapotty for bathroom.
Go back to the main camper van conversion page…
Here are the two layouts that we came down to in the end after looking at quite a few. This is a highly personal decision that depends on how you use the RV and what you want to carry, so these may well not be right for you, but it covers a process for choosing a good layout.
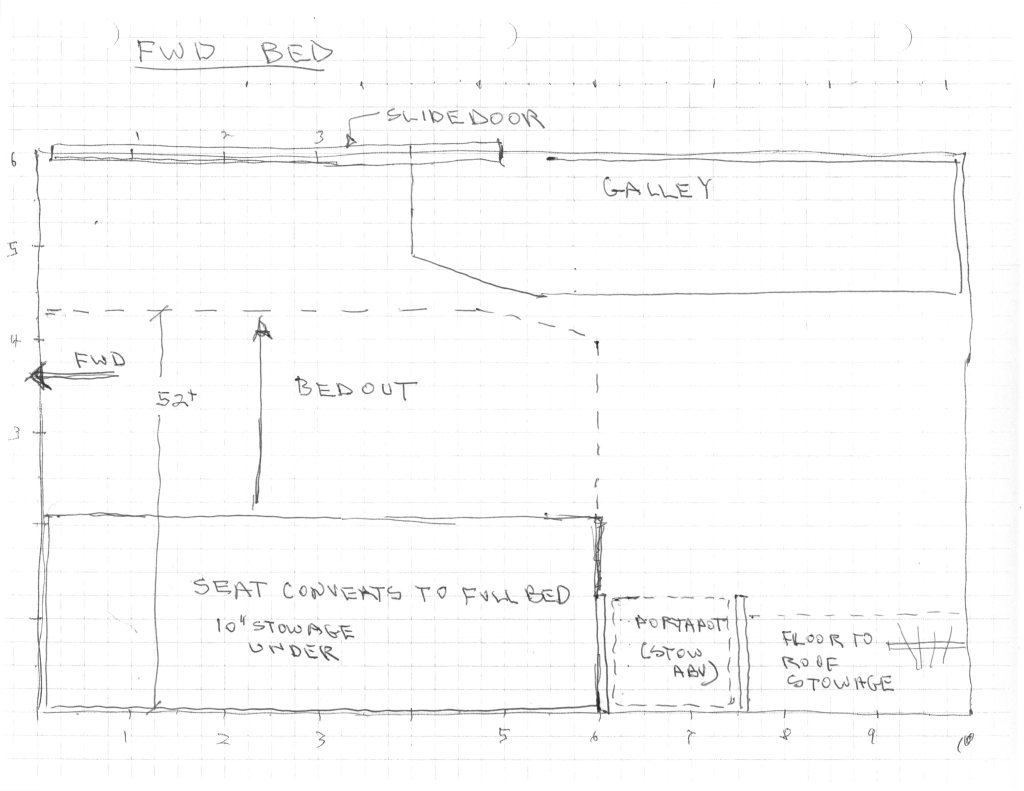
Forward Bed Layout
This idea came from the Murvi commercial RV — its the 2nd one in this video.
Really like the open feel and what seems like practical layout.
This is a rough full size model of the forward bed arrangement in our ProMaster.
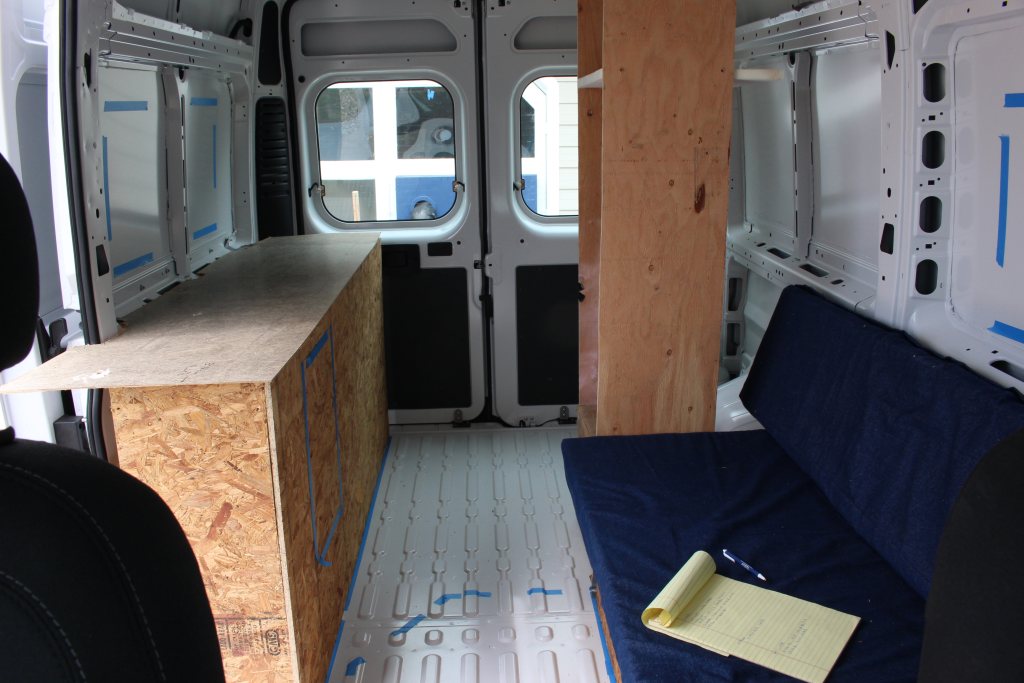
To right (with blue cushions) is the bed in the seat configuration. Tape marks on the floor show what it comes out to when in bed configuration.
The long cabinet along the left is the galley.
The vertical plywood aft of the bed is where porta pot goes, and then floor to ceiling stowage cabinet would be behind that.
There would be a small table to go in front of the seat.
It takes a while to mockup a layout full size, but there is nothing like a full size layout that you can actual “live in” to get a feel for what its really going to be like.
We like the nice open feel this one has and it seems to get the job done and has a comfortable bed.
Don’t like so much that you have to do a bit of a conversion of seat to bed and bed to seat a couple times a day.
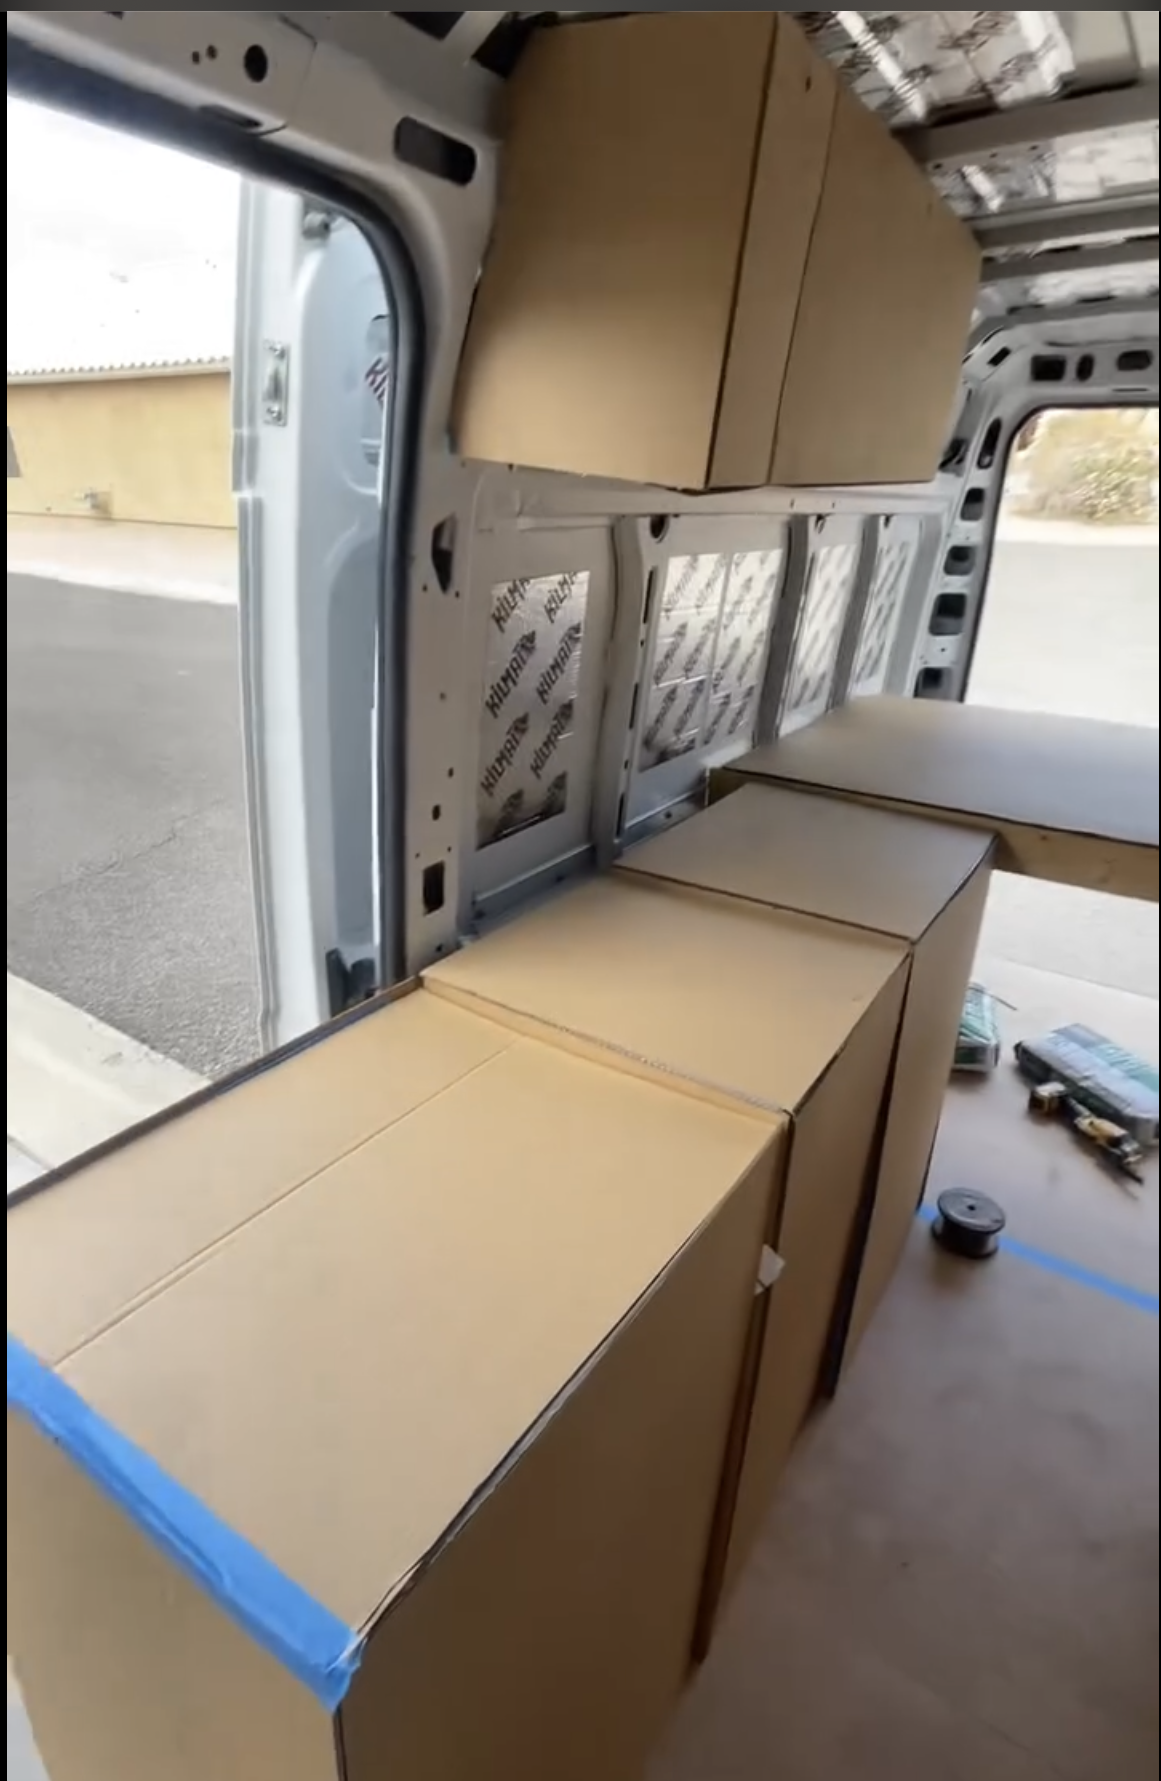
Aft Bed Layout
This one has beds in the back with galley along drivers side up front. 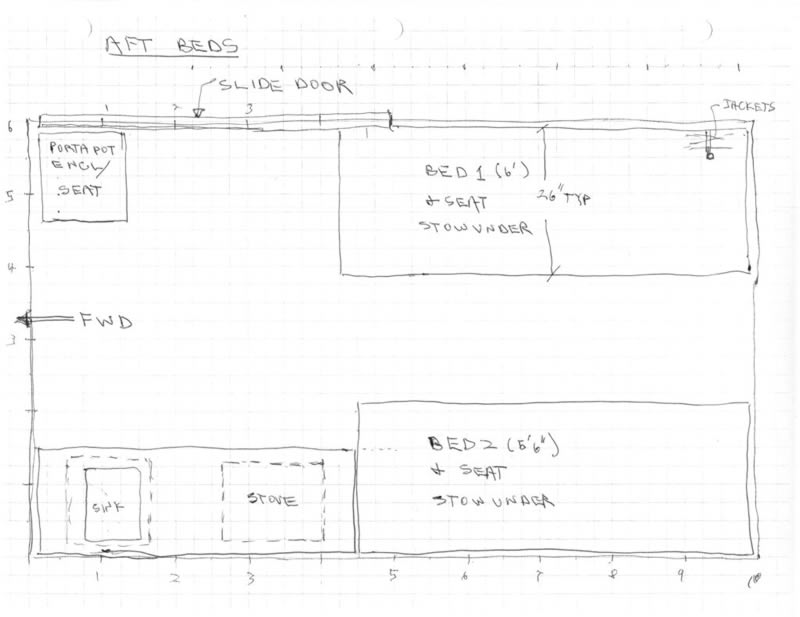
Also did a crude mockup of this one.
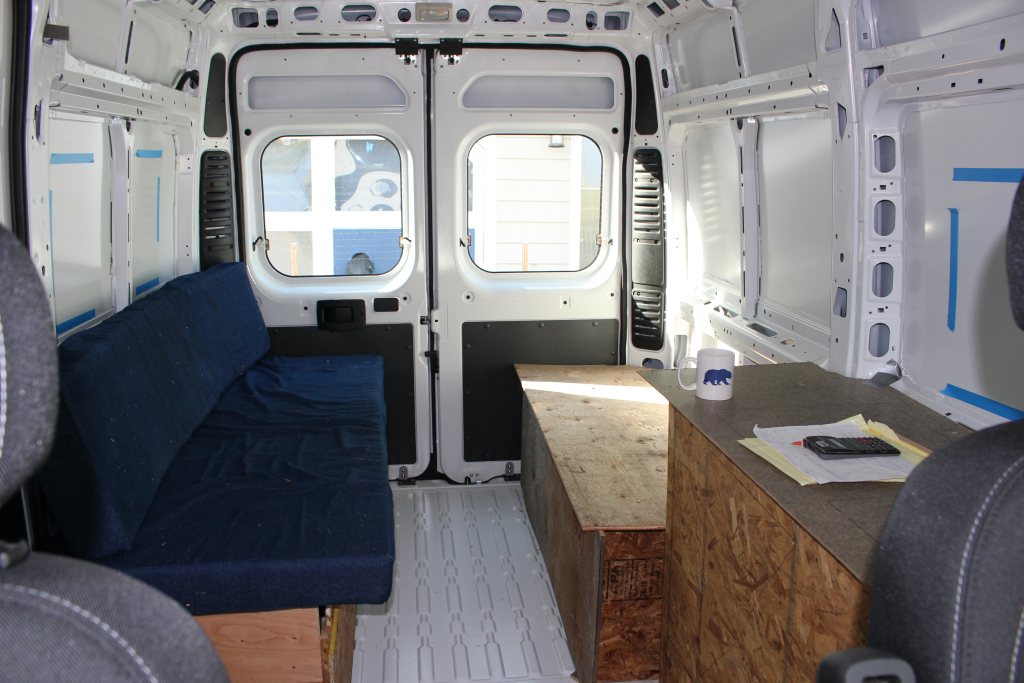
Like the open feel of this one as well.
Galley size suffers compared to the other one, but beds are probably better.
I cheated the driver side bed down to 5.5 ft to make the galley longer — just right for my spouse
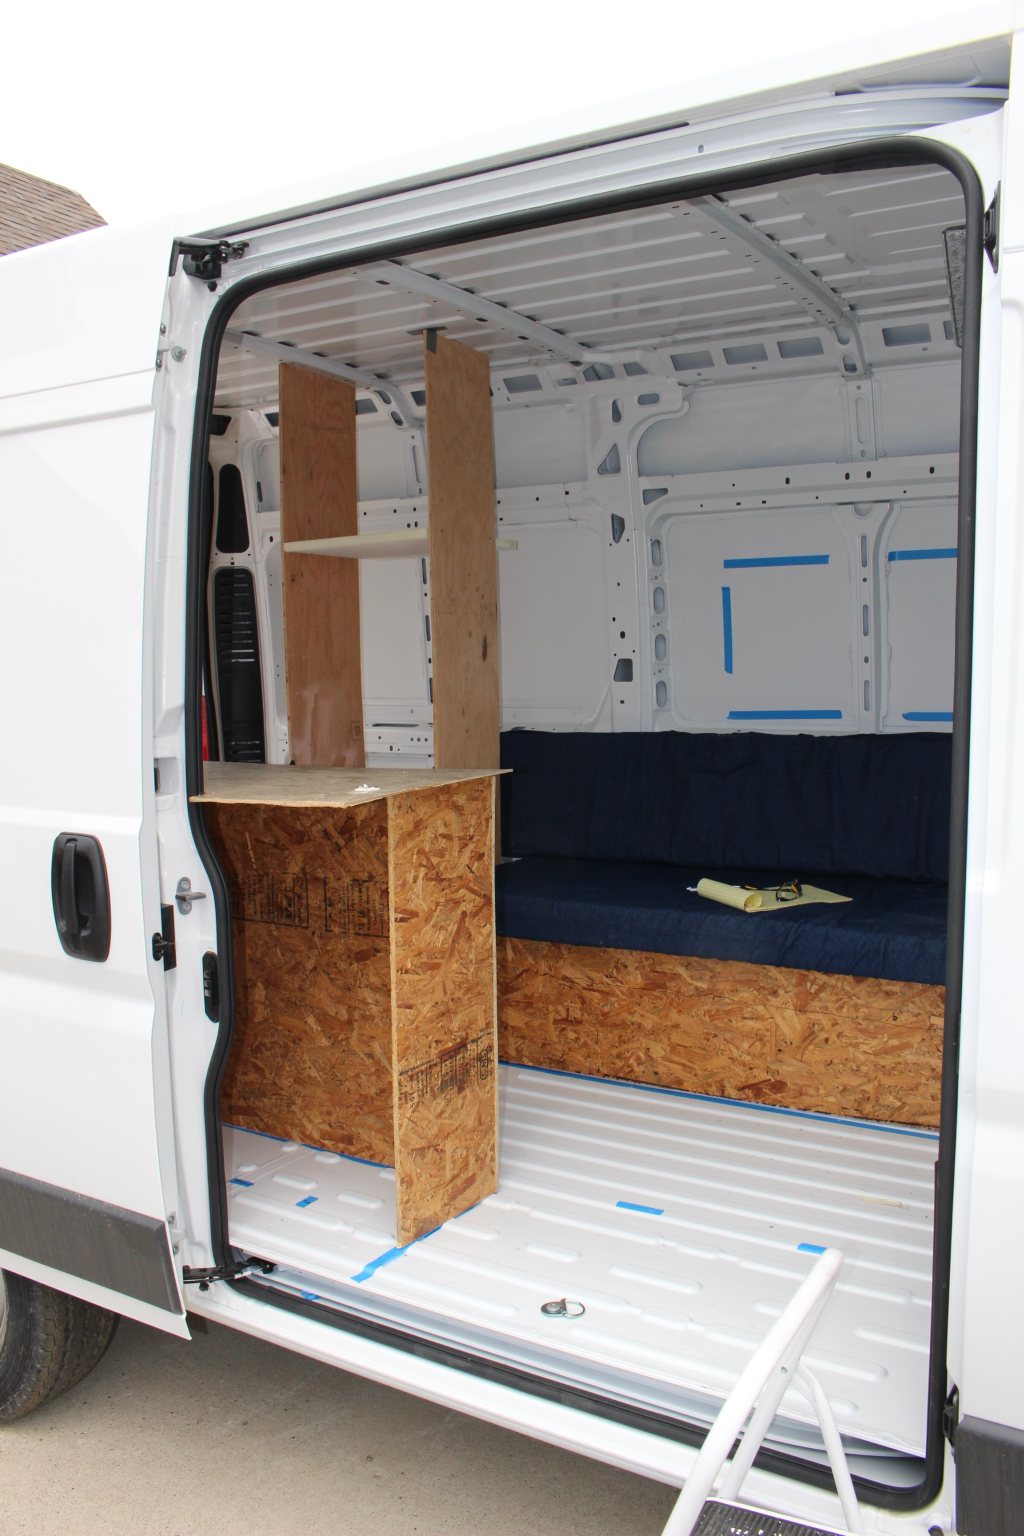
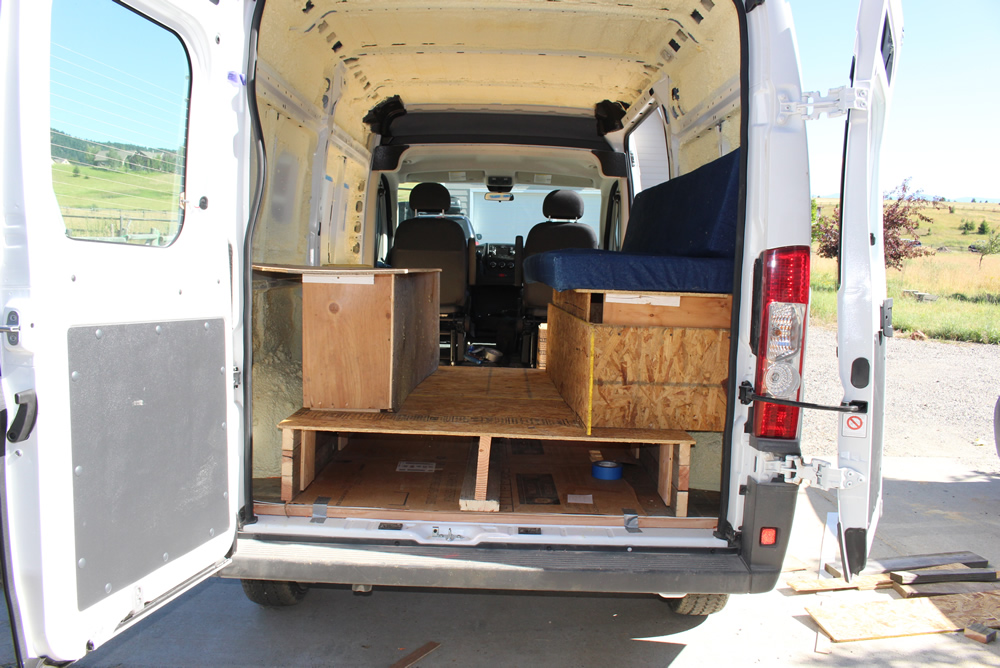
View from the back:
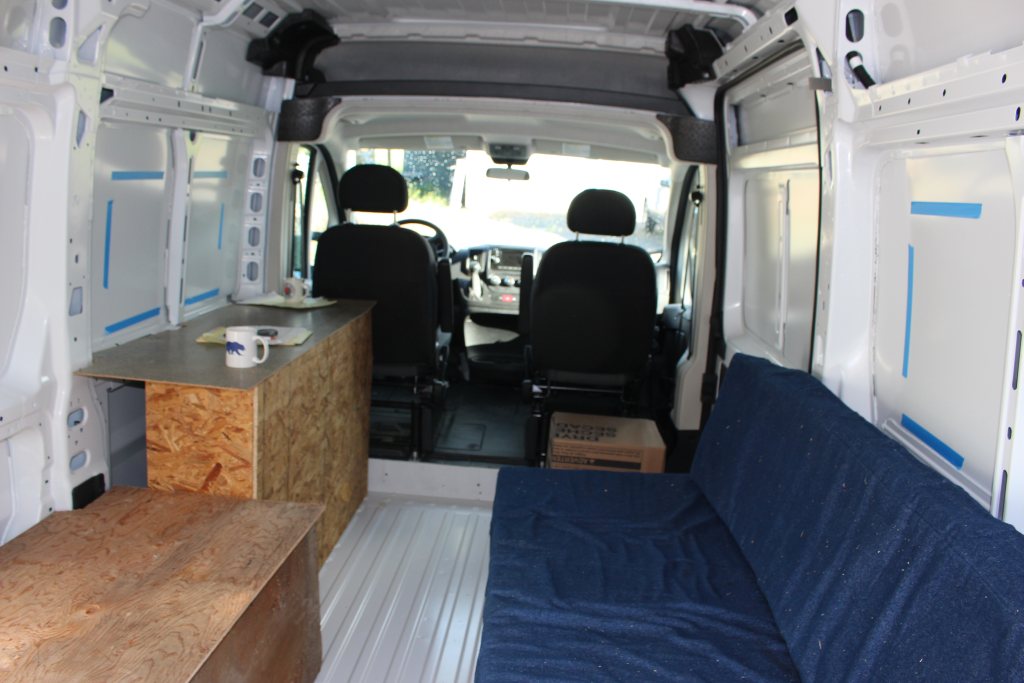
The portapotty is mocked up with cardboard just behind the passenger seat.
On both setups there would be some cabinets above the windows in the corner where wall meets roof.
There would be windows in the sidewall and sliding door for both layouts — the aft bed layout might allow aft windows on both side.
Aft Beds on Raised Platform
Saw a picture of a converted van that had the aft bed arrangment, but built on top of a raised platform that went side to side of the van under the whole bed area. So, this provides a lot of storage under the platform without compromising the usability of the bed area very much.
Decided to do a quick mockup of this arrangement — obviously very crudely done, but good enough to sit in the seats and experience the lower headroom and get a feel for what it would be like to live in.
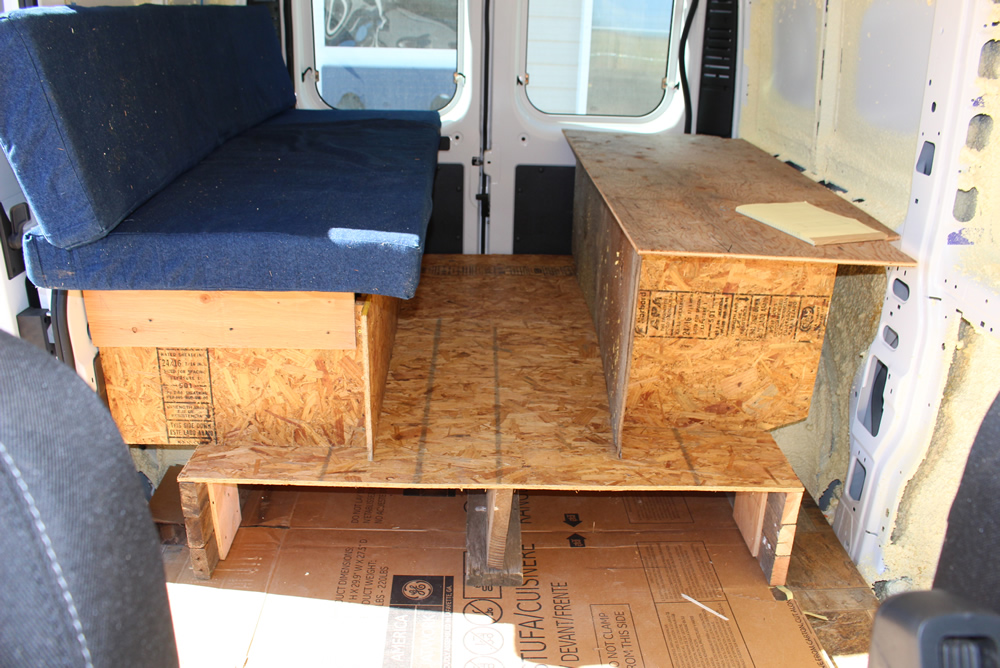
On the plus side, this setup adds a lot of storage under the platform, and does not really compromise the bed/dinette area very much.
When you are seated on one of the beds, it does seem a bit high relative to the windows, and the back cushions on the seat/bed would have to go up into the window area a bit.
You can no longer standup in the back area (over the platform), but this does not seem like a big deal in that you would normally be either sitting or laying down in this area.
This mockup is done with about 12 inches under the platform, but this could be adjusted depending on what you want to carry.
Final Decision
We ended up going with the aft beds without the raised platform — a difficult decision in that we liked all three layouts.
We will have some upper cabinets. We considered have a vertical cabinet just aft of the galley which would come down from the ceiling to about 14 inches above the bed. For now we have decided not to do this, as it takes a bit away from the feeling of openess that we are going for.
Update after a couple trips: Like the aft bed arrangement and the open feel that comes from no floor to ceiling cabinets. We plan to leave it this way. Do plan to add a small cabinet over the galley as galley storage is just barely adequate now.
Any comments or thoughts would be very welcome. Or, ideas for an altogether different layout.
Crosswise Beds
Another popular layout uses beds across the width of the van in the back. But, one thing to be careful about on this one is the that your van provides enough width for your height. The ProMaster is the widest of the current vans, and fine for people up to about 5 ft 10 inches, but gets to be a compromise if you go much above this. It is possible to use part of the wall depth to gain a bit more width. Another reason to use a real mockup.
Mockups
As you can probably tell from whats above, I like mockups. I think more than anything else you can do a rough mockup tells you what living with your layout is actually going to be like.
I usually use scrap lumber and scrap plywood, but you can buy sheets of cardboard that can be used to make good mockups – here is one from the ProMaster Forum..
Build a full sized mock-up..what a great idea! Thank you.
I’m thinking of building a mock-up of the whole interior in the living room of my apartment before buying a van…trying to decide whether a Transit Connect (great fuel economy) has enough room for me to be comfortable.
Hi Brad,
I think the mockup for the Transit Connect would be a great idea — its going to be challenging to see if you can come up with an interior that can meet your needs within the Connects space. The mockup will definitely tell you if it will work for you.
Would love to get some pictures of you mockup if you go ahead with it.
Gary
Your van conversion is amazing! Can you stand up in the living area? And, is it crazy to consider doing a vintage interior from old vw bus or vintage camper?
Hi Susan,
Yes — I can stand up anywhere with several inches to spare — I’m 5 ft 11 inches.
I think that the old VW bus based camper theme would be a great idea.
One site that has a lot of conversions with character is: http://www.doityourselfrv.com/
Gary
Hi,
Firstly big thanks for putting the site together. Have just started to look through all the info, I am in the early research phase myself but am leaning towards the Promaster due to the width of the van along with the high roof.
I was wondering, did you happen look at a bed width wise? Myself and my wife are both around 5.6 and Im wondering if I could add a bed across and also have it as a lift bed. With seats underneath or storage. I see you noted as the width as over 6 ft. Taking into account the insulation, ply and bed pilars. I wonder if it would work.
Many thanks for any advise.
Cheers
Peter
Hi Peter,
I think the width is fine for a side to side bed. I just measured ours and its 6 ft 1 inch wide inside the walls at bed height — so, you should have plenty of width.
If you go with a bed that converts to seats, I’d put a lot of emphasis on making sure its a good comfortable bed. We had a Coachman RV sometime back that had a sofa that converted to bed, and it was awful to sleep on.
Gary
Hey,
Awesome work! I am looking at doing a similar design in the same van. I was just wondering why you didn’t use the raised aft floor in the end please?
Cheers,
Nick
Hi Nick,
We both liked the raised aft floor layout a lot, but we did not really need the extra storage for our use, and the slightly less good view out the back windows when you were sitting in the dining area pushed us toward the non-raised floor.
I could easily see the raised aft floor being the best layout if you need the extra storage.
Gary
Aft bed plan looks good. Maybe design a bunk bed in the location of ‘Bed #2 since you have a high roof? This will free up a bed space. Another option is to turn the bed layout parallel to the rear doors because you have over 6 feet 5 inches space between the walls.
Less is more. Use light weight materials in order to get better gas mileage is the way to go.
Good job. You have done a lot of studies and planning.
Good hunting, there are lots of information online.
Hi Mary,
Agree that the side to side bed layout could be a good option.
Maybe this is TMI, but both of us are old farts and the bathroom trips are a bit awkward the the side to side bed layout 🙂
We actually remodeled our last RV to go to the side to side bed arrangement and liked it a lot.
I like the full sized mockup to make these kinds of decisions, and some people go so far as to do a rough conversion with what they think is going to be a good layout, and actually try it for a couple weekend trips — to me, this is ideal.
This is especially true if this is the first RV you have done.
gary
I was considering the exact same raised platform concept. It was pointed out to me that the raised seats/bed/sofa concept would eliminate the possibilty of adding seatbelts to the seats. .. You win some you lose some.
Agree that it would be a challenge to work out an effective seat belt arrangement.
For us it would not be too big a deal as there are only two of us and we normally ride up front when on the road.
What arrangement did you end up going with?
Gary