This section provides a breakdown of the weight, the cost, and the labor for the full conversion. The weight includes the van + conversion weight + payload.
The summary might be helpful if you are planning your own conversion, but be careful to account for differences between what we did and what you plan to do.
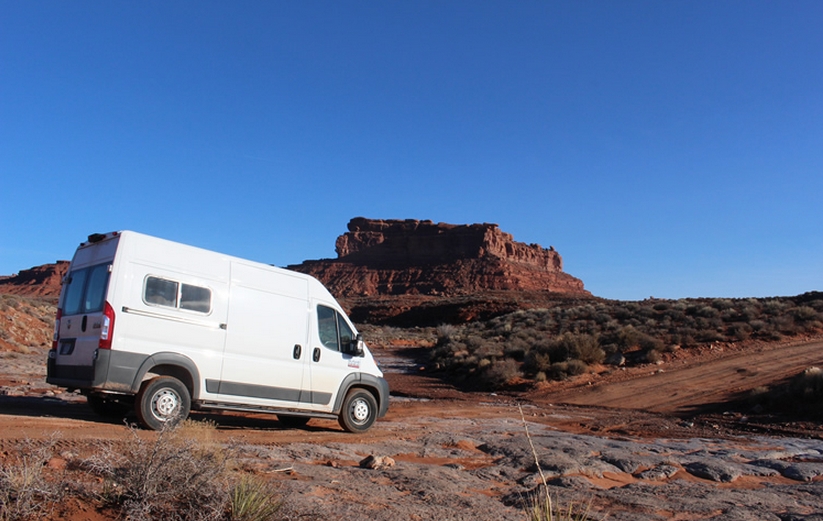
The quick summary is that the van starts at 4730 lb as delivered, the camper conversion adds 1030 lbs, and the payload (two people, water, propane, groceries, …) add another 970 lbs bringing the full up ready to travel weight to about 6700 lbs — well under the allowed weight of about 8600 lbs.
Go back to the main camper van conversion page…
Weight Summary
|
Item
|
Total
Weight (lb)
|
Front Axle
Weight (lb)
|
Rear Axle
Weight(lb)
|
|
|---|---|---|---|---|
|
Empty Weight
|
4730 | 3013 | 1717 | Empty Van |
|
Conversion Weight
|
1034 (1) | 154 | 880 | Conversion parts(beds, tanks, galley, paneling, … |
|
Empty Weight After Conversion
|
5764 | 3167 | 2597 | Weight of converted van without payload |
|
Payload
|
971 | 546 | 425 | Payload (people, water, groceries, propane, junk) |
|
Total Trip Weight
|
6734 lbs | 3713 lbs | 3022 lbs |
Note (1): Includes just about everything including 50 lb PV panel that has not be mounted yet. We might add some small storage cabinets and other odds and ends later.
I did weigh the van and get front and back axle weights and a total weight. There was a modest discrepancy between the actual scale weight of the converted van and the sum of the weights I estimated for each part (flooring, insulation, …), but only about 60 lbs.
The maximum allowable weight for the ProMaster 1500 model is 4630 lb front, 5291 lb back, and a total of 8550 lbs — so, we have 900+ lbs margin on front axle, and 2200+lbs margin on back axle, and 1800+ lbs on total weight. So, it looks like the 1500 model on the 136 WB can easily handle a complete conversion.
Breakdown of Conversion Weight, Cost and Labor
| Item | Cost ($) | Labor (hr) | Weight (lb) | |
| Insulating | $360 | 6 | 20 | Weight is based on what 1 inch of polyiso would weigh |
| Electrical incl solar | $1,507 | 24 | 236 | batteries, inverter/charger, PV … |
| Windows | 570 | 12 | 36 | Window weight minus sheet metal removed |
| Curtains | $109 | 2 | 6 | EuroCamper on windshield, Reflectex rest. |
| Flooring | $204 | 20 | 96 | Vinyl floor with polyiso insulation. |
| Paneling | $180 | 36 | 99 | Hardboard wall and ceiling paneling. |
| Galley (incl stove, fridge, sink) | $1,120 | 24 | 179 | Includes fridge ($630), sink, stove cabinets |
| Fresh and grey waters systems | $270 | 10 | 42 | Includes fresh and grey tanks, plumbing and pump |
| Composting toilet/seat | $82 | 12 | 37 | homemade |
| Beds and storage | $349 | 24 | 175 | Includes platform, mattresses, hinges, propane compartment |
| Ventilation fan | $278 | 4 | 12 | Fancy fan was $268 |
| Furnace | $430 | 3 | 23 | Just furnace, no supports etc which are incl in galley cabinet |
| Running Boards | $519 | 6 | 45 | |
| Propane system | $60 | 2 | 28 | This is empty tank and plumbing (cabinet in bed weight) |
| Total | $6,038 | 185 | 1034 |
The detailed pages for each area (Insulation, Paneling, …) has a breakdown for the weight, cost and labor for that area.
The labor column adds up to 185 hours, but I’m thinking this is on the low side. I did try to keep track of time spent as I went along for each job, but I’m guessing I missed some hours. One thing it does not count for sure is the many hours of internet research and trying to figure out what will work.
The total calendar time for the conversion was 6 months. This was from starting the insulation in July of 2014 to our first shake down trip to Utah with the finished conversion in January of 2015. This also makes me suspicious of the 185 hours number above, as this only works out to about 32 hours per month, and I believe I spent more time on it than that.
Note that the weights for your conversion may differ significantly from these depending on what you include.
Go back to the main camper van conversion page…
Gary
February 8, 2015, June 25, 2015, November 16, 2019.
do you have a company that will do the conversions to the ram promaster with your specs
Hi Tony
I’m not very familiar with outfits that do that conversions.
I have seen some of the work done by Morehead Design, and it looks good, and they will do it as simple or fancy as you like.
Sportsmobile also does this kind of work and has a good reputation.
Both of these places may be a long ways from you, so maybe look for a local guy also?
Gary
I converted 2014 promaster. Did you try different tires. The continental that came with my van have awful traction on slippery grass even. I’m concerned about camping in sand. Did you find a better tire?? Thanks tom
Hi Tom,
A lot of people don’t like the orginal tires — especially for snow.
We had to replace our back two tires due to a tire blowout on a gravel road on our Yukon trip. Did not have a lot of choice on the replacement as we were a couple hundred miles from nowhere. They found us a pair of Goodrich TK’s, and we have been happy with them. I’ll probably just get two more for the fronts very soon. Since the new ones are on the back, can’t tell a lot about snow performance, but the reviews say they are good and the tread looks good.
Lots of tire replacement discussions on the ProMaster forum with a range of opinions.
If you replace your tires, please let us know what you get and how they work out.
Gary
Great write up. Looking at doing something like your but unsure about the size. Are you happy with the size? I think the 136WB will work for us but I keep thinking that if I am going to do all of this work to make the van then I should maybe just get the 159WB to be sure. We also want to haul a few bikes and an inflatable boat with a 2hp engine (~30 lbs). Thoughts? Thx again for sharing your info.
Hi scott,
The 136 works out well for us, but we don’t haul equipment. I think that for you the 159 might be a better choice. It’s still pretty maneuverable.
Lots of size discussions on the PM forum with many opinions.
Gary
Impressive job. Your write ups are exemplary – lots of good detail with facts, not IMHO. I would only want to add a small shower and toilet with black water, but the Promaster may not quite have the volume. Any thoughts?
Hi Mike,
There are some thoughts on various approaches to doing a shower here: https://www.buildagreenrv.com/design-and-build-information-for-camper-vans/installing-a-shower/
I’d say its hard to work a permanent shower into the 136 wheel base PM, but definitely feasible for the 159 inch WB.
Some thoughts on various toilet options here: https://www.buildagreenrv.com/design-and-build-information-for-camper-vans/installing-toilet/
Not much on the black water tank approach. I’ve never really looked at trying to work a black water tank under the PM and to what limits it would place on where you could put the toilet. There are some toilet versions that use an above floor black water tank that would be easier to work in, but not sure if they offer enough capacity to work well.
Having had a couple RVs with black water tanks, I have to say I’m not a fan — maybe worth taking a look at some of the other options?
I’d like to know what you are able to work out for the PM.
Gary
Hi,
Are you building and selling any of these Green RV Vans, or do you know of anyone who is making and selling them?
Would you need a bigger power system to put in an RV roof air conditioner?
Could I go there as an apprentice to help you, and learn to build my own Van?
Thanks,
Jay
Hi Jay
One conversion was enough for me 🙂
It was a lot of fun, but I don’t plan to do it for a living.
There are a lot of commercial places that do van conversions, and some of them are willing to do the conversion along the lines you want and keep it simple. Here is one example on the ProMaster forum: http://www.promasterforum.com/forum/showthread.php?t=16609
Doing a roof AC without shore power will take a larger electrical system — some people have concluded its not really feasible to do a typical RV roof AC on a battery system.
You would want to insulate very well, and then look for an AC that is just large enough to do the job and is efficient.
One solution would be to only camp in places that have shore power available during the hottest weather when you need the AC.
In weather that is just warm, opening windows and something like a Maxxfan can do a pretty good job of keeping you cool. In dry climates, evaporative coolers provide a lot of cooling for the power they use — much more efficient than regular AC — but only for dry climates.
Gary
Hi Steve,
Sounds good — you did a really nice job on minimizing weight.
That seems odd on the inverter in that you would think it would have some protection for overloads. Maybe you can let us know how that gets resolved.
If you want to send me some pictures and/or suggestions for improvements on the conversion design that would be great — I’d start a new page for them.
This Contacts link has my email: https://www.buildagreenrv.com/contact-gary/
Thanks — Gary
Hi Gary, I have the same Van and have mostly cloned your design although I went with a rear “garage” design. My total post-conversion weight came out at roughly 6200 pounds, 3250 front/2950 rear fully loaded for a week long ski trip, probably 200 pounds of gear.
Everything is working except for the inverter which I think got fried by the expresso maker, I’m working with Tripp-Lite on it now. Great support. Thanks again for the inspiration!