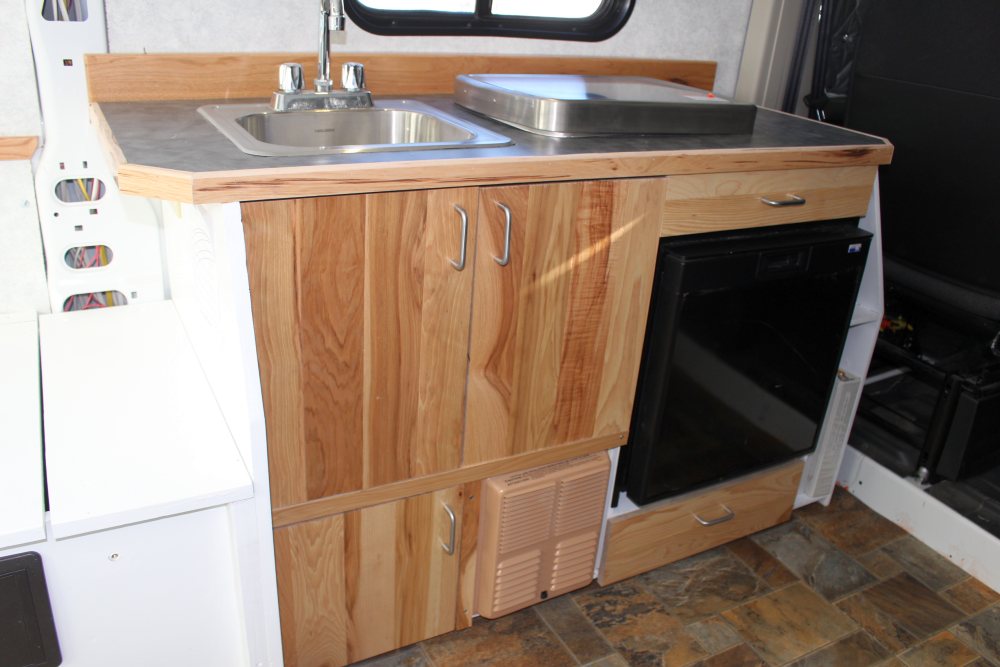
This page covers the design and build for the galley area of our RAM ProMaster camper van conversion.
Go back to the main camper van conversion page…
Construction
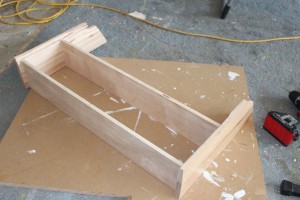
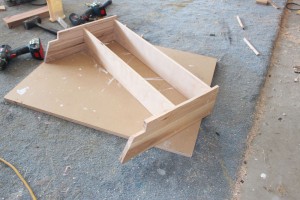
Base Cabinet
The galley cabinet is constructed from Medium Denisty Overlat (MDO) plywood. It provides a home for the fridge, stove, sink, and furnace.
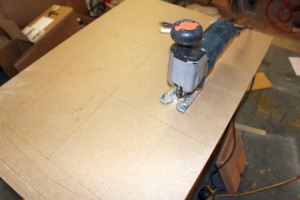
Some pictures of the cabinet being built in the shop.
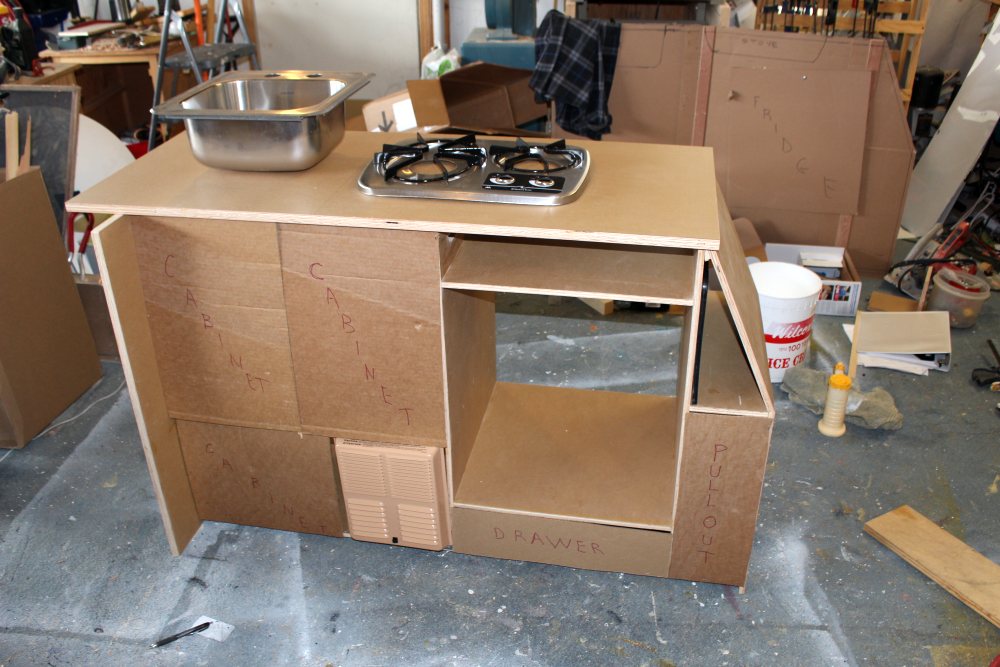
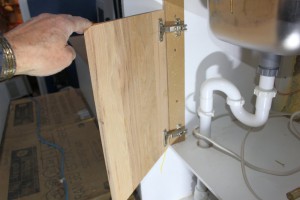
This is what the base cabinet looks like with the locations of things mocked up with cardboard doors.
The big hole on the right side is for the fridge.
The galley space to work with was limited, so it took some doodling to get all the essentials in. We did consider having the fresh and grey water tanks in the cabinet to make things really simple, but it seemed like that would take up most of the available space, so we elected to place these tanks elsewhere. For now, we don’t plan to have an overhead cabinet, so we wanted to try to get everything in this cabinet.

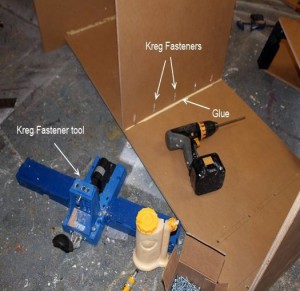
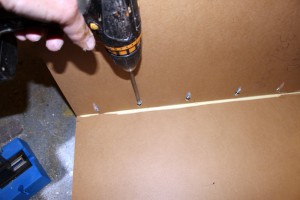
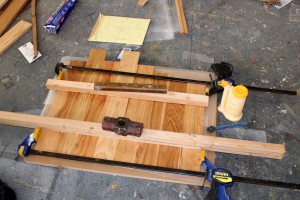
Gluing up the pieces (back of cabinet is on floor)
Counter Top
The counter top is a 3/4 inch piece of the MDO plywood with Wilson Art (Formica like) counter top material contact cemented to it.
Getting the layout of the sink and stove on the counter top.
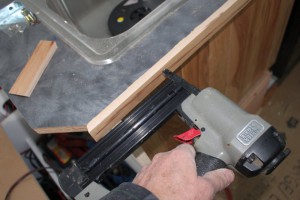
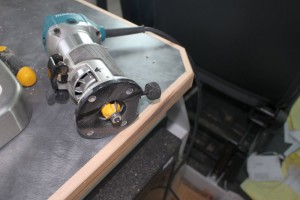

I used the same Hickory flooring that was used to make the cabinet doors and drawer fronts to do the edging around the counter top.
The backsplash is also made from the Hickory flooring:
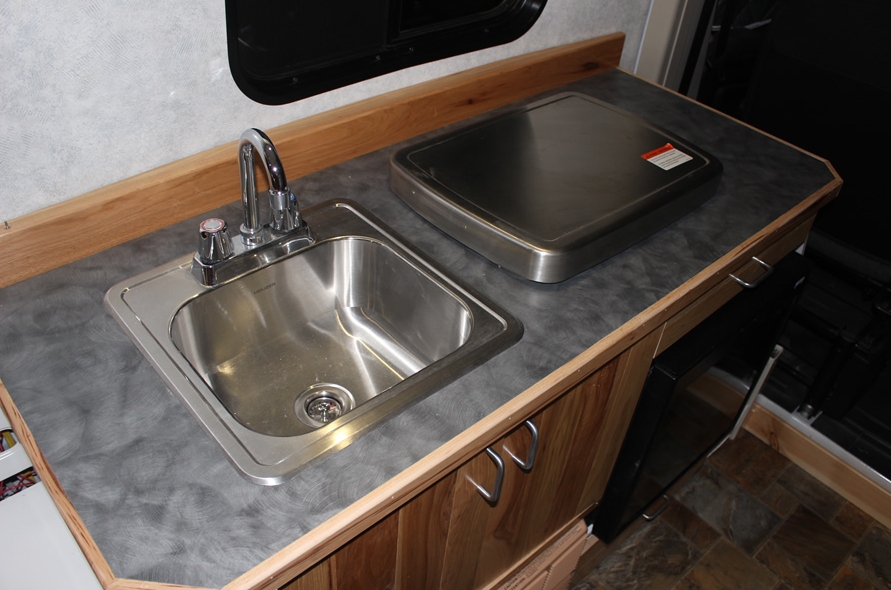
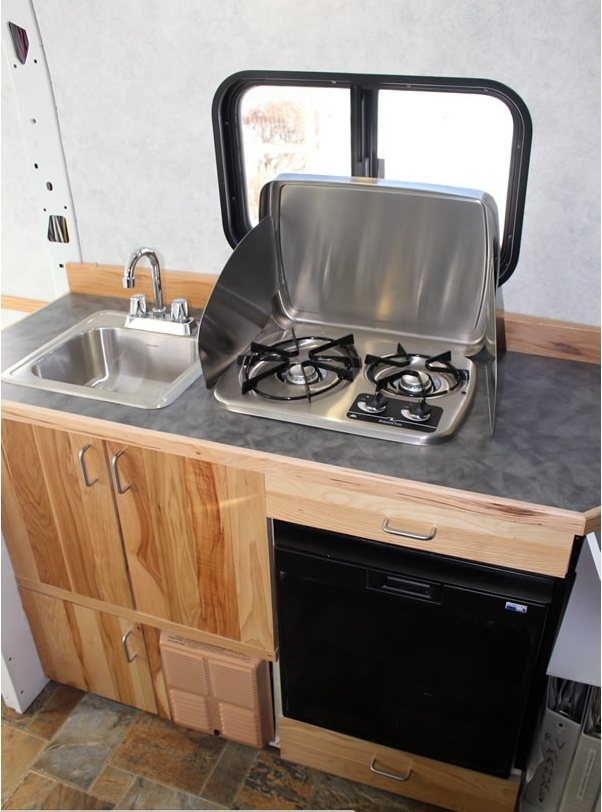
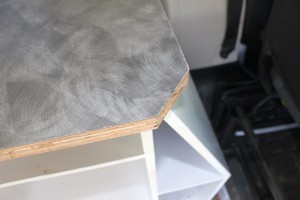
Finished counter top.
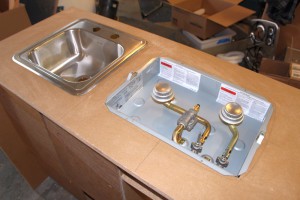
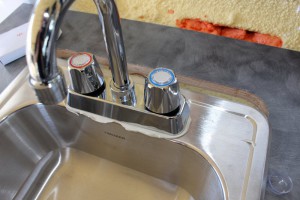
Sink install
The sink is compact and is made for RV’s or to use as a bar sink. The sink and faucet were offered as a package.
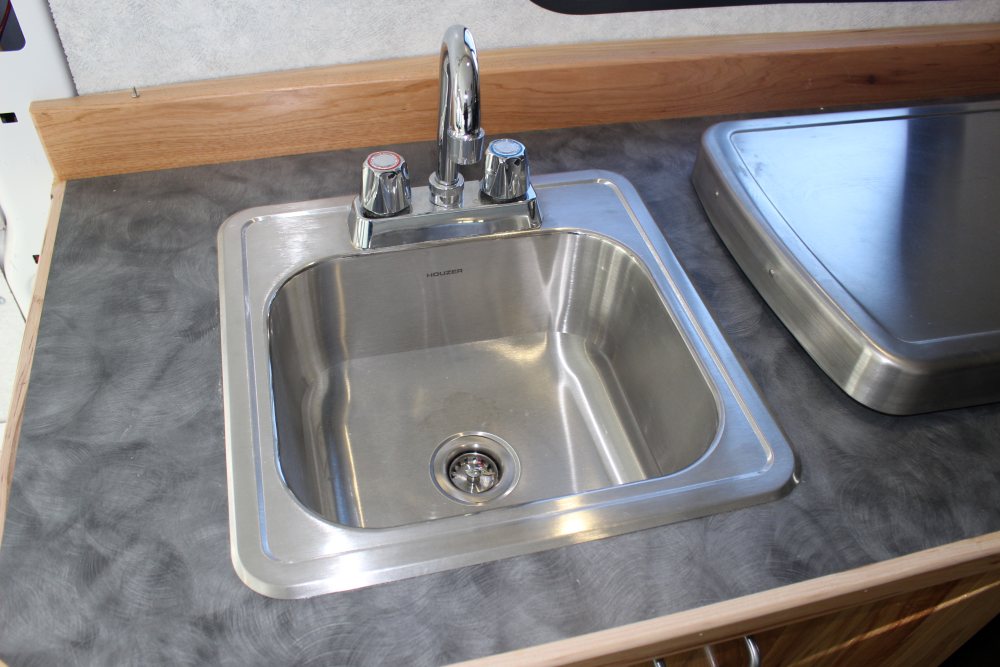
Some pictures of installing the sink:
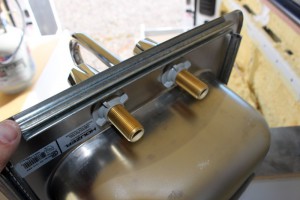
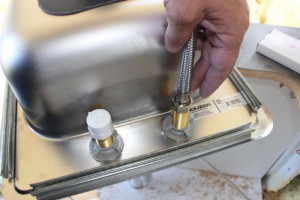
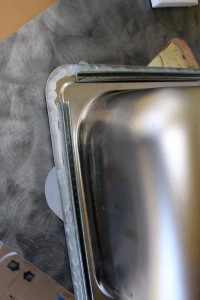
The sink mounts from the underside with clips that they provide and that go in fairly easily.
Stove install
Our stove is a two burner Atwood that appears to be built well and works fine in the bit of testing we have done. We also got an optional stainless steel cover made for the stove that provides some counter top space when the stove is not in use. The stainless steel cover is nice and functional, but does not fit quite flat on the counter top. The cover also forms a fire shicld around three sides of the stove when cooking — something I think is a very good feature. Note: this stove does not appear to be available anymore, but there are similar cooktops available from Atwood and others.
The Stove does not have any kind of auto ignition system, so you have to manually light the burners. Still looking for a good pizo-electric lighter gadget if you know of any.
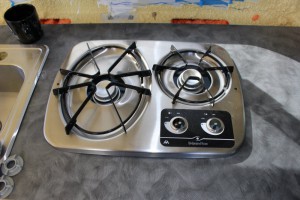

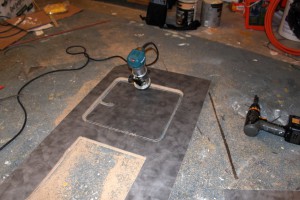
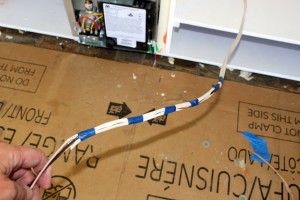
The stove base fits in a cutout in the counter top. The 3/8 copper propane line stove as shown in this picture with a flare fitting.
Be sure to test for leaks. There is a rubber bushing where the copper line comes into the stove base that was not installed when this picture was taken.
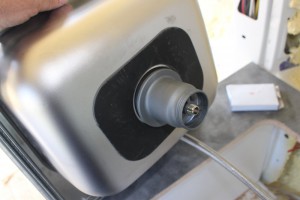
Fridge install
The fridge that we selected is the Norcold NR751. It is a 12 volt DC refrigerator that that uses the efficient Danfoss BD35 compressor for low power use. Most of the RV fridges use quite a bit of power, but the power usage of this fridge makes it feasible to use with solar power only for extended periods — unfortunately this comes at a fairly steep price — $630.
Having lived with propane fridges in past RV’s, one of our main objectives was not use one in this RV. We have found propane fridges to be finicky about being level and very energy inefficient.
The capacity is 2.7 cubic feet and it has a separate freezer. This was about as large as we could fit in the galley cabinet — should be plenty for us.
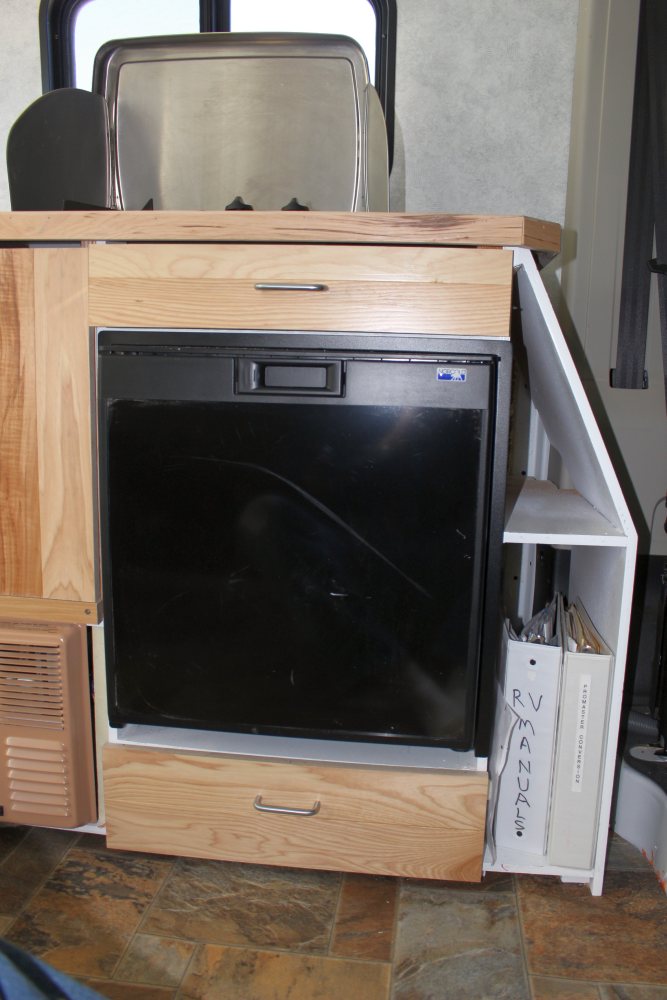
The fridge is easy to install as long as you make the cabinet opening the right size for it to slide into. It just slides in and is attached with 4 screws near the front.
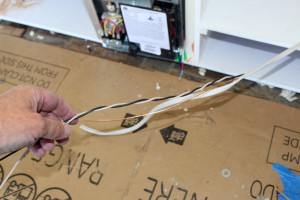
The electrical hookup is also easy, it just needs a dedicated 12 volt DC circuit with a 15 amp fuse. They want you to twist the supply wires together for the first few inches to prevent electrical interference (not sure is this is to protect the fridge from the van or the van from the fridge)
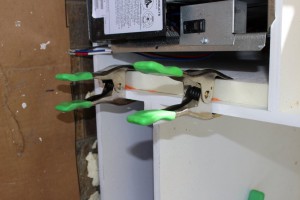
The pictures below show how the insulation panel was installed between furnace and fridge.They recommend installing the fridge away from heat sources like the furnace and stove, and since we really could not do this and get everything in the galley cabinet, I installed rigid polyiso insulation panels between these warm items and the fridge.

Doors and Drawers
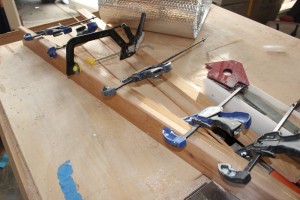
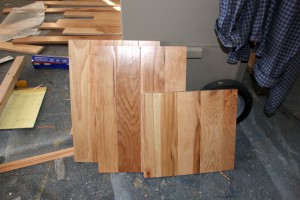
We both like the look of Hickory and thought it would be nice to make the cabinet doors and drawers out of Hickory. In looking around for some suitable source for the Hickory, I ran across bundles of Hickory flooring the Home Depot sells, and decided to use it.
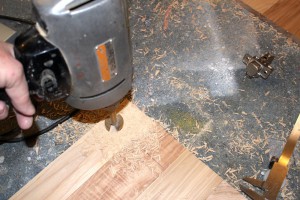
I took the about 3 inch wide tongue and groove floor pieces that were about 3/4 inch thick with grooves on the back and surface planned them down to about 5/8ths leaving the prefinished tops intact. I was prepared to rip off the tongues and grooves and edge glue the pieces together using biscuits, but found that just edge gluing them with the tongue and groves still in place worked fine. So, I just edge glued enough pieces together for each cabinet door and each draw front, and them cut them down to the exact size needed. Not sure if this is the simplest way to get to Hickory doors, but it worked OK and was not too expensive.
Also ended up using the Hickory for the trim around the counter top and the backsplash board.
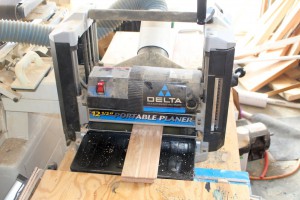

Surface planning the Hickory down to make a flat back side at 5/8ths thick.
Cutting the edge glued pieces down to door size needed.
I used the European style hinges — they have some adjustment to easily get the fit just right, which is nice.
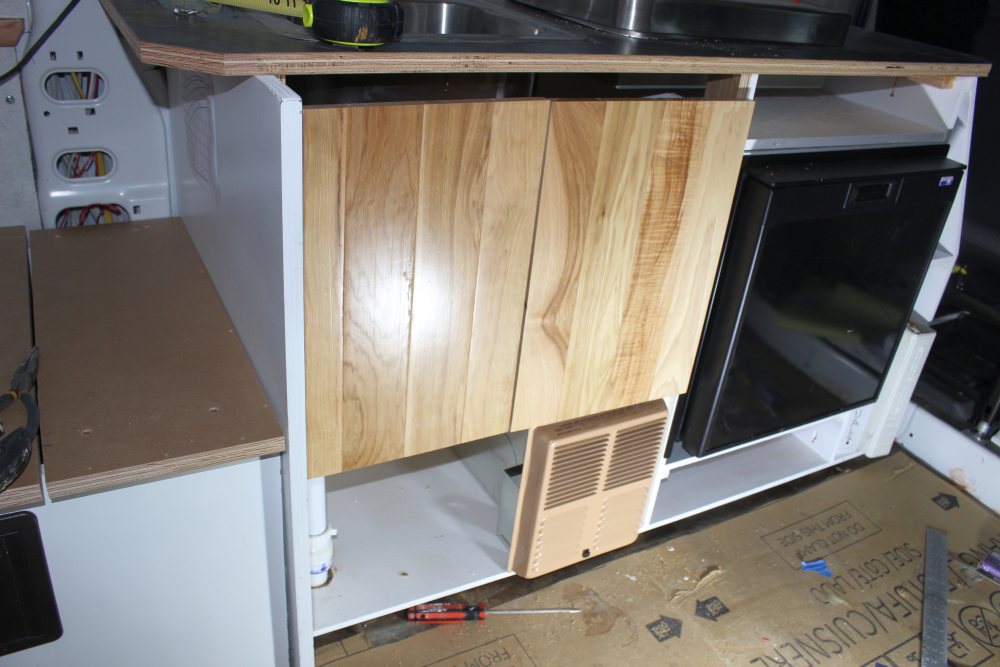
First couple doors in place.
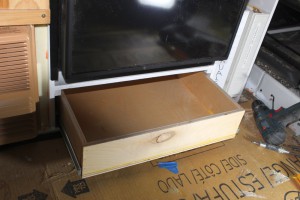
The door boxes are made from a simple box of half inch Birch plywood. I just made a bottom piece and then glued and mailed the sides to the bottom. Using dadoes in the sides to slide the bottom piece into would have cost us about a half inch of drawer depth that we just don’t have. The Hickory drawer fronts are glued and screwed to the plywood box — being careful to get the alignment just right.
I used heavy duty, self closing drawer slides from Home Depot.
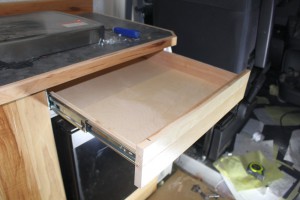
The drawer above the fridge is very shallow, but should be just deep enough for silverware and knives.
Keeping the doors and drawers closed:
A way is needed to keep the doors and drawers from opening as you go around corners.
I’ve bought and installed one of these “Push Latches” from RV Designer that holds the door in place with a few pounds of force. I’m not sure whether it will be adequate or not, and still considering other ways to hold things in place.

One of the RV Designer lataches installed — they do work pretty well, just not sure if its enough force.
Attaching Galley Cabinet to van
The galley cabinet is attached to the van side wall and also bolted through the floor. It is important to have the cabinets secured well enough to keep the cabinets and contents from becoming missles in a crash — a cabinet with 50 lbs in it in a 30 g crash has 1500 lbs trying to rip it off its attachments and break it up.
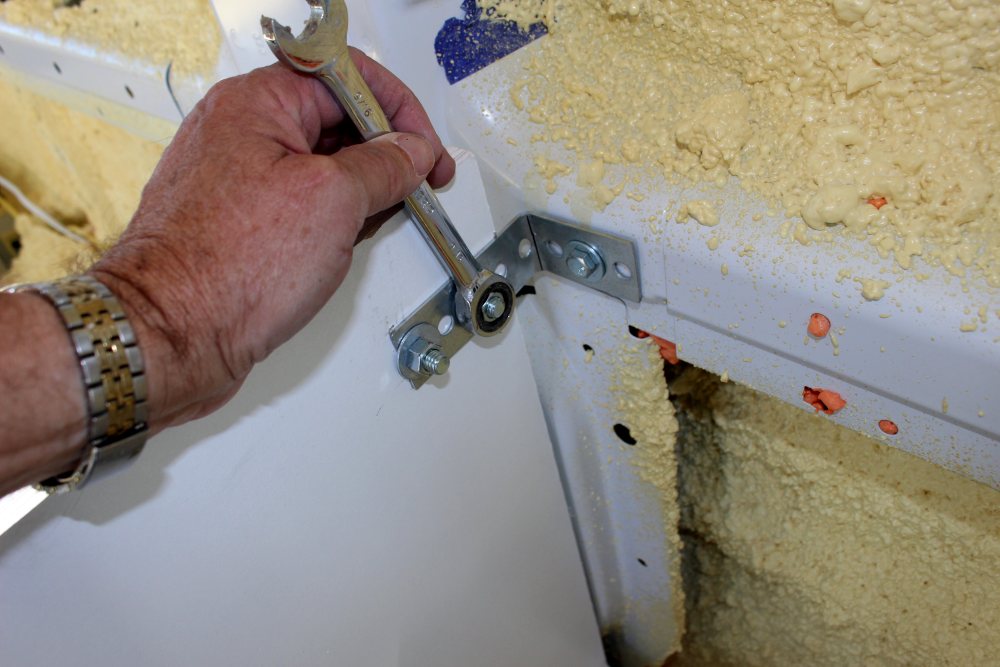
The upper outboard part of the galley cabinet is attached to the van sidewall longeron using rivnuts in the longeron and
bolts through the cabinet end walls. This is done at both the forward and aft ends of the galley cabinet.
I have not completed the bolting of the galley cabinet through the floor yet, but plan to do this before using it. It will be done in the same way as the bed platforms are bolted down.
Added Cabinet
After a couple trips, we decided we could use an upper cabinet in the galley area as the galley storage was a bit tight. We thought about adding a full size upper cabinet, but decided that a smaller one would provide enough storage without getting in the way and would help to keep the open feeling the van has.
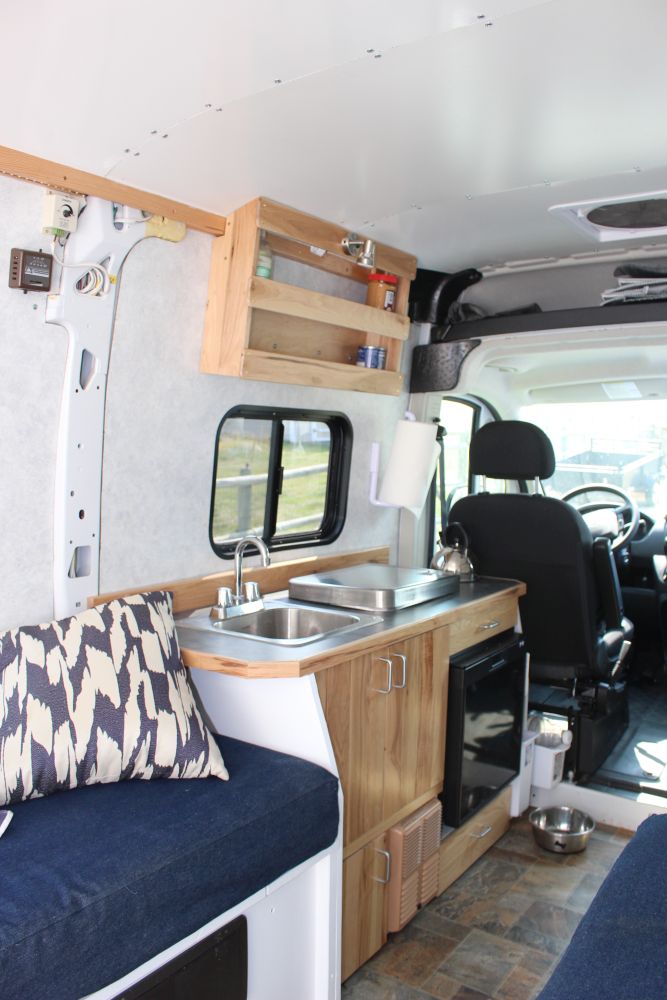
The new cabinet is built out of the same Hickory flooring that we used to make the galley cabinet. It is securely screwed to the main wall steel longeron in 4 places as well as to the wood rail that runs along the joint between the roof and wall.
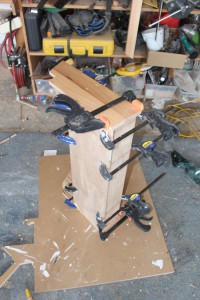
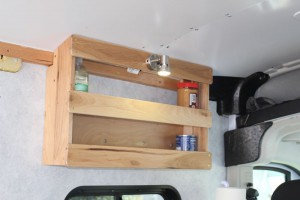
The battens across the front are intended to be tall enough to keep articles in the cabinet from coming out even in a crash.
The new cabinet (more like a couple shelves) has worked out fine — a lot of the things we used most often fit there and are easy to get at.
Cost, Weight and Time
| Item | Cost ($) | Weight (lb) |
|---|---|---|
| base cabinet | $70 | 72 lb |
| Counter top | $50 | 5 lb ? |
| Cabinet and drawer fronts (Hickory) | $80 | 22 lb |
| Drawer boxes | $20 | 11 lb |
| Stove and cover | $170 | 12 lb? |
| Fridge | $630 | 50 lb |
| Sink and faucet | $100 | 7 lb ? |
| Total | $1120 | 179 lb |
I did not keep good track of the time that went into the galley cabinet — If I had to guess, I’d say a half day to do the base cabinet + a half day to do the counter top and cutouts + a bit more than a day to do the cabinet doors and drawers + maybe another half day for painting and odds and ends — say the equivalent of 3 full days.
Go back to the main camper van conversion page…
Gary December 3, 2014, June 24, 2015
Comments? Questions?
Thanks for including the weights of all components used. While I may not replicate it exactly, it gives me a baseline in the planning of other features (on paper) without going overweight when the build is completed.
Gary,
Is your galley box open behind your NR751 frig? We just purchased one for our conversion and the installation instructions don’t tell us if it needs to be enclosed in the back.
Hi Pauline,
Yes, its open behind the fridge.
I believe that there is an air channel about an inch tall under the fridge that goes from the front under the fridge all the way to the back.
I have wondered if adding a small, 12 volt fan might help the fridge run more efficiently and use less electricity, but have not done anything about it yet.
The fridge has done a good job and still freezes icecream with no problem.
Gary
Gary,
I’m looking at refrigerator options and came across this one. How do you think it will compare to yours? https://www.raneystruckparts.com/truck-fridge-built-in-12-volt-dc-refrigerator-with-freezer-crx-50-by-dometic/
Dennis
Hi Dennis,
From what I have read, TruckFridge has a good reputation.
Some of the folks at the ProMaster forum have them and seem satisfied.
When I was searching for ours, I was particularly looking for the Danfoss BD35 compressor because they have a good reputation. This one does not appear to use the Danfoss, but I’m sure there are other good ones out there.
Energy consumption looks very close to ours, which I consider good. But, some of the chest style ones are said to do better — but you have to deal with the top opening.
The size appears to be a bit smaller than ours. I do like the size we have — its just about right for us. But, this is a highly personal thing.
Gary
I am looking for a Removable kitchen pod arrangement like they use over in Europe while caravanning. While I would like to travel in my Ram Van, for the most part it will be used more mundanely as a scooter mobility van, so I would like to be able to have the kitchen unit removed and stored when not traveling. Any ideas on who in the US might have something like this?
Hi,
There are definitely solutions like that out there.
If you search YouTube for something like “conversion van furniture modular” some come up — not all exactly like what you want, but some ideas.
Have also seen builds on the ProMaster Forum where people did very easily removable galley pods. Probably more of them on the Sprinter and Transit forums.
You could use the galley arrangement where the water tank is a plastic jerry tank that fits in the bottom of the galley cabinet and has a small submersible pump that goes right into the jug.
Electrical could be something like the Yeti 1000
https://www.amazon.com/Goal-Zero-Portable-Generator-Alternative/dp/B074T392CQ/ref=sr_1_1?ie=UTF8&qid=1515943331&sr=8-1&keywords=yeti+1000
Costco has these for $1000 now. Goal Zero offers other similar solutions.
Definitely some good solutions out there.
Gary
Thanks for write-up and all the pics! You talked about use of propane, etc. and I see you are using a propane stove, but I could not find anywhere you explain what kind of tank you are using and how you are storing it and getting it to your stove?
Do you have a sealed compartment inside your van? is a tank mounted outside or underneath the van?
Thanks
Hi Jordan,
The propane system is all on this page:
https://www.buildagreenrv.com/our-conversion/promaster-camper-van-conversion-installing-the-propane-system/
The list of all the pages for our conversion is here:
https://www.buildagreenrv.com/our-conversion/
Its very simple and very cheap and has held up well.
The only change I’ve made is to hinge the access door for the propane compartment so that it hinges up and latches down with a couple very strong latches.
One thing I would do differently is to make the propane tank compartment just slightly larger so that a couple of the 1 lb disposable propane cartridges would fit in the corners to act as a back up in case we were to ever run out of propane.
Gary
Hi Gary,
This is an amazing amount of info and really, really tempts me to go it alone. Alas, I am a bit crunched for time because with my skills it would take me twice as long to do this:) I don’t suppose I could talk you into building another one? I’ve looked up and down at all the professional outlets but to be honest your work and having something custom like this would be worth the money to me. Ridiculous ask, I know you are out enjoying your van, but thought I’d ask:)
BTW I have a large sailing cat wandering around the world so if a sailing/ surfing/ kitesurfing/ beach roaming vacation trade would do the trick let’s talk! (www.offshoreodysseys.com).
Hi Gavin,
Fascinating website you have. Wish I had run across it when I was 20 🙂
Will definitely spend some more time there.
I’m going to pass on building vans for others. It was a lot of fun to do ours, but building for others seems like it might get to be work, and I’m too happy with retired life to think about work.
Have been researching doing some form of kit airplane for next project.
Gary
Have you looked a Morehad Design — they seem to do nice work and will do the kind of conversion you want.
Gary
Gary,
Do you still recommend the Norcold 751 AC/DC refrigerator/freezer for your van?
Hi David,
Yes, still like it. No problems.
There is another fridge comparison thread running on the PM forum — nothing like more data to confuse things 🙂
http://www.promasterforum.com/forum/showthread.php?t=61834
Gary
Gary,
Amazing work on the galley. Curious about the size of plywood or MDO you used. Counter top was 3/4 inch, but what were the sides, drawers, etc. It looks like 1/2 inch plywood or MDO?
Hi David,
The cabinet is a mix of 3/4 and 1/2 inch MDO. I tried to use the 3/4 in the areas that are important to keep the cabinet in place if there is a crash.
The verticals inside the cabinet and the shelfing are half inch. The drawers are made from some half inch birch plywood I had left over, and the doors are made from Hickory flooring that is edge glued together to make wider boards — I had this left over from another project and just used it for the look.
I guess most important is that the main shell of the cabinet that is bolted to the floor and to the van ribs is strong enough to not come apart in a crash.
The MDO has held up to use and abuse well so far.
Sorry about the slow response — we are actually on a trip with the van right now — currently around Santa Fe, NM.
Gary
Hi Gary-
Getting ready to build the galley cabinet. One problem with the Nissan NV2500 van is that the window goes down to about 24″ but the work surface needs to be at least 33″ high, blocking a large part of the window and making it hard to open with the latches on the bottom. Any suggestions?
Hi Jon,
Have thought about it a bit, but not come up with much.
For getting to the window latch, I guess you could just have something like a 6 by 6 inch “tunnel” in the galley cabinet that would let you reach in from the front of the galley to the latch? Or, even a drawer that pulled out quickly and allowed access to the latch?
I wonder if you could have most of the galley cabinet built at a lower level that would show more of the window, and have a counter top that would be at 33 inches and would slide or hinge back when not in use. But, this gets complicated when sinks and stoves are mounted in the counter top. Maybe use a stove that is not fixed to the counter top so it can be stowed somewhere else in the galley cabinet, which would allow the part of the counter top that the stove sits on to be hinged or slid over. This also has the advantage of allowing the stove to be used outside. If I were doing my conversion again, I’d go with a stove that could be used inside or outside.
Will keep thinking about it an let you know if any new thoughts come up.
Gary
You do superb work. Thank you for the photos and detailed info.
Thanks Kevin — glad to hear its helpful.
Gary
Hello:
What are the dimensions of your galley?
Thanks, Jim
Hi,
cabinet width 44 inches
Counter top width 51 inches
Depth 21 inches
Height 33 inches
This does not include the open shelf at the front end that follows the seat back.
Gary