This is a report on our first trip with the new RAM ProMaster based RV conversion van.
It provides some info on how things worked out with the new van, van camping, cooking, and fuel economy.
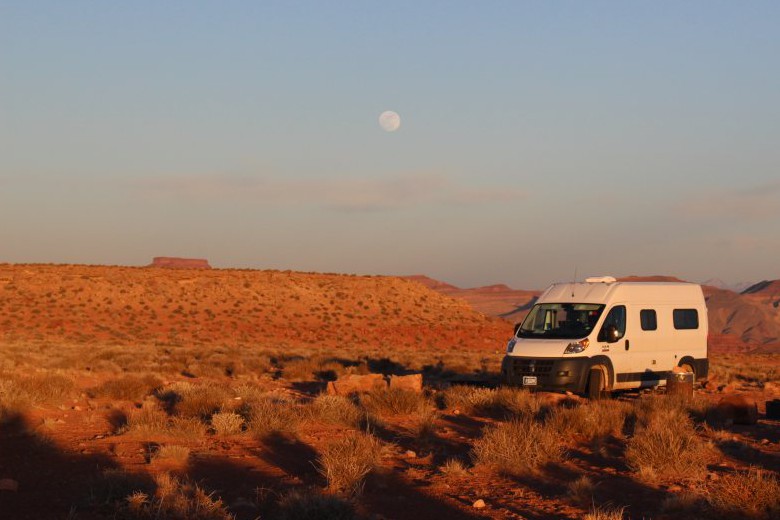
Camping at the Goosenecks — sourthern Utah.
Go back to the main camper van conversion page…
How did it work out? Overview
The ProMaster van worked well. On the highway it rides nicely, handles well, reasonably quiet, parks easily. Its not quite like driving a car, but close. One thing I really liked about it is that the big windshield is nice for looking at scenry.
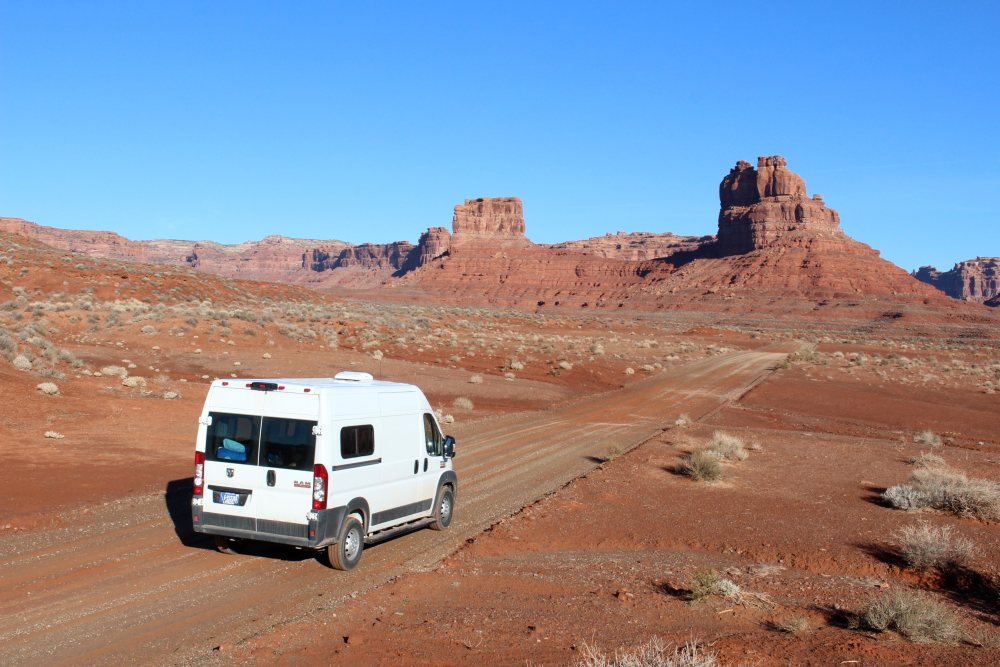
The PM works well on unpaved back roads. It has good ground clearance and its small enough to maneuver well on back roads. Traction is good. Its not a 4WD jeep and not made for jeep trails, but it did fine on unpaved, narrow, bumpy, back roads.
So, for our needs, this version of the ProMaster looks like a good choice.
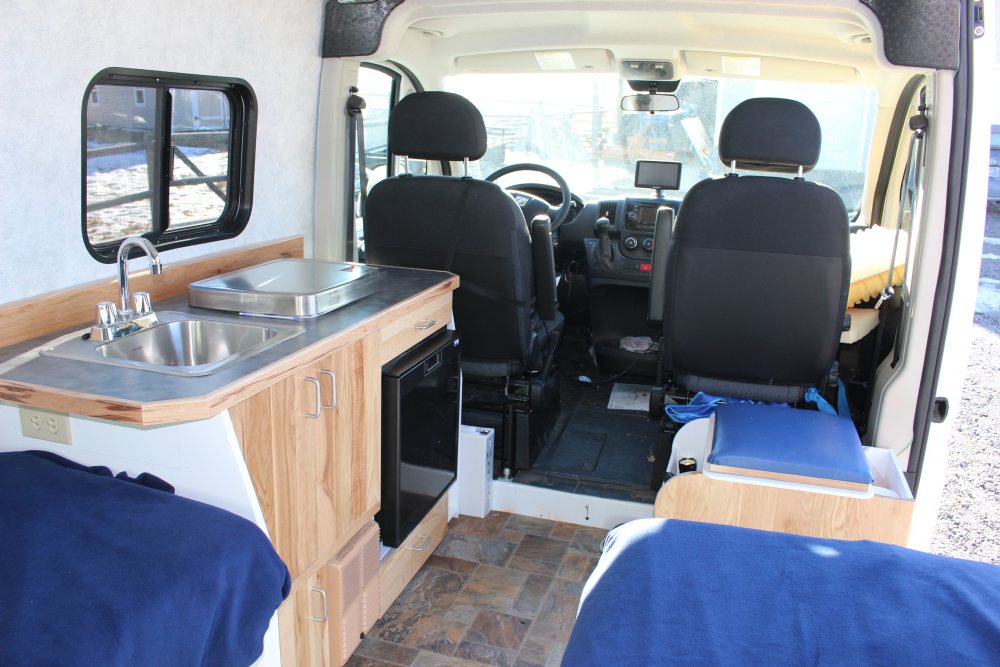
The simple conversion is also working out. We have just the basics, but (so far) we have not missed having all the extra stuff that would come with a larger RV. There are a few things we want to change/add (see below), but overall we are quite satisfied.
How Stuff Performed
PM Van
Overall, the PM did well and we have no serious complaints. The van engine, transmission, steering, brakes (other than squeaks), lights, heating and AC, radio, … all worked well.
The sliding door on our PM can be a bit balky. Sometimes you close it from outside, and then it can’t be opened using the outside handle even though its not locked. It still opens from the inside, but takes a couple tries. This on the talk to the dealer about list.
The only other thing was the somewhat squeaky brakes that many have reported on. Its not that much of an issue for a road trip where you don’t do much braking, but its a small problem (wife would say large problem) in city driving. Hopefully RAM will have a solution soon.
Garmin GPS
We have the Garmin 760 RV gps and it worked well and we liked it. Screen is large and easy to read (its mounted just aft of the RAM clipboard on top the dash). The Garmin interface is very easy to use, maps and place locations (in our experience) were accurate. It is far better than the manufacturer installed GPS we paid a ton of money for on another vehicle. It has an option for a backup camera, which we did not get as we already had the RAM backup camera, but it might be a good option if you don’t already have the backup camera.
Fridge
I made a wiring error that ended up cutting off the power to the fridge. Since when I first hooked up the fridge I checked it and it worked, I assumed when it would not work for the trip that there was something wrong with the fridge. So, we ended up just buying ice bags and using it as an ice chest.
I should have pulled the fridge out and checked the wiring as it would have been easy to fix on the road, but I jumped to the conclusion that there was something wrong with it and it would need to be repaired. Based on the use as an icebox and a bit of running it on electricity after we got back, it looks like its going to work out well, but no on the road use yet.
Update: The fridge has worked well for all of our subsequent trips. We can keep ice cubes and ice cream in the freezer compartment and all the rest of the refrigerator for regular stuff that needs refrigeration. No problems.
Furnace
The furnace got quite a bit of use as temperatures were generally chilly. It worked fine with no problems at all. The noise level was OK and it did not keep either one of use up at night. The outside noise level was fine.
Electrical System
To the extent that we used it, the electrical system worked fine.
We had a chance to test: charging from an electrical hookup, chaging from the van alternator/battery system, minor use of the inverter to power 110VAC stuff, powering misc 12VDC items. Did not blow any fuses or need to change any wiring (except for my mistake on fridge wiring).
On most nights we did not have an electrical hookup to use, and even with the furnace running quite a bit, the house batteries were fine in the morning. While we drove enough each day to recharge the batteries, I think that a couple days even without the solar hooked up would have been fine.
We don’t have the solar panels installed yet, so did not test charging from the PV panel.
Update: 315 watt solar panel and charge controller installed and working well. Our experience is that for spring, summer, and fall the solar can typically provide all of the house battery charging. Winter is more difficult due to lower sun and more cloudy weather, and will likely require some house battery charging from the van alternator.
Propane System
The propane system worked fine. No problems or leaks and the CO and Propane gas detectors never peeped.
Because the weather was cold and we used the furnace a lot, we decided to swap out the propane cylinder at a hardware store that offered the trade in your empty BBQ cyl for a full one about a week into the trip. This worked fine and took less than 5 minutes. We probably could have made it home without the exchange, but the fact that I forgot the scale to weigh the propane cylinder meant I could not tell exactly how much was left in the old cylinder, and we thought it was best with the cold weather to be conservative and change it.
The way I measure the amount of propane left is to weigh it with a fish scale. This is quite accurate given that the cylinders have the empty weight stamped on them, and the propane weighs 4.2 lbs per gallon. The only negative is that to weigh the cylinder I have to undo 4 wing nuts and pull the cover off the the propane compartment — this is a bit of a pain, but I think I’m going to keep using this system rather than installing a gage.
Stove
The stove worked fine and cooked well. Manual lighting not much of a chore once you get used to it.
The stainless steel stove cover does not fold down to fit perfectly flat on the counter top — rather, one corner is up a little bit above of the countertop. This makes for a rattle when driving. We ended up just putting a dish towel over the burners and then closing the cover. This eliminates the rattle, but seems like the cover should fit flat and not rattle as it comes.
Sink and Plumbing
The whole fresh water and grey water systems worked fine.
With no flush toilet and no shower, water use was very moderate. Even though our tank is only 17 gallons, we we only refilled once during the trip.
The grey water tank was emptied twice during the trip, and the little hose and valve setup worked fine.
The pump and sink arrangement worked fine. The Shurflo 4008 pump worked very well and handles low flow situations better (more smoothly with less cycling) than I remember the older Shurflo RV pumps doing.
Before we left, I added a very simple vent at the top of the grey water tank that consists of a hole at the top of the tank with a short tube connected to it to vent the tank. This results in smooth draining of the sink with no burbles. Without this vent line, the sink draimed slowly and with some burbbling. At some point I plan to extend the vent tube to a higher point so that if the grey water tank fills up, it won’t drain water out the vent line.
The homemade grey water tank is (so far) doing well and showing no signs of leaks or problems.
Update: March 2017, all tanks, including the homemade grey water tank still working well.
Composting Toilet
I’m afraid we failed to do much of a test on the composting toilet. We used the urine diverter and pee bottle part multiple times every day and it worked fine. But, we used the composting poo part not at all as there was always some kind of toilet or out house around. Will try to do better on next trip. But, there may be a message here that for a lot of camping a pee only toilet may be enough.
We did make use of the toilet at a seat a lot, and the cushioned top was definitely worth doing. This also makes me think that the swiveling passenger seat would be a good option — its a handy place to have a seat.
The only change we plan to make for now on the toilet is to try to get a larger pee bottle in. As several people told us, the 64 oz bottle we have now is too small.
Update: We have changed the pee bottle to be a 1 gallon container. Toilet is working fine for us. We find that the the poop function is not used a lot as there are usually facilities around, but pee bottle is used a lot and works fine — just remember to empty.
Curtains and Shades
The Eurocamper shades for the front of the van and homemade Reflectix shades for the back worked just as expected — no problems. Given the cold temperatures, the added insulation they provided was welcome.
Dog
The dog did fine. Most of the days while driving he just used one of the regular beds (good views out the windows and comfy sleeping), and at night we placed his pad between the two bed platforms near the rear doors.
Fuel Economy
Fuel economy and carbon emissions are important to us. We chose the smallest PM (136 WB) that we thought would be OK for camping, and we worked on keeping the weight of the conversion down. The only exterior drag producers are MaxxFan, running board, and the new solar panel which is mounted as low as possible to reduce drag.
Full up weight on the road for trip, about 6500 lbs.
We drove with fuel economy in mind — went 60 to 65 mph on freeways, and 50 to 65 mph on two lanes with average near 60 mph.
I kept track of mpg (miles per gallon) both with computer and using actual gallons from fill ups.
The computer reported anywhere from 0.1 to to 1.2 greater mpg than actual calculations — weighted average was 0.56 mpg higher.
Full trip was 2065 miles from Bozeman, MT down through south Utah canyon country and back.
Grand average for 2065 miles was 20.2 mpg on computer and 19.6 mpg on actual calculations.
Breaking the mpg down by type of driving:
- Freeway driving at 60 to 65 mph: 20.5 mpg
- Two lane roads at 50 to 62mph: 19 mpg
- Side trips up into the mountains on good paved roads: 18.5 mpg
- Back roads, slow, twisty, sand/gravel 5 to 15 mph: 15 mpg
These are actual mpg based on fillups. Not sure I believe the poorer mpg going slower on paved two lane roads — have always done quite well on mpg for this kind of driving on other vehicles.
This was all on winter formulated gas. FuelEconomy.gov says the winter formulation cuts mpg by about 3.5%, which would raise the numbers above by about 0.7 mpg.
We only had 430 miles on odometer at start of trip, so there may be some breakin still happening, and that may raise mpg a bit (or not?).
This is nearly twice the the mpg we got on our past RVs, which were not huge ones by any means, so we are feeling pretty good about the PM. Would love to someday have an RV that gets 30+ mpg, but this is good for now.
Things We Need to Add Or Change
I guess the main thing was that the van and conversion worked well — I’d be happy to go out again with no changes. But, there were a few things that could make life on the road better and smoother.
This is the “to-do” list of changes for the next trip, or as soon as we can get to them:
Access to Under Bed Storage — Most of our storage is under the two bed platforms in the back. The way we access this now is that the bed platform lids that support the mattresses just hinge up to provide access to the storage. Two things make this less than ideal: 1) we use the storage a lot, so we are constantly in and out of it, and 2) the beds tend to be the accumulating place for odds and ends that are out (computer, books, cloths, …), and to be able to get to the storage you have to move this stuff and then lift up the storage lid. It would be nice if at least some of the storage under the beds had a more direct way to get at it that did not require moving other stuff.
Still thinking about how best to do this — if you have any ideas, please send them in.
Update: Cut access openings into the vertical walls of the bunk pedestals that are just large enough to allow our daily use bags to be stowed in them. This provides for easy access to the stuff we use everyday.
Table — I built one of those small dinette tables to fit between the two beds in the back — the type used on RV’s a lot. The idea is that you can quickly set it up for a meal, and then take it down and stow it at other times. We found that it was more trouble than it was worth and whenever its up its always in the way. Stowing the table top and the pedestal is also a pain.
What we are going to do instead is to cut out a couple of flat thin “trays” that are about 20 by 20 inches. When not in use they stow between the mattress and the bed platform (they are thin enough not to make a bump). When you want a table type surface, you pull out the tray and place it on top the mattress surface. It provides plenty of flat surface area for table activities. It will have a non-skid surface on the bottom so it does not tend to slide off the mattress.
Securing Mattresses — The passenger side mattress tends to slide forward when we brake to a stop. We will add a plywood end plate at the forward end of bed platform that will act as a stop to keep the mattress from sliding forward. Sliding side to side does not seem to be a problem even though its not restrained.
Specialized Storage — We want to add some small, dedicated storage for a few things. This includes: paper towel holder, a few things at head of bunks to stow: books, clock, glasses, phone/tablet, watch, flashlight, bear spray, …
Electric Cord and Grey Water Drain Pipe — While we have storage for both of these inside, they are used outside and can get dirty. I would like to add either some type of outdoor compartment, or store them in the space inside the rear doors. If stored in the rear doors, they would be accessed by opening the door from the outside, swinging it open, and then reaching the cord and drain pipe coil from an opening in the inside panel of the rear door. This would not be practical for a normal size grey water drain hose, but ours is relatively small in diameter and only handles grey water.
Microwave — We would like to add a low power microwave just to make cooking faster and easier when we don’t feel like doing real cooking. This hinges on finding a good place for it where it is easy to use and does not get in the way of other activities. The house batteries and inverter are sized to run a small microwave and not need to have an electrical hookup to use it.
Outside Shower — Might add an outside shower head and hose at the back doors. Just to wash the dog (and maybe us) off. This would be easy to do.
A few pictures on the road
Here are a few pictures taken along the way.
This was in late January, so we had things pretty much to ourselves.
Valley of the Gods

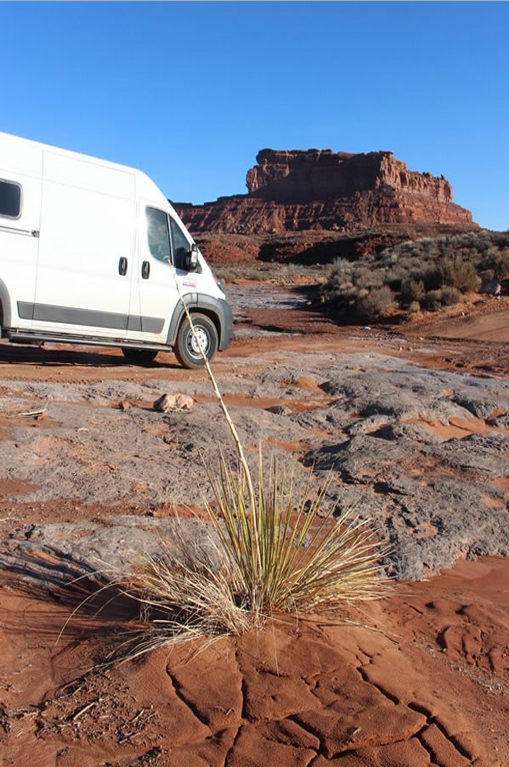
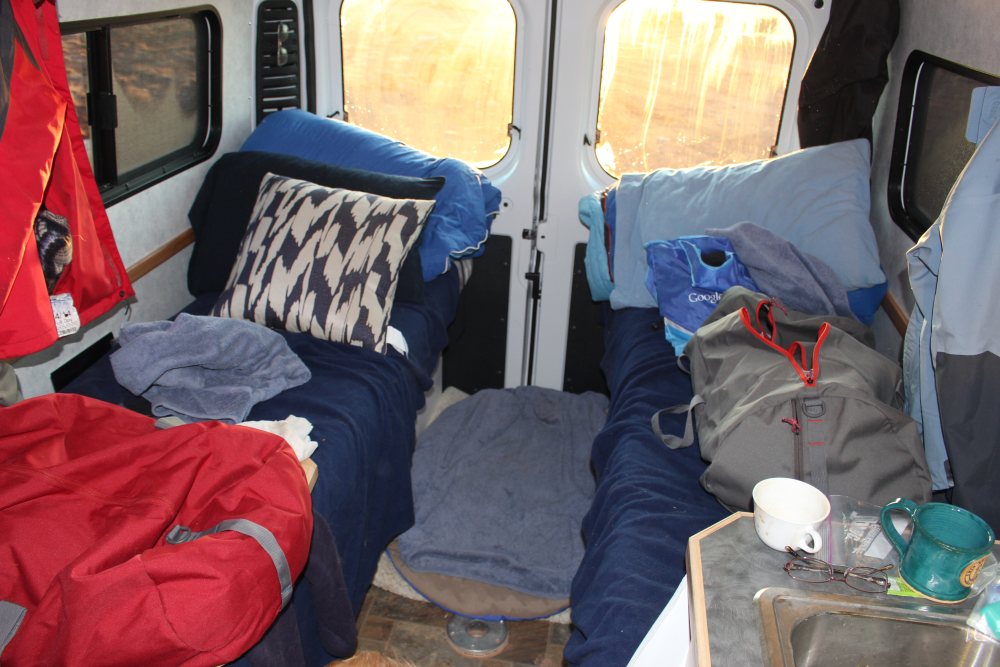
Things get a bit cluttered.
Goosenecks of the San Juan


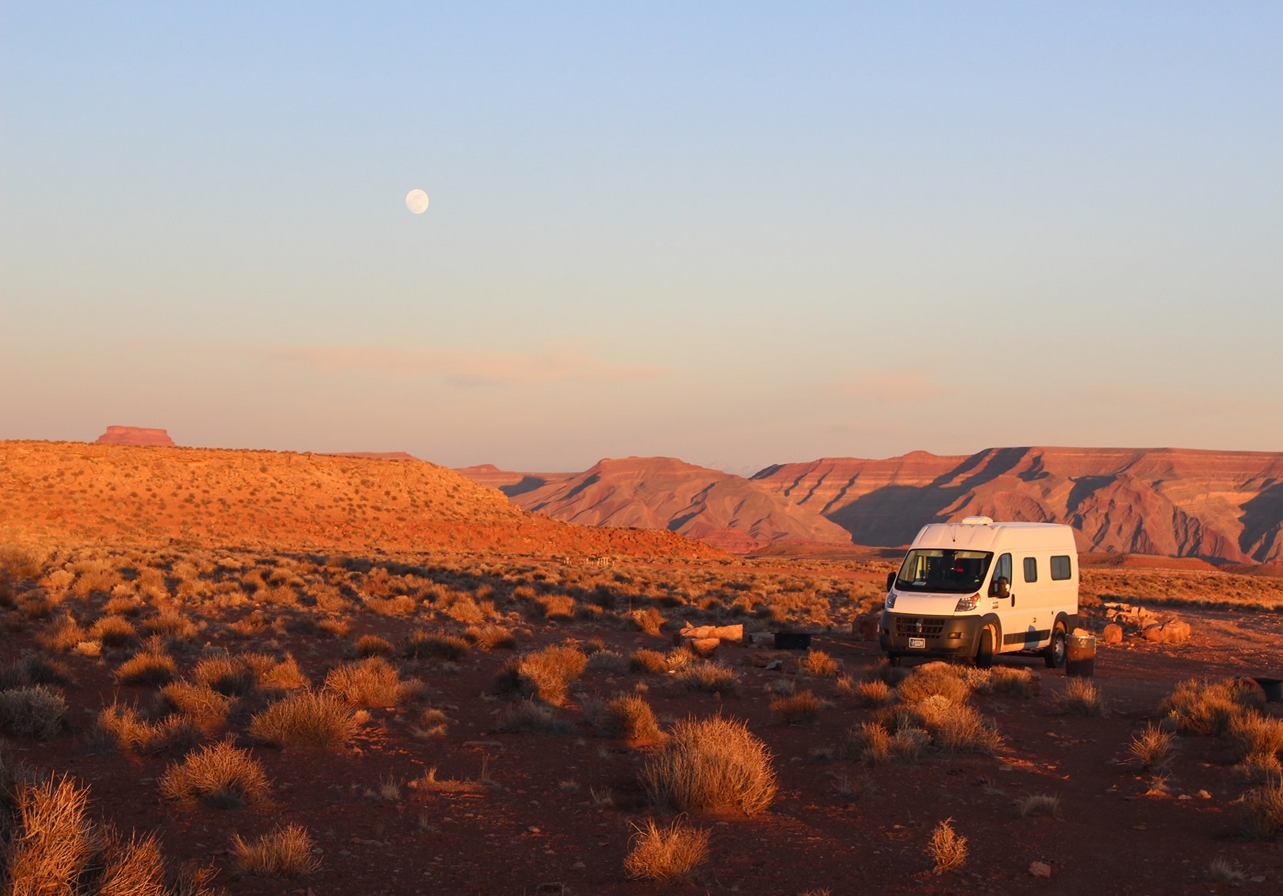
Camp spot at the Goosenecks — lovely and quiet.
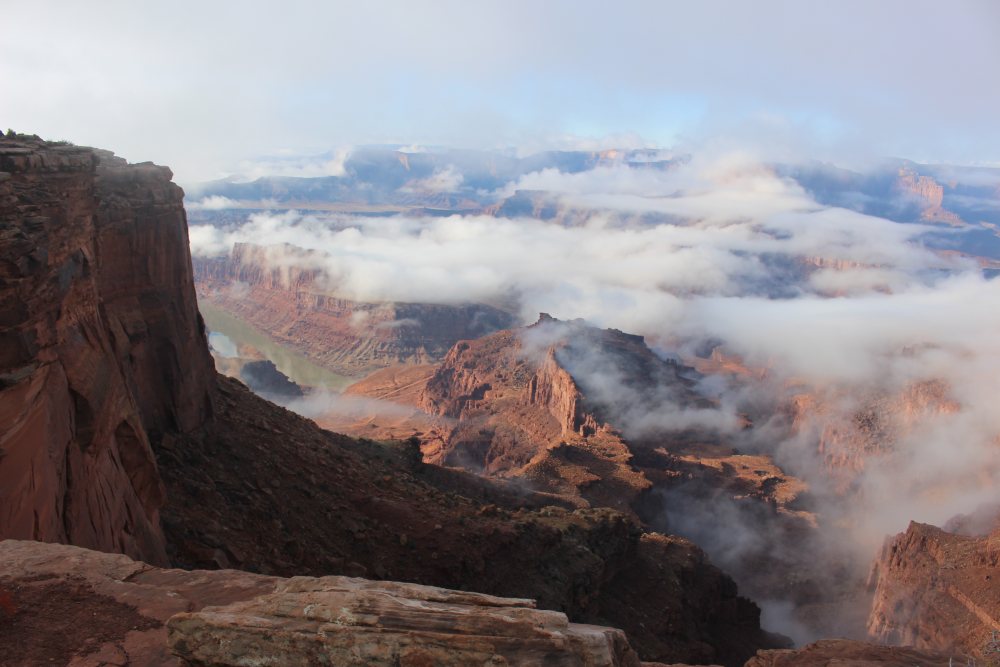
Deadhorse Point State Park
Monument Valley

Gary
February 5, 2014, June 27, 2015
Questions? Comments?
No mileage for Enterprise vehicles. Just rented a Ram 1500 pickup truck for a trip to CO from FL. 6k round trip, $340 a week. I made a temp tounuea cover out of plywood, turning the bed into a giant suitcase. The tail gate locked with auto door locks too.
Back to the Ram Master van. I saw a convertible couch to a double twin at Costco for $400. That would bolt quickly to the floor in the back and allow for couch usage as well a double as a full size bed. Again, $299 a week, $1200 for a month, why buy a “B” class. Trouble is the Enterprise model a bare bones, no cruise, basic radio, etc. which is a bit of a bummer………..
Hi Scott,
$300 a week sounds like a deal — is there any limit on mileage?
Is the interior finished at, or bare metal?
I really like the idea of being able to rent one for a trip, put some barebones furniture/camping gear and go. But, if its just bare metal, I think the noise level would get to you — they are really loud before the insulation goes in.
Maybe there is some way to drape the walls and ceiliing with something that could be easily added and then removed at the end of the trip. Then maybe some carpet for the floor? Or, possibly a heavy curtain/drape to separate the cab area from the back would work to keep the noise while driving reasonable.
We once had a Coachman class B that came with a folding couch/bed. It was so awful to sleep on that we ended up completely doing over the interior to get a comfortable bed. This kind of turned me off on convertible beds, but I guess if it was done well it might be OK. You can usually make a bed into a reasonable seat with come pillows/cushions, but making a couch into a good bed is not easy.
If you give this a try, I’d love to get some pictures.
Gary
Hi I love your site. I’m still trying to decide on the right van. I’m 6ft tall and scared of stooping. What was your final interior height? and was it enough?
Hi Zack,
I just went out and measured the height in my van. Its 74.5 inches from finished floor to finished ceiling. This is with a floor of 1 inch polyiso plus about 3/8 inch of plywood plus finish floor (you could use something like half inch polyiso and gain another half inch of headroom).
So, that would give you a couple inches of headroom over your 72 inches. If you really want a lot of headroom, I think the Ford Transit with the high roof would probably give you more. But, to me, the van looks kind of tall.
Gary
I’m thinking about getting a 2015 Promaster and equipping it for camping. My first trip will be in Utah. I noticed there is a sway bar on/near the rear axle that hangs down below the bottom and prevents the van from having a high clearance. Common sense says it’s not a good idea to remove that. Any threads/conversations on the ability of the van to go over high-clearance roads? I wouldn’t be taking it off-roading, but would want to go on some of the gravel or lightly rutted roads in some of the national parks.
Have you heard of anyone modifying it?
Hi Jim,
To the best of my knowledge, the rear axle itself is the lowest clearance to the ground and runs the full width of the vehicle. But, its somewhere between 7 to 8 inches, and this is really pretty good ground clearance — its more than my SUV offers.
Ours has been on a lot of back roads including some pretty rutted ones, and its been fine.
I like that type of gage from the point of view that you can read it without picking the tank up or moving it, but I’ve been told that they are poor on accuracy. Had planned to try one just to see, but have not gotten around to it yet.
Gary
Regarding checking the propane level, you can buy gauges that fit onto standard propane tanks. Here’s one:
http://www.homedepot.com/p/Nexgrill-Propane-Tank-Gauge-530-0074/206405531
Hi,
My understanding is that those gages are not very accurate, but will give one a try and see how it compares to weighing.
There are also ones that fit under the tank and weigh it and give a remote reading, but I don’t have room to fit one in at this point.
Gary
Just leased a ProMaster 1500 high top and drove to Illinois from Florida to round trip a few things back to FL. Enterprise’s rent was $299 a week so that couldn’t be beat. It was great just to go into the back and crash on the floor with blankets, pillows and dog.
I want to buy a simple conversion just like you put together. Thanks for doing so with all of the information. I explained to my wife that we would still hit the LaQuinta’s for quality showers now and then as we travel around the country. Having just read “One Second After” and then “One Year After”, your simple conversion van is quite luxurious. (need to get rid of the items that a major EMP could cause total failure…….. LOL) Thanks again……….
Hi Scott,
The idea of renting a bare van and then equiping it with camping sort of equipment, bunks etc. is really a good one. I’m guessing renting a fully equiped RV with milage charges is pushing $299 per night.
Does Enterprise charge a miles rate as well as the $299 a week?
We also have a dog, so are also fans of LqQuinta and their nice pet policy.
Gary
Guesstimating Propane Level: A method that we have used on our boat with good access to the propane tank was to slowly pour hot water near the top of the tank and feel the cold line where the liquid level is located. Over time and several marked lines this became fairly accurate. This may or may not be practical with the location of your propane bottles and the amount of water available. Certainly more reliable and less expensive than a gage.
hi Jerry,
Interesting to hear that that methods works pretty well.
As you say, not to useful my install, but maybe for others.
Thanks — Gary
I too would like to thank you for kindly sharing this. Very inspiring.
Thanks guys!
Gary
Thanks for all your hard work documenting your project and for sharing it. It was very well done, thanks again!
Thanks Keith
Gary
Great write-up. Thanks for sharing it. I know you’ve already done some of the things you include on your post-trip to-do list, but I’m not sure if the passenger seat swivel you mention is one of them. I installed a swivel base on the passenger seat of our Dodge conversion and highly recommend it. It provides a comfortable, always available seat as you’d expect it to. A pleasant surprise was the roomy feeling that resulted from not having the seat back and headrest poking into the open floor space. It turned out to be one of the best mods I did to the van.
Steve
Hi Steve,
We have not done the swivel seat yet.
Thanks for the info — I’ll move the swivel up on the todo list 🙂
Gary
Thanks so much for sharing your projects in such detail. Currently we have a Eurovan camper which suits us well but if we start going on longer trips I may want something a bit newer and roomier but still retain decent gas mileage and portability.
One downside to the Eurovan is that the Norcold refrigerator is very unreliable except on AC power, which we almost never use. How is your newer Norcold working out?
Hi Alex,
I really like the Eurovans — seems like a carefully thought out design, and the poptop should make them aerodynamically more efficient.
So far the Norcold has been fine.
Seems odd that it would work OK on the 120VAC and not so well on the 12 VDC — maybe something in the power supply or in the 12 volt wiring?
Gary
Thanks Gary. Yes it is a little odd that AC works so much better. I don’t believe they have a compressor and are notoriously finicky. Unfortunately the newer Norcold’s with the efficient compressor don’t come in sizes I can easily use.